The fastest way to learn canvas painting is to finish a real painting, start to end, with every step explained. This canvas painting for beginners tutorial walks through one complete project, a sunset lake with a silhouetted tree line, because it teaches the core skills in a single afternoon: blending a sky, painting a horizon, layering darks over lights, and adding small highlights that make a piece look finished.
Quick answer: For a first canvas painting, use acrylic paint on an 11 x 14 inch pre-primed canvas with a large flat brush, a medium round and a small liner. Paint from back to front: sky first, then the distant horizon, then the water, then dark foreground shapes, and finish with small highlights. The whole project takes about two to three hours, and acrylic lets you paint over mistakes once a layer dries.
Supplies for This Tutorial
Everything below is standard beginner gear. If you are buying from scratch, a bundled kit that pairs canvases with a basic acrylic palette is the simplest route; our guide to the best canvas and paint sets for beginners compares what those kits typically include.
- One 11 x 14 inch stretched canvas or canvas panel, pre-primed
- Acrylic paint: titanium white, cadmium yellow (or a hue), cadmium red (or a hue), magenta or quinacridone pink, ultramarine blue, and black or Payne’s gray
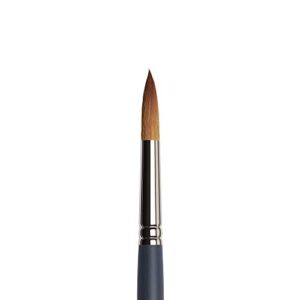
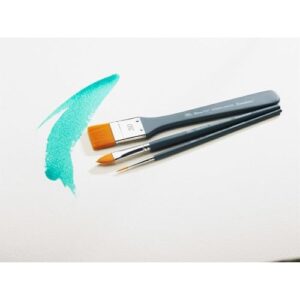
- Brushes: 1-inch flat, size 8 filbert or round, size 2 or 0 liner
- Palette or a paper plate
- Two water jars (one for rinsing, one clean)
- Paper towels, a spray bottle and a pencil
- A table easel or a book to prop the canvas at an angle
Before You Start: Five Habits That Save Paintings
- Squeeze small amounts. A nickel-sized blob of each color is enough to begin. Acrylic dries on the palette within 20 to 40 minutes in a dry room.
- Mist your palette. A light spray every 10 minutes keeps paint workable.
- Blot after rinsing. A brush full of water thins paint and causes streaks. Touch it to a paper towel every time.
- Work back to front. Paint what is farthest away first, then layer nearer objects on top.
- Let layers dry. If paint starts to drag or lift, stop and let it dry for a few minutes before continuing.
Set Up Your Workspace
A comfortable setup makes the painting easier before a single stroke. Cover the table with newspaper or a plastic sheet, since acrylic is permanent on fabric and wood once dry. Place the palette on your dominant-hand side so you are not reaching across wet paint. Position the canvas at a slight angle, either on a table easel or propped on a book, so you look at it straight on rather than at a slant, which distorts proportions.
Good light matters too. Daylight from a window or a daylight-balanced bulb shows color accurately. Warm household bulbs make yellows look stronger and blues duller, so a painting can look different the next morning.
Three Brush Strokes You Will Use
- Long horizontal strokes with the flat brush, pulling the full width of the canvas in one motion. These make smooth skies and calm water.
- Tapping or stippling with the tip of a dry filbert or round, used for leaves, bushes and soft textures.
- Thin lines with the liner brush, holding it near the end of the handle and using paint thinned to the consistency of ink. These make branches, grass and highlights.
Practice each stroke for a minute on scrap paper before starting. It warms up your hand and shows you how much paint each brush holds.
Canvas Painting for Beginners Tutorial: The Sunset Lake
Step 1: Mark the horizon (5 minutes)
Lightly draw a horizontal line about 40 percent of the way up from the bottom of the canvas. Avoid the exact middle; a horizon slightly low gives more room for a dramatic sky. Sketch a rough, uneven tree line along the horizon if you like, but keep pencil marks faint because light paint will not cover heavy graphite well.
Step 2: Paint the sky gradient (20 minutes)
Load the 1-inch flat brush with yellow mixed with a touch of white and paint a band just above the horizon. While it is wet, paint orange (yellow plus a little red) above it, then pink-magenta above that, and finally a purple-blue (ultramarine plus a little magenta and white) at the top of the canvas.
Now blend: with a clean, damp brush, use long horizontal strokes across the borders between colors, overlapping each band by about half an inch. Wipe the brush between borders so you do not drag blue into yellow, which turns green. If the paint dries before blending, mist lightly and continue.
Step 3: Add the sun glow (5 minutes)
Mix white with a tiny bit of yellow. Paint a small semicircle sitting on the horizon line, then soften its outer edge by tapping gently with a dry brush so it glows rather than looking like a sticker.
Step 4: Paint the water (20 minutes)
Water reflects the sky in reverse, so the colors go in the opposite order. Directly below the horizon, paint yellow-orange; below that, pink; and near the bottom edge, the purple-blue. Use horizontal strokes only. Make the reflected colors slightly darker and less saturated than the sky by adding a touch of the blue mix, because water reflections usually look a little deeper than the sky above them.
Let this layer dry fully, around 15 to 30 minutes depending on thickness. A hair dryer on a cool setting, held at a distance, speeds this up.
Step 5: Paint distant land (10 minutes)
Mix a soft gray-purple from blue, magenta, white and a touch of black. With the filbert, paint a low, uneven band of distant hills along the horizon. Keep this lighter than your foreground darks; lighter values make objects feel farther away. This principle, called atmospheric perspective, is one of the most useful ideas in landscape painting.
Step 6: Paint the silhouette tree line (25 minutes)
Mix a near-black from ultramarine and a little red or use Payne’s gray. A pure black straight from the tube can look flat; a mixed dark has more life. Along one side of the canvas, build a cluster of trees:
- Paint vertical trunks with the liner brush, thick at the base and thinner at the top.
- For pine trees, start at the top of each trunk and tap short, downward-angled strokes that get wider toward the bottom.
- For leafy trees, stipple with the tip of a dry filbert to create rounded, irregular clusters.
- Vary heights. Equal-sized trees look like a fence.
Paint a dark strip of shoreline along the base of the trees, then extend it a little across the canvas so it overlaps the distant hills.
Step 7: Reflect the trees in the water (10 minutes)
Using a slightly thinned version of the dark mix, paint rough, vertical reflections of the trees beneath the shoreline. Then drag a clean, dry flat brush horizontally through the reflections once or twice. This breaks them into ripples and makes the water feel flat and wet.
Step 8: Add shimmer and highlights (10 minutes)
Mix white with a little yellow. With the liner, paint a few short, thin horizontal dashes on the water directly below the sun, getting smaller and closer together as they reach the horizon. Add two or three tiny dashes where the shoreline meets the water. These small touches carry more impact than their size suggests.
Step 9: Optional details (10 minutes)
A few birds in the sky (a simple flattened “v” shape with the liner), a distant sailboat silhouette, or a single bright star can add story. Stop before you crowd the canvas; one detail is usually enough.
Step 10: Sign, dry and protect
Sign with the liner in a color that already exists in the painting. Let the painting dry for at least 24 hours, then apply a gloss or satin acrylic varnish if you want to protect it and even out the sheen.
Time and Paint Guide
| Stage | Approx. time | Main brush | Skill practiced |
|---|---|---|---|
| Sky gradient | 20 min | 1-inch flat | Wet blending |
| Water reflection | 20 min | 1-inch flat | Mirroring color, horizontal strokes |
| Distant hills | 10 min | Filbert | Atmospheric perspective |
| Tree silhouettes | 25 min | Liner and filbert | Mark variety, stippling |
| Highlights | 10 min | Liner | Restraint and contrast |
Fixing the Most Common Beginner Problems
The sky has streaks or hard lines
The paint dried before blending. Let it dry, repaint the area slightly thicker, and blend faster with a damp, not wet, brush. Adding a little slow-drying medium can help.
Colors turned muddy
Complementary colors mixed together, often blue and orange, or the brush was not clean. Wait for the area to dry, then paint fresh color over it.
The canvas texture shows through
The first layer was too thin. Acrylic often needs two coats for solid coverage, especially with lighter colors. Apply a second layer once the first is dry.
Trees look like lollipops
The shapes are too symmetrical. Break the outlines with uneven edges and let some sky peek through gaps in the foliage.
The painting looks flat
Usually there is not enough value contrast. Darken the foreground and lighten the area near the sun so the eye has clear lights and darks to read.
What This Project Teaches You
Each step trains a skill you will use in almost every future painting:
- Blending carries over to portraits, skies, fabric and any smooth transition.
- Back-to-front layering is how nearly all representational paintings are built.
- Value control (light versus dark) does more for realism than color accuracy.
- Brush variety, using large brushes for big areas and small ones only at the end, prevents the fussy look of beginners who detail too early.
Three Follow-Up Projects
- Winter version: repeat the same composition with a cool palette of blue, white and violet and snow on the trees.
- Moonlit lake: a dark blue sky, a pale moon and silver reflections. This trains you to work from dark to light.
- Simple still life: one piece of fruit on a table. It introduces form, shadow and light direction.
Repeating a composition with changes is a fast way to improve, because you are not solving new drawing problems each time and can focus on paint handling.
Choosing Your Next Canvas
Once you have finished one painting, you will notice how the surface affects the result. Canvas panels are flat, inexpensive and easy to store, which makes them good for practice. Stretched canvases have a little bounce and look ready to hang. Canvas pads are the cheapest way to try many quick studies. For learning, a mix of panels for practice and a few stretched canvases for keepers works well.
FAQs
What is the easiest thing to paint on canvas for beginners?
Sunsets, simple landscapes with silhouettes, abstract color fields and single objects like a piece of fruit are among the easiest. They rely on broad shapes and blending rather than detailed drawing.
Do I need to gesso a canvas before painting?
Most store-bought canvases are already primed. An extra coat of gesso is optional and gives a smoother surface, but it is not required for a first painting.
What size canvas is best for beginners?
An 11 x 14 inch or 12 x 16 inch canvas is a good starting size. It is large enough to use a wide brush comfortably but small enough to finish in one session.
How long does acrylic take to dry on canvas?
Thin layers are dry to the touch in about 15 to 30 minutes. Thicker layers take longer, and full curing can take a day or more before varnishing.
Can I fix mistakes in acrylic painting?
Yes. Once a layer is dry, you can paint over it. Opaque colors, especially those mixed with a little white, cover mistakes well.
Should beginners use acrylic or oil on canvas?
Acrylic is usually easier for beginners. It cleans up with water, dries quickly and does not require solvents.
Next Step
Finish this sunset, then paint it again a week later and compare the two. You will see real progress. When you are ready to stock up for more projects, compare the kits in our guide to beginner canvas and paint bundles to find a set with enough canvases and colors to keep practicing.