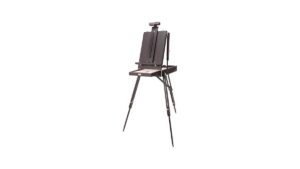
Quick answer: To make a tabletop easel, cut two front legs (about 24 in), one rear leg (about 22 in), a canvas ledge (about 16 in) and a top crossbar from 1×2 pine, then join the front legs with the crossbar and ledge to form an A-shape. Attach the rear leg to the crossbar with a hinge, add a short chain or cord between front and rear legs to lock the angle, sand everything, and seal it. A beginner can finish one in an afternoon with a drill, a saw and basic hardware.
A small easel that sits on your desk or kitchen table is one of the easiest studio tools to build yourself. It holds a canvas at a comfortable angle, keeps wet paint off your work surface, and folds flat when you need the table back. If you have been wondering how to make a tabletop easel without a full woodshop, the good news is that the job needs only straight cuts, a few screws and one hinge.
This guide walks through materials, a cut list with real dimensions, assembly in order, how to set the angle, and the finishing steps that keep a homemade easel from wobbling. It also covers two simpler variations, plus the point where buying a ready-made model makes more sense. If you would rather skip the sawdust, our roundup of Richeson tabletop easels for steady desk painting compares finished options.
What a Tabletop Easel Needs to Do
Before cutting anything, it helps to know what separates a useful easel from a decorative one. A working tabletop easel has four jobs.
- Hold the canvas at a stable angle. Most painters work between 60 and 80 degrees from the table. Steeper angles reduce glare and drips; shallower angles suit watercolor and drawing.
- Resist pressure from the brush. When you press a loaded brush into a panel, the easel should not slide backward or rock. That depends on leg spread and foot grip.
- Fit the sizes you actually paint. A desk easel usually handles canvases from 5×7 in up to about 16×20 in. Larger than that and a floor easel is the better tool.
- Fold or store easily. A hinged rear leg lets the frame collapse to a couple of inches thick.
Keep these in mind as you read the cut list. Every dimension below exists to serve one of them.
Materials and Tools
You can build this from a single 8-foot length of 1×2 lumber with a little left over. Pine or poplar both work; poplar is slightly harder and dents less, while pine is cheaper and easier to cut by hand.
Materials
- One 8 ft length of 1×2 board (actual size about 3/4 x 1-1/2 in)
- A small offcut of 1×3 or a 3/4 in square strip for the canvas lip (optional but useful)
- One 1-1/2 in butt hinge or a small strap hinge with screws
- About 12 wood screws, 1-1/4 in long (#6 or #8)
- Wood glue (PVA)
- About 12 in of light chain, sash cord or a small folding stay hinge
- Two small screw eyes (if using chain or cord)
- Felt or rubber pads for the feet
- Sandpaper in 120 and 220 grit
- Finish: water-based polyurethane, paste wax or a drying oil
Tools
- Hand saw with a miter box, or a miter saw if you have one
- Drill/driver with a pilot bit (about 3/32 in) and a countersink
- Tape measure, square and pencil
- Two clamps (spring clamps are fine)
- Screwdriver for the hinge screws
A countersink bit is worth having. It lets screw heads sit flush so they do not scratch canvas backs or snag clothing.
Cut List for a Basic Tabletop Easel
These dimensions produce an easel roughly 24 in tall that comfortably holds canvases up to about 16×20 in. Scale every part up or down by the same proportion if you want a smaller or larger version.
| Part | Qty | Length | Notes |
|---|---|---|---|
| Front legs | 2 | 24 in | Cut a 10-degree angle on the bottom end so they sit flat when splayed |
| Rear leg | 1 | 22 in | Slightly shorter so the easel leans back when opened |
| Top crossbar | 1 | 8 in | Joins the front legs near the top |
| Canvas ledge | 1 | 16 in | The shelf the canvas rests on |
| Ledge lip | 1 | 16 in | Thin strip glued to the front edge of the ledge to stop slipping |
| Lower brace (optional) | 1 | 12 in | Adds rigidity between the front legs below the ledge |
Total length used is a little over 7 feet, which is why one 8 ft board covers it. Mark all parts before cutting so you can shift them around knots.
How to Make a Tabletop Easel: Step-by-Step
Work in this order. Each stage builds a rigid sub-assembly before the next part goes on, which keeps the frame square.
- Cut and sand all parts. Cut each piece to length, then knock off sharp edges with 120-grit paper. Sanding now is far easier than sanding an assembled frame with inside corners.
- Lay out the front A-frame. Place the two front legs on a flat surface with their tops touching and their feet about 14 in apart. This creates the splay that gives the easel side-to-side stability.
- Attach the top crossbar. Position the 8 in crossbar about 1-1/2 in below the tops, overlapping both legs. Trim its ends to match the leg angle if you want a clean look. Glue, clamp, drill pilot holes, and drive one screw into each leg from the back.
- Fit the canvas ledge. Measure about 7 in up from the feet on each leg and mark a level line. Glue and screw the 16 in ledge across the front of both legs at this mark. Let the ends overhang equally so the ledge can support wider canvases.
- Add the lip. Glue the thin lip strip along the front top edge of the ledge so it stands about 1/4 to 1/2 in proud. This little rail stops a canvas from sliding forward off the shelf.
- Install the lower brace. If you are adding it, screw the 12 in brace across the back of the front legs about 3 in above the feet. It prevents the legs from twisting under brush pressure.
- Hinge the rear leg. Center the rear leg on the back of the top crossbar. Screw one leaf of the hinge to the crossbar and the other to the top end of the rear leg so it can swing backward.
- Add the angle limiter. Open the rear leg to the angle you want, then fix a screw eye to the back of the lower brace (or a front leg) and another to the rear leg at the same height. Connect them with chain or cord. This stops the legs from spreading flat.
- Pad the feet. Stick felt or rubber pads under all three feet so the easel grips the table and does not scratch it.
- Finish the wood. Give everything a final pass with 220 grit and apply your chosen finish. Let it cure fully before loading a canvas.
Expect the build to take two to three hours, plus finish drying time.
How to Build a Table Top Easel With an Adjustable Angle
A fixed chain is fine if you always paint at the same tilt. For more control, swap the chain for one of these adjustable systems.
Notched rear support
Cut a 10 in strip of 1×2 and saw three or four shallow notches into one edge, about 1-1/2 in apart. Screw this strip flat to the tabletop side of the front legs’ lower brace. The foot of the rear leg drops into whichever notch gives the angle you want. It is simple, quiet and has nothing to loosen.
Folding stay hinge
A lid-stay or folding stay hinge, the kind used on toy chests, locks at full extension. Mount one end to the rear leg and the other to the front frame. It holds one angle firmly and folds neatly.
Wing nut and slotted arm
Cut a slot down the middle of a short arm, bolt one end to the rear leg, and run a carriage bolt with a wing nut through the slot into the front frame. Loosen, set the angle, tighten. This gives continuous adjustment and is the closest DIY equivalent to the mechanism on many commercial desk easels.
Choosing the Right Angle
Angle affects comfort, glare and how paint behaves. Use this as a starting point and adjust to your medium.
| Medium or task | Suggested angle from table | Why |
|---|---|---|
| Oil and heavy acrylic | 70–80° | Reduces glare on wet, glossy paint and keeps the view close to how it will hang |
| Fluid acrylic and gouache | 55–70° | Less risk of runs while still upright enough to judge proportions |
| Watercolor washes | 10–30° | Lets washes flow gently downward without racing off the paper |
| Drawing and sketching | 40–60° | Keeps the paper square to your line of sight to avoid distortion |
A useful rule: your eye should look at the center of the canvas at roughly a right angle. If you are tilting your head or leaning in, the angle or the easel height needs work.
How to Make a Table Top Easel Even Simpler: Two Quick Variations
Not every situation calls for a hinged, three-legged build. These two designs trade some versatility for speed.
The book-stand easel
Take two pieces of plywood or MDF, roughly 12×16 in for the back and 4×16 in for the base. Join them along one long edge with two hinges, then add a small lip to the back panel near the bottom. Add a hinged prop on the back to set the angle. The result looks like a large recipe or book stand and works well for small panels, sketchbooks and watercolor blocks.
The no-tools cardboard prop
For a temporary setup, fold a sturdy cardboard box into a triangle prism and tape it shut, then tape a strip along the front face as a ledge. It is not durable, but it lets you test whether you like working upright before committing to a wood build.
Finishing Your Easel So It Lasts
Paint, solvents and water will end up on your easel. A finish protects the wood and makes cleanup easier.
- Water-based polyurethane: clear, fast-drying, low odor. Two thin coats with a light sanding between them give good protection against water and acrylic paint.
- Paste wax: quick, natural feel, easy to renew. Less protective against solvents, so better for watercolor and acrylic users.
- Drying oil (such as linseed or tung oil): gives a warm, traditional look and resists oil paint smudges well, but needs days to cure. Spread oily rags flat outdoors to dry before disposal, because rags soaked in drying oils can self-heat.
Whatever you choose, finish the ledge carefully. It takes the most abuse from wet canvas edges.
Common Mistakes When Building a Desk Easel
- Too narrow a footprint. If the front feet are closer than about 12 in apart, the easel tips sideways easily. Wider is more stable.
- Screwing without pilot holes. Thin 1×2 stock splits easily near the ends. Always drill pilot holes, especially within an inch of a cut end.
- Ledge set too low. If the ledge sits right at the table, you cannot paint the bottom edge of the canvas comfortably and drips hit the table. Six to eight inches up is a good range.
- No angle limiter. Without a chain or stay, the rear leg will creep outward under pressure until the easel collapses.
- Skipping the lip. A flat ledge lets canvases slide forward, particularly thin panels.
- Using bare wood. Unfinished wood absorbs paint and water, which can swell joints and stain canvas backs.
Troubleshooting a Wobbly Homemade Easel
If your finished easel moves more than you would like, work through these fixes.
- Check that all three feet touch the table. Place it on a flat surface and press each corner. If one foot lifts, sand the longest leg down a little at a time.
- Tighten the hinge. A loose hinge screw lets the rear leg twist. Replace stripped screws with a slightly longer or thicker size.
- Add a lower brace. If the front legs flex when you push the canvas, the brace described in step 6 usually solves it.
- Increase friction. Swap felt pads for rubber or silicone bumpers if the easel slides across a slick table.
- Shorten the chain. A slightly steeper angle shifts weight onto the rear leg and reduces bounce.
DIY vs Buying a Tabletop Easel
Building your own is satisfying and inexpensive, but it is not always the best choice. Here is an honest comparison.
| Factor | DIY easel | Ready-made easel |
|---|---|---|
| Cost | Low, especially with scrap wood | Varies by build quality |
| Time | An afternoon plus drying | Minutes to unbox |
| Customization | Full control over size and angle | Limited to the design |
| Adjustability | Basic unless you add hardware | Often includes height and tilt adjustment |
| Storage features | Usually none | Some include drawers or palette storage |
| Finish and durability | Depends on your skill | Generally consistent |
If you need a canvas mast that adjusts in height, a built-in drawer, or a precise multi-angle tilt, a manufactured model will usually do those jobs more reliably than a first DIY attempt.
FAQs
How do you make a table top easel without power tools?
Use a hand saw with a miter box for straight cuts and a hand screwdriver with a small gimlet or awl to start screw holes. Glue every joint as well as screwing it, because hand-driven screws are often slightly less tight than power-driven ones.
What wood is best for a tabletop easel?
Poplar and pine are the most practical choices. Poplar is harder and resists dents better, while pine is cheaper and lighter. Oak and maple are sturdier still but harder to cut and drill by hand.
How tall should a tabletop easel be?
Most are 18 to 30 in tall. Aim for a height that puts the center of your typical canvas near eye level when you are seated at your work table.
Can a tabletop easel hold a large canvas?
A small DIY design like this one handles canvases up to about 16×20 in comfortably. Larger canvases make the easel top-heavy and are better suited to a floor or studio easel.
How do I stop my canvas from sliding off the easel?
Add a raised lip to the front edge of the ledge and pad the ledge surface with a strip of non-slip shelf liner. Some painters also add a sliding top clamp on the mast to grip the canvas from above.
Is it cheaper to build or buy a tabletop easel?
Building is usually cheaper if you already own basic tools, since the materials are a single board and some hardware. If you have to buy tools just for this project, a basic ready-made easel may cost about the same.
Next Step
A homemade desk easel is a great first project, and the steps above give you a stable, foldable frame that suits most small canvases. If you find you want height adjustment, a canvas clamp or storage built in, it may be time to look at a finished model. Our guide to the best Richeson tabletop easel picks breaks down which designs offer the adjustability and stability a DIY build cannot easily match.