Landscapes are one of the kindest subjects for a first acrylic painting. Trees do not need to be anatomically accurate, a mountain can shift an inch without anyone noticing, and clouds forgive almost any brushstroke. What a beginner does need is a sequence: which part to paint first, how to make the distance look far away, and when to stop. That sequence is the core of how to paint acrylic landscapes for beginners, and it is simpler than it looks.
Quick answer: Paint acrylic landscapes back to front: sky first, then distant mountains or hills, then the middle ground, and finally the foreground with the most detail. Make distant shapes lighter, cooler, bluer and less detailed, and nearer shapes darker, warmer and sharper. Use a large flat brush for big areas, a fan or round brush for trees and grass, and a small liner for final details. A simple sunset lake or rolling hills scene on an 11×14 canvas is an ideal first project and can be finished in one or two sessions.
The One Rule That Makes Landscapes Easier
Almost every successful beginner landscape follows the same order: paint what is farthest away first, and work toward the viewer. That approach solves two problems at once.
First, it handles overlap naturally. Mountains sit in front of the sky, trees in front of mountains, grass in front of trees. Painting in that order means each layer covers the bottom edge of the one behind it, so you never have to paint carefully around shapes.
Second, it builds depth. Distant layers are painted with lighter, softer, cooler colors, and each layer forward gets a little darker, warmer and more detailed. By the time you reach the foreground, the painting already reads as deep space.
This principle, called atmospheric or aerial perspective, also underpins more advanced work. Once you are comfortable with it, our guide on painting realistic landscapes with acrylics goes deeper into light, texture and composition.
Supplies for Painting Acrylic Landscapes for Beginners
- Canvas: 11×14 or 9×12 inch canvas or canvas panel. Small enough to finish, large enough for broad strokes.
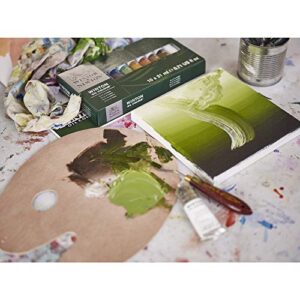
- Paint: Titanium white, cadmium yellow medium (or hue), cadmium red light (or hue), ultramarine blue, phthalo blue, burnt sienna, burnt umber and sap green. Student-grade paint is fine.
- Brushes: 1-inch flat, 1/2-inch flat, medium filbert, fan brush, size 4 round and a liner brush.
- Palette: A stay-wet palette or a plate with a damp paper towel underneath.
- Extras: Two water cups, paper towels, a spray bottle, a pencil and painter’s tape for a straight horizon if you like.
If you are building a kit for landscape work, the acrylic landscape painting guide explains which colors and supplies make scenery easiest to paint and display.
Understanding Atmospheric Perspective
| Layer | Value | Color temperature | Saturation | Detail and edges |
|---|---|---|---|---|
| Sky | Lightest near horizon | Cool blue above, warm near horizon at sunset | Moderate | Soft, blended |
| Distant mountains | Light | Cool, bluish or purple-gray | Low | Very soft, no texture |
| Middle ground hills or trees | Medium | Neutral to slightly warm greens | Medium | Some shape definition |
| Foreground | Darkest and brightest contrasts | Warm greens, yellows, browns | High | Sharp edges, texture, detail |
Keep this table near your easel. Whenever something looks too close or too far, check its value, temperature and detail against the layer it belongs to.
How to Paint a Landscape in Acrylics: Sunset Lake Project
This beginner project includes a gradient sky, distant mountains, a line of pine trees and still water with reflections. Total time is about two to three hours, plus drying breaks.
Stage 1: Plan the horizon
Draw a light pencil line about one-third of the way up from the bottom of the canvas. That is where the far shore of the lake will sit. Placing the horizon off center, rather than in the exact middle, gives a more pleasing composition. Sketch the rough mountain silhouette above it.
Stage 2: Paint the sky
- Mix three sky colors: a light warm yellow (white plus a little yellow), a soft peach (white, yellow and a touch of red) and a blue (white plus ultramarine, with a hint of phthalo for intensity).
- With the 1-inch flat, paint the yellow just above the horizon in horizontal strokes.
- Paint peach above it, overlapping slightly, and blend the boundary with light horizontal strokes.
- Paint blue across the top, then blend it down into the peach. Work quickly and mist if the paint drags.
- Extend the sky slightly below the mountain line so there are no gaps later.
If blending gets streaky, let it dry, then repeat with a thin second layer. Sky gradients often look smoother in two passes.
Stage 3: Distant mountains
- Mix a light, cool purple-gray: white, ultramarine and a touch of red or burnt sienna.
- Paint the farthest mountain range with the 1/2-inch flat, keeping the top edge soft and irregular.
- For a second, closer range, add a little more blue and burnt umber to darken the mix, and paint it overlapping the bottom of the first range.
- Add a few soft highlights on the side facing the sunset using the peach sky color mixed with a little of the mountain color.
Stage 4: Tree line on the far shore
- Mix a dark, slightly cool green: sap green, ultramarine and a touch of burnt umber.
- Use a fan brush held vertically, or the edge of a flat, to tap in simple pine shapes along the horizon. Vary their heights.
- Let some trees overlap and leave small gaps where sky shows through.
- Fill the base of the tree line with solid dark color so it reads as a mass.
Stage 5: The lake and reflections
- Paint the water using the same colors as the sky, but in reverse: blue near the shore line below the trees, transitioning to peach and yellow toward the bottom. Water reflects the sky above it.
- While the water is still wet, pull down short vertical strokes of mountain and tree colors directly beneath them. Reflections sit straight below the object, not angled.
- Gently drag a dry flat brush horizontally across the reflections to blur them slightly.
- Once dry, add a few thin horizontal lines of light color across the water with a liner to suggest ripples.
Stage 6: Foreground shore
- Mix a warmer, darker green and some burnt sienna for the near shore along one side or across the bottom.
- Use a fan brush or round to flick up grasses, and a filbert to paint a few rocks.
- Add a couple of larger pine trees on one side, taller than the far tree line, with more detailed branches.
Stage 7: Final details
- With a liner and thinned paint, add a few highlights on the foreground grass and rocks using yellow-green.
- Add a small sun glow near the horizon with a dot of warm white softened at the edges.
- Step back, check the depth, and stop. Overworking is the most common way beginners lose a good landscape.
Easy Landscape Painting for Beginners in Acrylic: Three More Ideas
Rolling green hills
Paint a pale blue sky with a few soft clouds, then three or four overlapping hills. Make the farthest hill lightest and bluest, the nearest darkest and warmest. Add a path winding into the distance and a few dabbed bushes. This scene teaches value layering with almost no drawing.
Snowy winter field
Use a cool gray sky, distant blue-gray tree lines and a white field. Shadows in snow are blue or violet, not gray. A fence or row of bare trees with liner-brush branches adds interest.
Desert mesa at sunset
Paint a warm orange and pink sky, mesas in red-brown and purple shadow, and a foreground of sand with a few cacti silhouettes. The bold shapes make this an excellent composition exercise.
Brushwork for Common Landscape Elements
| Element | Brush | Technique |
|---|---|---|
| Sky gradient | 1-inch flat | Horizontal strokes, blend while wet |
| Clouds | Filbert or round | Dab and soften with a dry brush |
| Distant mountains | 1/2-inch flat | Flat shapes, soft tops |
| Pine trees | Fan brush or round | Tap downward from a center line |
| Deciduous trees | Round or old frayed brush | Stipple clusters of foliage |
| Grass | Fan brush | Upward flicks, varied heights |
| Water reflections | Flat brush | Pull straight down, then blur horizontally |
| Branches and twigs | Liner | Thin paint, quick confident strokes |
| Rocks | Filbert or palette knife | Dark base, lighter top planes |
Mixing Natural Greens for Landscapes
Green is where many beginner landscapes go wrong. Tube greens are often very saturated and cool, which looks artificial across large areas of grass and trees. Mixing your own greens, or adjusting tube green, makes scenery look far more natural.
| Green you want | Mix | Where to use it |
|---|---|---|
| Dark forest shadow | Sap green + ultramarine + burnt umber | Tree bases, foreground shadows |
| Olive mid-tone | Cadmium yellow + ultramarine + touch of burnt sienna | Middle-ground hills, shrubs |
| Fresh spring green | Cadmium yellow + phthalo blue (tiny amount) | Sunlit grass, new leaves |
| Distant blue-green | Sap green + ultramarine + plenty of white | Far tree lines, hazy hills |
| Warm highlight green | Sap green + cadmium yellow + touch of white | Foliage tips, grass catching light |
| Dry autumn grass | Yellow ochre or yellow + burnt sienna + a little green | Fields, late-season foregrounds |
A useful habit is to add a tiny amount of red or burnt sienna to any green that looks too bright. Red is green’s complement, so a small amount neutralizes it without turning it brown.
Composition Tips for Acrylic Landscapes
- Use the rule of thirds. Place the horizon one-third from the top or bottom, not in the middle.
- Give the eye a path. A river, road, fence or line of trees leading into the scene draws viewers into the painting.
- Pick one focal point. A bright sun, a single large tree or a cabin. Everything else supports it.
- Vary shapes and spacing. Trees of identical size and spacing look artificial.
- Frame with darks. A darker tree or shoreline on one edge of the foreground frames the scene.
Common Mistakes in Beginner Acrylic Landscapes
- Painting distant mountains too dark. They jump forward. Add white and blue to push them back.
- Using tube green straight. It often looks artificial. Mix greens with yellow, blue, burnt sienna or red to make them natural.
- Too much detail in the background. Save texture for the foreground.
- Tilted horizon. A slanted lake horizon looks like water draining off the canvas. Use a ruler or tape.
- Muddy colors from overblending. Blend a few strokes, then leave it. Let layers dry before adding more.
- Not letting layers dry. Painting trees into a wet sky can smear them. A few minutes of drying time, or a hair dryer on low, helps.
A Four-Week Practice Plan
- Week 1: Paint three sky gradients and three cloud studies on small panels.
- Week 2: Paint layered hills and mountains, focusing on value steps from light to dark.
- Week 3: Practice trees, grass and water reflections as separate exercises.
- Week 4: Combine everything into the sunset lake project, then paint one of the alternative scenes.
FAQs
What is the easiest landscape to paint in acrylic for beginners?
Rolling hills or a simple sunset over water are among the easiest. Both rely on broad shapes and color gradients rather than detailed drawing.
What order should you paint an acrylic landscape?
Work back to front: sky, distant mountains, middle ground, then foreground. Add the finest details and highlights last.
How do you make a landscape look like it has depth?
Make distant objects lighter, cooler, less saturated and less detailed, and nearby objects darker, warmer and sharper. Overlapping shapes and decreasing size with distance also help.
What colors do I need for acrylic landscapes for beginners?
White, a warm yellow, a red, ultramarine blue, burnt sienna and burnt umber cover nearly everything. Add sap green and phthalo blue for convenience.
How do you paint trees in acrylic easily?
For pines, tap downward from a center line with a fan brush. For leafy trees, stipple clusters of dark, mid and light greens with a round or old frayed brush, then add a few branches with a liner.
Should I varnish a landscape painting?
Yes, once it has fully dried. A varnish protects against dust and UV light and evens out sheen so dark areas look rich.
Final Thoughts
Painting acrylic landscapes for beginners becomes manageable once you follow the back-to-front order and the atmospheric perspective rules. Sky, distance, middle ground, foreground, then details. Keep the background soft and cool, push contrast and texture into the foreground, and stop before you overwork.
When you are ready to see finished scenery in a room or explore more styles, our acrylic landscape paintings guide covers sizes, color moods and display ideas that turn practice pieces into wall art.