Quick answer: To teach a painting class, choose one clear learning goal and a project that fits your time slot, prepare a finished sample and step-by-step demo, and set up every station before students arrive. Run the session in stages: a short introduction, a live demonstration of each step, guided painting time while you circulate, and a wrap-up where students share. For kids, keep each step under about 10 minutes, use washable paints and plan cleanup into the schedule. For adults, explain the why behind each technique and give room for personal choices.
Teaching others to paint is rewarding, but it is a different skill from painting itself. Learning how to teach a painting class means planning the project around the learners, breaking techniques into small, visible steps and managing time, materials and mess so everyone leaves with something they are proud of. That applies whether you are leading a classroom of eight-year-olds, an after-school club or a group of adults at a community center.
This guide walks through planning, setup, lesson structure, demonstration techniques, classroom management, adapting for different ages and handling common problems. If you are equipping a room for younger students, our guide to the best classroom paint sets for kids compares washable, bulk-friendly options.
Step 1: Define Your Audience and Goal
Everything else flows from two questions: who is in the room, and what should they be able to do by the end?
- Age and experience. A kindergarten class needs very different pacing and materials than a group of retirees or teens.
- Class length. A 45-minute school period fits one simple technique. A three-hour adult workshop can cover a full composition.
- Class size. With more than 12–15 students, plan for more prep and possibly a helper.
- One main skill. Pick a single focus, such as blending a sky, mixing secondary colors or painting with a limited palette. A clear goal keeps the lesson from becoming a rushed copy session.
Step 2: Choose a Project That Fits
The project is the vehicle for the skill. Good class projects share a few traits:
- Finishable within the session, including drying time between layers
- Uses a limited palette of three to five colors plus white
- Has a clear sequence of stages from background to details
- Allows personal variation in color, details or subject
- Looks satisfying even if executed imperfectly
| Group | Project ideas | Skill focus |
|---|---|---|
| Ages 4–6 | Handprint animals, sponge-painted flowers, rainbow fish | Brush control, color naming |
| Ages 7–10 | Sunset silhouettes, color wheel mandalas, cityscape with tape lines | Blending, mixing secondary colors |
| Ages 11–14 | Value studies, simple landscapes, abstract color fields | Value, composition |
| Teens and adults beginners | Moonlit seascape, still life of a single fruit, tree silhouette at sunset | Layering, blending, highlights |
| Adult intermediates | Limited-palette landscape, portrait study, palette knife florals | Color temperature, edges, texture |
Step 3: Make a Sample and Plan the Steps
Paint the project yourself before class, timing each stage. This reveals tricky spots and gives you a finished example to show.
- Paint the full project once, writing down every step and how long it takes.
- Paint it a second time, if possible, stopping at each stage to photograph or keep partially finished versions. These “stage samples” let students see where they should be at each point.
- Group the work into four to six stages, such as background, large shapes, middle values, details, highlights.
- Note drying gaps. Use them for a short lesson, a color mixing exercise or a stretch break.
A rough rule: whatever takes you 30 minutes may take beginners 60–90 minutes.
Step 4: Gather and Prep Supplies
Per student
- Painting surface: canvas, canvas panel or heavy paper
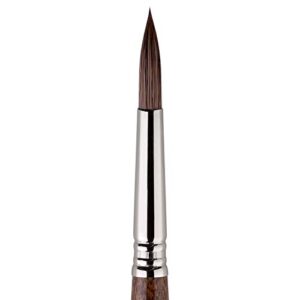
- Two or three brushes: a large flat, a medium round, a small detail brush
- Palette or paper plate with pre-portioned paint
- Water container (two for watercolor: one to rinse, one clean)
- Paper towels or rags
- Smock or apron
Shared
- Extra paint in squeeze bottles for refills
- Table covers, such as plastic sheeting or kraft paper
- Drying rack or clear floor space
- Name labels or masking tape and a marker
- Hair dryer for speeding up acrylic drying, used by the instructor
- Wet wipes and a sink or bucket for cleanup
Choosing paint by group
| Paint | Best for | Notes |
|---|---|---|
| Washable tempera | Young children | Easy cleanup; matte finish; can crack if thick |
| Student acrylic | Older kids, teens, adults | Dries fast, permanent on fabric |
| Watercolor pans | All ages | Low mess, portable, less forgiving |
| Oil or water-mixable oil | Adult workshops | Slow drying; requires ventilation and solvent handling (fewer solvents for water-mixable) |
For school settings, bulk washable paint sets save time and cost; our comparison of kid-safe paint sets for classrooms and art clubs lists options that come in refillable sizes.
Step 5: Set Up the Room
- Cover tables and tape covers down at the corners.
- Arrange seating so everyone can see your demo, ideally in a horseshoe or with a document camera projecting your work for larger groups.
- Pre-portion paint on palettes for younger students; offer squeeze bottles for adults to serve themselves.
- Place supplies at each seat before students arrive.
- Prepare a drying zone clear of walkways.
- Display your sample where everyone can see it.
- Set up your demo easel at a height visible from the back row.
Step 6: Structure the Lesson
| Segment | Kids (60 min) | Adults (2–3 hr) |
|---|---|---|
| Welcome and introduction | 5 min | 10–15 min |
| Skill mini-lesson | 5 min | 10–20 min |
| Demo and guided painting cycles | 35 min | 90–120 min |
| Independent finishing time | 5 min | 15–30 min |
| Share and reflect | 5 min | 10–15 min |
| Cleanup | 5 min | 10 min |
Introduction
Show the finished sample and stage samples. Explain the goal in one sentence, such as “Today we will learn to blend a sunset sky.” Cover basic rules: how to rinse brushes, where to put wet paintings, how to ask for help.
Skill mini-lesson
Teach the key concept briefly, for example mixing orange from red and yellow, or how a dry brush makes texture. Let students try it on scrap paper before touching their project.
Demo and guided painting cycles
Repeat this loop for each stage:
- Demonstrate one stage, narrating what you do and why.
- Students paint that stage while you circulate.
- Check in with the group before moving on.
Keep each demo short, usually 2–5 minutes for kids and 5–10 for adults.
Independent finishing
Let students add personal touches, such as extra details, a different color scheme or a signature.
Share and reflect
Line paintings up and ask each student to name one thing they like about their own work and one thing they learned. For kids, specific praise (“Look how smooth your sky is”) builds confidence.
Step 7: Demonstrate Effectively
- Face the class or angle your easel so they see your brush and canvas.
- Use large movements so actions are visible from the back.
- Name every material: “I’m using the big flat brush and just a little white.”
- Explain why: “We paint the sky first because it’s behind everything else.”
- Show mistakes and fixes. Purposely smudge an area and show how to recover. It lowers anxiety.
- Pause for questions after each demo segment.
- Use a document camera or phone on a stand to project close-ups for groups larger than about 12.
Step 8: Manage the Classroom
With children
- Set clear routines, such as “brushes down, eyes up” before each demo.
- Assign jobs: paint helper, water changer, towel distributor.
- Have early finishers do a bonus activity, such as painting a small extra card.
- Keep sleeves rolled and smocks on.
- Use washable paint and avoid aerosols or solvents.
With adults
- Encourage, but do not insist on copying the sample exactly.
- Respect different paces; offer optional advanced steps for faster painters.
- Invite questions and keep the atmosphere relaxed.
- For oil classes, establish solvent safety and ventilation rules at the start.
Step 9: Give Helpful Feedback
Good feedback is specific, kind and actionable.
- Start with a strength. “Your colors are really vibrant here.”
- Suggest one change. “Try a lighter value on the left side to show where the sun hits.”
- Ask questions. “What part do you want people to notice first?”
- Avoid taking the brush unless the student asks; demonstrate on scrap paper instead.
Painting Art School Tips for New Teachers
- Over-prepare materials, under-prepare content. Have plenty of supplies, but leave flexibility in the schedule.
- Teach value before color. Students who understand light and dark progress faster.
- Use limited palettes. Fewer colors force mixing and produce harmonious results.
- Repeat core concepts across lessons, such as background to foreground, big to small, dark to light (or light to dark for watercolor).
- Keep a lesson journal. Record what worked, timing and student feedback after each class.
- Celebrate process over product. Praise effort, experimentation and improvement.
Step 10: Plan Cleanup and Take-Home
Cleanup is part of the lesson, not an afterthought. With kids, announce a five-minute warning, then run cleanup as a routine: brushes into a rinse bucket, palettes stacked, water cups emptied by helpers and paintings moved to the drying zone. Wash brushes yourself afterward with mild soap and lukewarm water, reshaping the bristles and drying them flat or bristles down.
Acrylic paintings on canvas usually need at least an hour before they can be carried safely, and thick areas take longer. If students take work home the same day, provide a sheet of wax paper or a pizza box for transport. For oil paintings, students will need a wet-panel carrier or a second visit to collect their work.
Building a Multi-Week Painting Course
A single class teaches a project; a series teaches painting. If you run weekly sessions, sequence skills so each lesson builds on the last.
- Week 1: Materials, brush handling and value scales with one color plus white.
- Week 2: Color mixing with primaries and a color wheel.
- Week 3: Blending and gradients through a sky or sunset painting.
- Week 4: Shapes and form through a simple still life with light and shadow.
- Week 5: Composition with thumbnails before a landscape.
- Week 6: Texture with palette knife and dry brush techniques.
- Week 7: Student-choice project applying all skills.
- Week 8: Mini exhibition or sharing session for families or friends.
Revisiting earlier skills in later projects reinforces learning, and a final showcase gives students a goal to work toward.
Common Problems and Solutions
Students fall behind
Simplify their next step, offer a helper, or allow them to skip a detail stage and catch up for the final stage.
Paintings look muddy
Remind students to rinse brushes between colors and to let layers dry. Use a hair dryer on acrylic to speed drying.
Running out of time
Drop a detail stage, or plan a second session. Build buffer time into your plan.
Paint spills
Keep paper towels and wet wipes within reach, use spill-resistant water cups, and stay calm.
Students are frustrated
Share a mistake you made and show how to fix it. Point out what is working in their painting.
FAQs
How do I plan a painting lesson for beginners?
Pick one skill and a simple project, paint a sample to time each step, break it into four to six stages and prepare a demo for each.
What supplies do I need to teach a painting class?
Painting surfaces, two or three brushes per student, paint, palettes, water cups, paper towels, smocks, table covers and a demo easel.
How long should a kids’ painting class be?
Around 45–60 minutes works well for most elementary ages, with short steps and built-in cleanup time.
What paint is best for teaching kids?
Washable tempera or washable kids’ acrylic for young children, and student acrylics or watercolors for older kids.
Do I need to be an expert painter to teach a class?
No, but you should be comfortable with the project you are teaching. Practice it fully at least once before class.
How do I keep students engaged?
Keep demos short, let students paint immediately after each one, allow personal choices and end with a sharing moment.
Final Thoughts
A great painting class rests on preparation: a focused goal, a tested project broken into clear stages, a ready room and a calm, encouraging approach. Demonstrate in short chunks, circulate constantly and celebrate progress. For classrooms full of young artists, the right supplies make cleanup and planning much easier. Compare bulk-friendly options in our guide to the top washable paint sets for school classrooms.