Quick answer: Here is how to clean stencils after use in one pass: while the paint is still wet, lay the stencil flat on a towel, wipe both sides with a damp cloth or baby wipe, then rinse under lukewarm water with a drop of dish soap, rubbing gently with your fingertips or a soft brush. For dried acrylic, soak the stencil in warm soapy water for 10 to 20 minutes, then rub the softened paint off; for stubborn spots, use isopropyl alcohol on a cloth. Never scrub with abrasives, never use hot water on thin plastic, and always dry stencils flat before storing.
A stencil that goes back in the drawer with paint on it is a stencil that will bleed, bridge, and lose its crisp edges the next time it comes out. Dried acrylic builds up on the cut edges, narrows fine openings, and lifts the stencil off the surface so paint creeps underneath. Cleaning takes two or three minutes when done right away and perhaps fifteen when left for a week, so the habit pays for itself quickly.
This guide gives the full method, starting with the fast routine for fresh paint, then the recovery methods for stencils that have been neglected, broken down by stencil material and paint type. It also covers the brushes, since stencil brushes clog in the same way and are cleaned in the same session. If your brushes are already past saving, our guide to the best stencil brush set covers what to replace them with.
Why Stencils Need Cleaning Promptly
Acrylic and most craft paints dry by water evaporation into a plastic film that bonds to whatever it is sitting on. On a stencil, that film forms in two places that matter:
- On the cut edges. Paint that was pushed to the edge of each opening dries there and makes the opening slightly smaller and rougher. Over several uses, fine lettering and thin lines close up.
- On the underside. Any paint that crept beneath the stencil dries as a bump. Next time, that bump holds the stencil off the surface, and more paint creeps under, which creates more bumps.
Dried paint also stiffens flexible stencils and makes adhesive-backed ones lose their tack. Cleaning while wet avoids all of it. Cleaning later is possible but takes soaking and more handling, which is where thin stencils tear.
What You Need
- A sink or shallow tray with lukewarm water
- Mild dish soap
- Soft cloths, paper towels, or unscented baby wipes
- A soft toothbrush or a worn soft paintbrush
- Isopropyl alcohol (70 percent) for dried acrylic
- A flat towel for drying
- Optional: a plastic scraper or old gift card, a spray bottle, a small container for soaking
Avoid: steel wool, scouring pads, abrasive powders, acetone or nail polish remover on plastic stencils, and hot water above about 110 °F on thin mylar or acetate.
How to Clean Stencils After Use: The Fresh-Paint Method
This is the routine to run every time, before the paint has a chance to set. It takes about three minutes.
- Lift the stencil straight up. Peel from one corner, keeping the stencil parallel to the surface so wet paint on the underside does not smear across your work.
- Lay it paint-side up on a paper towel or old towel. Do not set it painted-side down on a clean surface; the paint transfers.
- Wipe the top with a damp cloth or baby wipe. Work from the center outward with light pressure. Most of the wet paint comes off in one or two passes. Fold the cloth to a clean section often.
- Flip and wipe the underside. This is where the creep is. Pay attention to the edges of each opening.
- Rinse under lukewarm running water. Add a drop of dish soap to your fingertips and rub gently across both faces. For intricate designs, use a soft toothbrush with very light strokes in the direction of the cut lines rather than across narrow bridges.
- Check the openings against the light. Hold the stencil up. Any remaining paint shows as a shadow along the edges. Rub those spots again.
- Rinse clean and shake off water.
- Dry flat on a towel, paint-side up, or pat dry with a lint-free cloth. Do not hang thin stencils from a corner while wet; they can stretch.
If you are using the same stencil repeatedly during a session, a quick wipe of the underside with a baby wipe between placements prevents buildup without a full wash. Do the full rinse at the end.
Cleaning Dried Acrylic Off Stencils
If the stencil sat for hours or days, the paint has cured into a film. It still comes off, but it needs softening first.
- Soak. Fill a tray with warm (not hot) water and a squirt of dish soap. Submerge the stencil flat for 10 to 20 minutes. Thick paint may need 30 minutes.
- Test a corner. Rub a painted area with a fingertip. If the paint slides or wrinkles, it has softened. If not, soak longer.
- Rub, do not scrape. Use fingertips first, then a soft toothbrush along the direction of the openings. On larger flat areas, a plastic scraper or old gift card held nearly flat can lift sheets of softened paint. Keep the blade angle low so it does not catch an edge.
- Use alcohol on what remains. Dampen a cloth with isopropyl alcohol and press it against stubborn spots for 30 seconds, then rub. Alcohol softens dried acrylic without harming mylar, most acetate, or metal. Test on a corner of any stencil you are unsure about.
- Rinse and inspect against the light. Repeat the alcohol step on any remaining shadows.
- Dry flat.
For thick accumulations that have built up over many uses, an overnight soak in soapy water followed by the alcohol step usually recovers the stencil. If the stencil has become brittle or warped, the buildup may have been there too long, and replacement is the realistic option.
Cleaning by Stencil Material
Stencils are cut from several materials and each tolerates slightly different handling.
| Material | Fresh paint | Dried acrylic | Avoid | Notes |
|---|---|---|---|---|
| Mylar (polyester film) | Damp wipe and rinse | Warm soapy soak, alcohol | Acetone, hot water, abrasives | The most durable and solvent-resistant; handles repeated cleaning well |
| Acetate | Damp wipe and rinse | Short warm soak, alcohol with testing | Acetone, prolonged alcohol contact, hot water | Can cloud or soften with strong solvents; dry flat to prevent curling |
| Vinyl (adhesive-backed) | Wipe the front only; keep backing side dry if reusing | Usually single-use; gentle wipe only | Soaking, alcohol on the adhesive side | Adhesive loses tack when wet; reuse is limited |
| Cardstock or oil board | Blot with a barely damp cloth, dry immediately | Not recoverable without damage | Water soaking, rubbing | Treat as semi-disposable; a coat of clear spray before first use extends life |
| Metal (brass, stainless) | Rinse and wipe | Soak, scrape, alcohol, or acetone | Leaving damp (brass tarnishes) | Very durable; dry thoroughly |
| Silicone | Rinse; paint often peels off in a sheet when dry | Peel dried paint, wash | Sharp tools | Easiest to clean; dried acrylic releases readily |
| Laser-cut wood or thin MDF | Wipe with barely damp cloth | Scrape gently when dry; light sanding | Soaking | Swells and warps when wet |
Cleaning by Paint Type
Acrylic and craft paint
Water while wet, soapy soak then alcohol when dry. Covered above.
Tempera and poster paint
Water-soluble even when dry. A warm rinse lifts everything; no alcohol needed. Good news for classroom stencils.
Fabric paint
Behaves like acrylic but often thicker. Clean promptly, since many fabric paints are formulated to bond aggressively. Soaking works if it has dried.
Spray paint
Solvent-based spray paint on a stencil dries fast and does not respond to water. On mylar or metal, mineral spirits on a cloth removes it; on acetate, test first since some solvents cloud it. Many spray stencil users simply let a thin layer build and treat the stencil as consumable, which is reasonable for simple shapes but not for fine detail.
Oil paint
Wipe off with a cloth and a little mineral spirits or an oil-paint-safe brush cleaner, then wash with soap. Do not let oil paint cure on a stencil; once it hardens it is very difficult to remove without damage.
Chalk paint and chalk-finish craft paint
Water-based and relatively easy; soak if dried. These paints are chalky and can leave a haze that a soft brush clears.
Ink and stencil markers
Alcohol-based inks come off with isopropyl alcohol; water-based inks with water. Pigment inks may stain pale stencils permanently without affecting function.
Cleaning Stencil Brushes in the Same Session
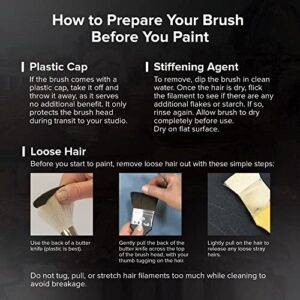
Stencil brushes have short, dense, flat-cut bristles that hold paint deep in the ferrule, and they dry stiff if left. Clean them right after the stencil.
- Blot excess paint onto a paper towel by pouncing the brush a few times.
- Rinse under lukewarm water, working the bristles with your fingers from the ferrule outward.
- Lather with a small amount of dish soap or brush soap in your palm, pressing and swirling the brush. Repeat until the lather is colorless.
- Rinse thoroughly and squeeze out water.
- Reshape the flat top and stand the brush bristles-up or lay it flat to dry. Drying bristles-down lets water run into the ferrule and loosens the glue.
For brushes with dried acrylic, soak the bristles only (not the ferrule) in warm soapy water for 20 minutes, then work the paint out. Alcohol or a dedicated brush restorer handles the rest. A brush whose bristles have splayed or whose ferrule is loose is not worth saving; dense, springy bristles are what make stenciling crisp, and worn brushes push paint under edges. Our guide to the top stencil brush sets explains what to look for in a replacement.
Drying and Storing Stencils
Cleaning is only half the job; how stencils are stored determines whether they are flat and usable next time.
- Dry completely before storing. Trapped moisture can cloud acetate and tarnish metal.
- Store flat. Between sheets of cardstock in a folder, in a binder with sheet protectors, or in a flat box. Rolling causes a permanent curl that lifts edges during use.
- Interleave with paper if stacking many stencils, so they do not stick together or scratch.
- Keep away from heat. Mylar and acetate warp near radiators or in hot cars.
- Label or photograph the set so you can find a design without unstacking everything.
- Re-stick adhesive stencils to their backing sheet once fully dry, if the adhesive still holds.
Common Mistakes
- Scrubbing with a scouring pad. It scratches the surface, and scratches hold paint and make future cleaning harder.
- Using hot water on plastic stencils. Thin mylar and acetate can distort above about 110 °F.
- Using acetone. It dissolves or clouds many plastics. Isopropyl alcohol does the job on dried acrylic without the risk.
- Picking at dried paint with a fingernail or blade. It nicks the cut edges. Soak first.
- Hanging a wet stencil from a clip. It stretches thin material.
- Storing damp, stacked, or rolled. The three fastest ways to ruin a clean stencil.
- Soaking adhesive-backed vinyl. The adhesive fails and the stencil will not stay down next time.
Quick Reference: Time Needed
| Situation | Method | Approximate time |
|---|---|---|
| Wet acrylic, just used | Wipe, rinse, dry | 2–3 minutes |
| Acrylic dried for a day | Warm soak 10–20 min, rub, alcohol | 20–30 minutes |
| Heavy buildup over weeks | Overnight soak, scrape, alcohol | Overnight plus 15 minutes |
| Tempera, wet or dry | Rinse | 1–2 minutes |
| Spray paint on mylar | Mineral spirits wipe, wash | 5–10 minutes |
| Oil paint, wet | Mineral spirits wipe, soap wash | 5 minutes |
Cleaning Stencils Used on Paper Crafts
Card making and scrapbooking stencils are often used with inks, pastes, and thin craft paints, and they are frequently small and detailed. Two adjustments help. First, keep a damp cloth on the table and wipe the stencil after every single use, because texture paste and embossing paste set quickly and are miserable to remove once hard. Second, clean intricate stencils with a soft brush rather than fingertips, since fingers cannot reach into fine lettering. The paints that behave well on paper and clean off stencils easily are discussed in our guide to the best paint for DIY paper crafts.
FAQs
How do you get dried acrylic paint off a stencil?
Soak in warm soapy water for 10 to 20 minutes until the paint softens, rub it off with fingertips or a soft toothbrush, then use isopropyl alcohol on a cloth for any remaining spots. Rinse and dry flat.
Can you wash stencils with water?
Yes, for mylar, acetate, silicone, and metal stencils. Use lukewarm water and mild soap. Avoid soaking cardstock, wood, or adhesive-backed vinyl stencils.
Should you clean stencils right after use?
Yes. Wet paint wipes off in seconds. Dried paint needs soaking and more handling, which risks damaging fine details.
Can you use rubbing alcohol on stencils?
Isopropyl alcohol is safe on mylar, metal, and silicone and is the best remover for dried acrylic. Test on acetate first, and keep it off adhesive backings.
How do you store stencils so they stay flat?
Dry them completely, then store flat between cardstock in a folder, in a binder with sheet protectors, or in a shallow box away from heat. Never roll them.
How do you clean a stencil brush?
Blot excess paint, rinse in lukewarm water, lather with dish soap in your palm until the foam is colorless, rinse, reshape, and dry bristles-up or flat.
Next Step
Cleaning stencils comes down to timing: wipe and rinse while the paint is wet and the job takes minutes, or soak and coax when it has dried and the job takes most of an hour. Either way, dry flat and store flat. Give the brushes the same attention, since clogged bristles undo the work of a clean stencil. If your brushes are already stiff, splayed, or shedding, the sets compared in our stencil brush buying guide will give you a fresh start.