
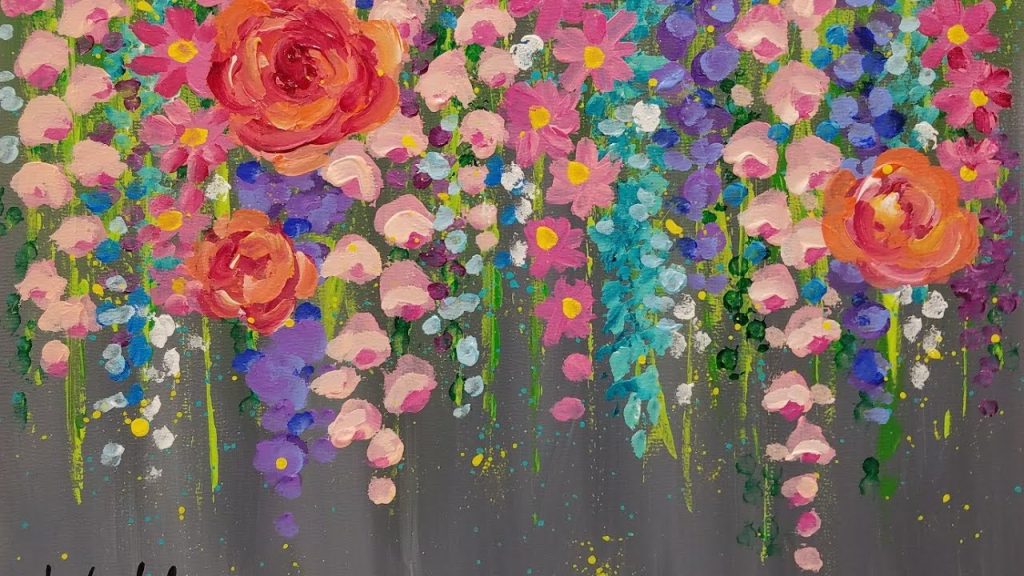
Quick answer: To paint flowers with acrylics, start with a simple underpainting of the background, sketch the flower as basic shapes (circles, ovals, cups), block in each petal with a mid-tone, then add shadows where petals overlap and highlights on the edges facing the light. Finish with the center, stems and a few crisp details. Working dark-to-light in two or three layers, and letting each layer dry, gives clean, convincing petals even for beginners.
A flower looks complicated because of how many petals it has. Paint it as a handful of simple shapes with light hitting one side, and most of that complexity disappears. That shift in thinking matters more than any brush or trick.
This guide explains how to paint flowers with acrylics using a repeatable method: how to see petals as shapes, a full step-by-step daisy and rose, an easy loose-style option, impasto flowers, and the color-mixing decisions that keep blooms fresh instead of chalky.
Before You Start: See Flowers as Shapes
Every common garden flower can be reduced to a basic geometric form:
- Daisies, sunflowers, cosmos: a flat disc or ellipse with petals radiating from a center.
- Tulips: an egg or cup shape.
- Roses and peonies: a ball or bowl, with petals wrapping around a tight center.
- Lilies and daffodils: a trumpet or cone surrounded by a star of petals.
- Lavender, foxglove, delphinium: a tall, tapering column of small marks.
Once you know the underlying shape, you can light it like any 3D form: the side facing the light is lightest, the side turning away is darker, and where one petal tucks behind another there is a shadow. That is the entire secret behind convincing petals.
Viewing Angle Changes Everything
A daisy seen straight on is a circle. Tilt it and the circle becomes an ellipse, with petals on the near side looking shorter and wider and petals on the far side looking thin. Beginners often paint every flower face-on, which makes bouquets look like stickers. Tilting a few blooms adds depth instantly.
Supplies for Painting Acrylic Flowers
| Supply | Recommendation | Purpose |
|---|---|---|
| Paint colors | Titanium white, cadmium yellow, cadmium red, quinacridone magenta, ultramarine blue, phthalo green or sap green, burnt umber | Covers most flower and foliage colors through mixing |
| Brushes | Size 8 to 12 filbert, size 4 round, size 1 liner, 1/2-inch flat | Filbert for petals, round for details, flat for backgrounds |
| Surface | Canvas panel or acrylic paper, 8×10 to 12×16 inches | Small enough to finish in a session |
| Palette | Stay-wet palette or a plate with a damp paper towel | Keeps acrylic workable longer |
| Extras | Spray bottle, paper towels, chalk pencil, slow-dry medium | Control drying and sketch lightly |
Flowers rely on clean, saturated color, and that is where paint quality shows. Cheap reds and magentas often turn dull pink as soon as white is added. For a deeper look at palettes and techniques built around blooms, see our full guide to acrylic flower painting techniques.
How to Paint Flowers With Acrylics: The Core Method
This sequence works for nearly any flower. The two demonstrations below apply it to specific blooms.
- Background first. Paint a soft, simple background and let it dry. A mid-value background makes both light and dark petals stand out.
- Sketch shapes. Draw the overall ellipse or cup of each flower, then divide it into petals.
- Block in mid-tones. Fill every petal with a single middle value of the flower’s color.
- Add shadows. Darken the bases of petals, the areas where they overlap, and the side turning away from the light.
- Add highlights. Lighten petal tips and edges facing the light. Keep highlights smaller than shadows.
- Paint the center. Add the flower center with texture: dots, stippling or small strokes.
- Stems and leaves. Paint these after the bloom so they sit naturally behind or beside it.
- Final details. A few crisp edges, vein lines or bright accents bring the painting into focus.
How to Paint Flowers With Acrylics for Beginners: A Simple Daisy
The daisy is the best first flower because its petals are repetitive and forgiving. Plan for about 45 minutes on an 8×10 panel.
Step 1: Background
Paint the panel in a soft blue-green, darker in one corner and lighter in the opposite. Let it dry.
Step 2: Sketch the Ellipse
Draw a slightly tilted ellipse for the flower head and a small circle a little off-center for the yellow disc. The off-center placement suggests the tilt.
Step 3: Petal Undercoat
Mix white with a tiny touch of ultramarine and burnt umber to make a light gray. With a filbert, press down at the outer edge and pull inward toward the center, lifting as you go. Each stroke makes one petal. Painting petals in gray first, instead of pure white, gives you room for highlights later.
Step 4: White Highlights
When the gray is dry, paint pure titanium white over the upper half of each petal on the light side of the flower. Leave gray showing near the center and on the shadow side.
Step 5: Center
Fill the disc with cadmium yellow. Add burnt umber mixed with a little yellow to the lower side of the disc for shadow, then stipple a few light yellow dots on the upper side.
Step 6: Stem and Shadows
Paint a slightly curved stem with a liner brush. Add a thin, darker gray shadow where petals meet the center to separate them.
Paint Acrylic Flowers for Beginners: Three Easy Styles
If realism feels like too big a jump, these styles build skill quickly while still looking finished.
One-Stroke Petals
Double-load a flat or filbert brush with two colors, such as white on one corner and magenta on the other. Press and twist to form a petal in one motion. Repeat around a center. This method teaches pressure control and produces surprisingly sophisticated blended petals.
Q-Tip and Dot Flowers
Dab circles of color with a cotton swab or the handle end of a brush to form petals around a center dot. Great for cherry blossoms, hydrangea clusters and filler flowers in a larger bouquet.
Loose and Abstract Blooms
Suggest flowers with a few confident shapes and drips, leaving edges soft and undefined. If this style appeals to you, our guide on painting abstract flowers with acrylics walks through composition and color choices for looser work.
How to Paint a Rose Step by Step
Roses intimidate many painters because of their spiraling petals. Treat the bloom as a cup holding a smaller cup.
- Base shape: Paint a circle in a mid-value red or pink.
- Inner cup: Paint a dark, curved shape near the top center. This is the opening of the rose and the darkest area.
- Center spiral: Inside that dark area, paint a small comma-shaped stroke of mid-value color to suggest the tightly wrapped inner petals.
- Front petals: Paint curved “C” strokes across the bottom half of the circle in a lighter value. Each stroke wraps around the form like a bowl rim.
- Side petals: Add larger, lighter curved shapes on each side, slightly overlapping the front petals.
- Shadows: Darken the undersides of each petal edge, where it curls away.
- Highlights: Add the lightest pinks or whites on the top edges of the front petals.
The key is that the darkest value sits deep inside the rose and the lightest values sit on the outer rims closest to the viewer.
Impasto Flowers Acrylic Painting
Impasto means applying paint thickly so the brush or knife marks stand up from the surface. With flowers, it creates sculptural petals that catch real light.
What You Need
- Heavy body acrylic paint (fluid paint will not hold peaks)
- A small palette knife with a pointed or teardrop blade
- Optional: modeling paste or a gel medium to extend paint and add body
- A rigid surface such as a canvas panel or wood board
How to Do It
- Paint a flat background and let it dry.
- Mix the petal color with gel medium or modeling paste, about 1 part medium to 1 or 2 parts paint.
- Load the underside of the knife tip with a ridge of paint.
- Press the tip at the outer edge of the petal and pull toward the center, lifting at the end so a ridge remains.
- Work from the back petals to the front, letting each layer firm up slightly before overlapping.
- Add the center with dabs of thick paint, or press the knife tip repeatedly for texture.
Thick impasto can take a day or more to dry through and may develop cracks if applied too heavily in a single layer. Building in two thinner layers is safer than one massive one.
Mixing Flower Colors That Stay Vibrant
| Flower color | Mix | Avoid |
|---|---|---|
| Pink | Quinacridone magenta plus white | Cadmium red plus white, which can look chalky salmon |
| Purple | Magenta plus ultramarine | Cadmium red plus blue, which often turns brown |
| Orange | Cadmium yellow plus a small amount of cadmium red | Too much red early on |
| Yellow shadow | Yellow plus a touch of burnt sienna or violet | Black, which turns yellow greenish |
| White shadow | White plus a little blue and umber, or a pale lavender | Pure gray mixed from black, which looks dead |
| Leaf green | Phthalo or sap green adjusted with yellow and a touch of red | Tube green used straight from the tube |
When shading a colorful petal, shift toward a darker version of the same family or toward its neighboring cool hue. A shadow on a yellow petal can lean orange or violet-brown. Avoid black, which deadens petal color quickly.
How Long Each Layer Needs to Dry
Flower paintings rely on clean layering, and painting into half-dry acrylic is a common reason petals turn streaky. Thin background layers usually dry in 15 to 30 minutes. Petal mid-tones painted at normal thickness dry in about 10 to 20 minutes. Impasto petals can stay soft inside for many hours even when the surface feels dry, so avoid pressing on them or varnishing for several days. If you want to blend petals wet-in-wet, add a few drops of slow-dry medium to the petal mix and work one flower at a time.
Common Mistakes and Fixes
- Every petal the same size. Vary length and width. Petals overlap and turn at different angles.
- No shadow between petals. A thin dark line or shape where petals overlap separates them.
- Muddy pinks and purples. Clean your brush between warm and cool colors and use magenta instead of red.
- Stems too straight and thick. Taper stems and give them a slight curve.
- Overworking. Acrylic gets streaky if you keep brushing as it dries. Let it dry and add another layer instead.
- Busy background. A simple, soft background lets flowers stand out.
Tips for Flower Bouquets and Compositions
Group flowers in odd numbers, such as three or five, which tends to look more natural than pairs. Make one bloom clearly dominant through size, brightness or detail, and let others recede with softer edges and muted color. Overlap flowers so they feel like a cluster, and allow some to be cut off by the canvas edge to suggest the arrangement continues.
Related Reading
FAQs
How do you paint flowers with acrylics easy?
Use a simple shape-based method: paint a soft background, sketch circles or cups for each flower, block in one mid-tone color, then add a darker shadow at the petal bases and a lighter highlight on the tips. One-stroke petals and dot flowers are also very easy entry points.
What is the best brush for painting acrylic flower petals?
A filbert brush is the most versatile because its rounded tip naturally forms petal shapes. A round brush handles details, and a liner is useful for stems and fine vein lines.
Should I paint the background or the flower first?
Paint the background first in most cases. It is easier to paint petal edges cleanly over a dry background than to cut a background in around finished flowers.
How do I make white flowers stand out?
Place white flowers against a mid-to-dark background, paint their first layer in a light gray or pale lavender, then add pure white only on the lit edges. White looks brightest when there is shadow around it.
Can I use acrylic paint for impasto flowers on canvas?
Yes. Heavy body acrylic, optionally mixed with gel medium or modeling paste, holds palette knife ridges well. Apply in moderate layers and allow extra drying time to reduce the chance of cracking.
Why do my acrylic petals look streaky?
Streaks usually come from brushing over paint that is already drying, or from using a thin, low-pigment paint. Let the layer dry, then apply a second coat with a fully loaded brush, or add a little slow-dry medium for more working time.
Next Step
Learning how to paint flowers with acrylics is mostly about repetition: the same shape-light-shadow logic applied to different blooms. Start with daisies, move to tulips and roses, then try loose bouquets or textured impasto once your brush control improves.
When you are ready to go deeper into composition, color harmony and advanced petal techniques, explore our complete resource on painting stunning blooms in acrylic.




