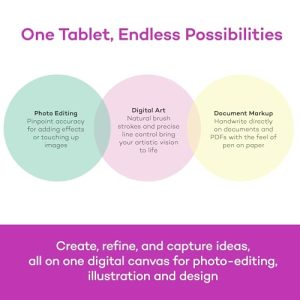
Start with a tablet and stylus, paint in layers, and build values before color.
If you want to learn how to paint digitally with clarity and speed, you are in the right place. I have guided teams and artists on how to paint digitally for years, from first strokes to studio-ready files. This guide will show you how to paint digitally step by step, with pro tools, practical workflows, and hard-won lessons that save time and stress.

What You Need to Start Painting Digitally
You can begin with a simple setup. A pen tablet, solid software, and a canvas at the right size are enough. Knowing how to paint digitally means choosing tools that fit your budget and your goal.
Tools worth using:
- Pen tablet options: graphics tablets (Wacom Intuos, Huion Inspiroy) or display tablets (Wacom Cintiq, Huion Kamvas). iPad with Apple Pencil is great for mobility.
- Software: Adobe Photoshop, Procreate, Clip Studio Paint, Krita. Pick one and stick with it for a month.
- Canvas settings: 3000–5000 pixels on the long side, 300 ppi for print, RGB color for screens. Work in sRGB for web to keep colors consistent.
Helpful setup tips:
- Turn on pen pressure for opacity and size. This gives you natural strokes.
- Use a neutral gray app background. It helps you judge values.
- Keep a small brush set. A hard round, a soft round, a textured brush, and an eraser are enough to learn how to paint digitally without noise.
Personal note: I shipped pro work for years with a mid-range tablet and three brushes. Focus on skill, not gear.

Digital Painting Basics You Must Know
Before you go deep on how to paint digitally, get the core ideas down. Layers, brushes, and blending control your look. Use them to work fast and without fear.
Key basics:
- Layers: Separate sketch, values, color, and effects. Name them. Group them. You can turn parts on and off and test ideas.
- Brushes: Hard edge for sharp forms. Soft edge for smooth blends. Use low flow for feathered strokes. Change brush angle and spacing for texture.
- Blending modes: Multiply for shadows and color wash. Overlay or Soft Light for gentle tints. Screen or Add for glow.
- Color modes and formats: Paint in RGB. Export CMYK only for print needs. Save a PSD or layered file. Share as PNG or high-quality JPEG.
Expert tip: Keep a values-only layer check. A desaturation adjustment on top shows if your forms read well before you push color.

Step-by-Step: How to Paint Digitally
Here is a clean workflow that shows how to paint digitally from a blank canvas to a polished piece. Follow it until it becomes second nature.
- Gather references: Collect 5–10 images for shape, light, and mood. Do not copy one image. Use a board for direction.
- Rough sketch: Use a mid-gray canvas. Sketch with a darker gray. Aim for clear shapes and readable silhouette.
- Block-in values: On a new layer, fill big shapes with flat tones. Keep three values first: dark, mid, light.
- Refine forms: Add planes and edges. Hard edges for detail focus. Soft edges for rest areas.
- Color pass: Add a color layer above values. Use Multiply or Color blending. Keep a limited palette to avoid mud.
- Lighting pass: Paint key light and bounce light. Add rim light if needed. Use Screen for highlights with restraint.
- Texture and materials: Use a few texture brushes or photo textures on low opacity. Mask them to the right areas.
- Final polish: Add small accents, sharp highlights, and clean edges. Check at 25% zoom for big read.
- Export: Save the layered master file. Export a web version (sRGB, PNG/JPEG) and a print version if needed.
When you practice how to paint digitally with this flow, your speed and clarity jump. You stop guessing and start making clear choices.

Mastering Color, Light, and Form
Great digital art feels solid and alive. To master how to paint digitally, focus on values, edges, and color temperature. These are your three pillars.
Simple rules that work:
- Values first: If it reads in grayscale, it will read in color. Keep a clear light and shadow design.
- Color temperature: Warm light makes cool shadows. Cool light makes warm shadows. Shift hue with light direction.
- Local color is a base: Light and environment change it. Add a tiny hue shift to show plane turns.
- Edge control: Hard edges pull focus. Soft edges suggest depth and soft light. Lost edges blend forms and add realism.
Practice drills:
- Paint a sphere with warm light and cool shadow. Then swap it.
- Paint a scene with only two hues. Aim for mood over detail.
Industry studies show viewers lock onto value contrast and sharp edges first. Use that to guide eyes through your composition.

Brush Control and Texture Techniques
Brush control is how to paint digitally with confidence. You tell the viewer what to feel with edge, texture, and stroke rhythm.
Core brush skills:
- Pressure curves: Tune pen pressure so light touch gives light marks. This prevents muddy blends.
- Opacity vs flow: Opacity is strength per stroke. Flow is rate within the stroke. Low flow builds soft form.
- Smudge with intent: Use smudge or a soft brush at low flow to soften edges. Do not smear everything.
Texture tips:
- Dual-brush or texture brushes: Add grit to surfaces. Keep texture aligned with form planes.
- Texture overlays: Place a photo texture on top. Set to Overlay or Soft Light. Mask to fit. Lower opacity until it feels natural.
- Noise for banding: A tiny noise layer hides banding in smooth gradients.
Mistake to avoid: A big noisy brush over every surface. Let skin be soft, metal be sharp, cloth be varied.

Non-Destructive Editing and File Management
If you plan to work with clients, this part matters. Knowing how to paint digitally is also about how to change things fast without damage.
Work smart:
- Adjustment layers: Use Levels, Curves, and Hue/Saturation as layers. You can tweak later.
- Layer masks: Hide, do not erase. Paint white to reveal, black to hide. This saves time.
- Clipping masks: Lock paint and effects to a base shape. Great for clean edges.
- Smart objects: Keep complex parts editable. You can scale without loss.
Stay organized:
- Name layers and groups. Use prefixes like 01_Sketch, 02_Values, 03_Color.
- Version control: Save v01, v02, v03 as you reach milestones. You can roll back.
- Backups: Use cloud plus local. Hardware fails. Your work should not.
Color management:
- Use sRGB for web to match most screens. Check on your phone and monitor for consistency.
Common Mistakes and How to Fix Them
Learning how to paint digitally means spotting traps early. These fixes come from years of client work and teaching.
Frequent issues and cures:
- Overblending everything: Forms look like plastic. Fix by restoring hard edges in focal areas.
- Low-resolution canvas: Edges break when you zoom. Start larger than you need and scale down at the end.
- Too many brushes: You chase the tool, not the skill. Limit to three core brushes for a month.
- Ignoring values: Pretty colors, weak forms. Paint in grayscale first, then add color.
- Zooming too close: You lose the big read. Check at 25% often and flip canvas to spot errors.
- Many effects early: Glow and filters hide weak structure. Build strong forms before effects.
When I began, I loved fancy brushes. My work looked busy. Cutting down to a hard round and soft round changed everything.
A 30-Day Practice Plan to Level Up
A clear plan makes how to paint digitally feel easy. Use short, focused drills. Track wins. Keep going.
Daily rhythm:
- Day 1–7: Value studies of simple shapes. 20 minutes each. Two per day.
- Day 8–14: Master studies in grayscale. Copy light and edges. One hour per study.
- Day 15–21: Color studies with a limited palette. Three colors only.
- Day 22–24: Material studies. Metal, skin, cloth, wood. 30 minutes each.
- Day 25–27: Small environment thumbnails. Ten tiny comps. 5–10 minutes each.
- Day 28–29: One finished piece using your workflow. Two sessions.
- Day 30: Review. Note three strengths and three targets for next month.
Tracking tips:
- Keep a dated folder. Save v01, v02, v03 as you refine.
- Write one sentence after each session on what clicked.
Frequently Asked Questions of how to paint digitally Informational 260 20 1.55 Sitelinks
What is the best software to learn how to paint digitally?
Start with what you can access and enjoy. Photoshop, Procreate, Clip Studio Paint, and Krita all support layers, brushes, and masks.
Do I need an expensive tablet to learn how to paint digitally?
No. A budget pen tablet works well. Upgrade later if you want a screen tablet for direct drawing.
What canvas size should I use when learning how to paint digitally?
Use 3000–5000 pixels on the long side at 300 ppi for flexible export. Keep sRGB color for web sharing.
How do I pick brushes for how to paint digitally?
Use a hard round, soft round, and one textured brush. Learn edge control first, then add more brushes as needed.
How long does it take to get good at how to paint digitally?
With daily practice, big gains show in 30–90 days. Strong fundamentals and focused drills speed it up.
How can I avoid muddy colors while I learn how to paint digitally?
Decide on light temperature and keep shadows the opposite temperature. Reduce saturation in shadows and keep values clear.
What is the simplest workflow for how to paint digitally?
Sketch, block values, add color, refine light, and polish edges. Save versions as you go for easy changes.
Conclusion
You now have a clear path for how to paint digitally, from tools to workflow to practice. Keep values simple, edges clear, and color choices intentional. Use layers and masks to stay flexible, and review your work at a small zoom to check the big read.
Start today with one 30-minute value study and one small color pass. Build a streak and watch your speed and clarity improve. Want more guides and drills? Subscribe for weekly practice plans, or leave a comment with your current roadblock so I can help you solve it next.