

Painting grass in oil can look simple, but artists soon realize it can be tricky to get right. Grass is full of color shifts, different textures, and light effects. If you just use one green and swipe it on, the result looks flat and fake.
To paint grass that feels alive, you need to think about color, light, direction, and the right brushwork. Whether you are a beginner or have some experience, mastering grass makes your landscapes much stronger and more realistic.
Let’s explore in detail how to paint grass in oil, from basic preparation to advanced tips. You will discover proven techniques, common mistakes, and practical advice that many artists only learn after years of trial and error.
Understanding Grass: The Foundation For Oil Painting
Before picking up a brush, it helps to really look at grass. Notice the way grass blades bend, how colors change in sunlight or shade, and how patches of grass differ in length and density. Some areas are lush and dark, others are dry and yellow.
In the distance, grass blends into shapes and colors, while up close you see detail.
Key insight: Most beginners use only one or two greens for grass. But real grass contains hints of yellow, blue, brown, and sometimes even purple or red.
Why Study Reference Photos And Real Grass?
- Reference photos help you see color shifts and how light falls on grass.
- Observing real grass outdoors shows you the range of textures and how wind or weather affects it.
Try collecting your own photos or painting outdoors (plein air). This builds your skill in seeing what’s really there, not just what you imagine grass should look like.
Choosing The Right Materials For Painting Grass
The materials you use can make painting grass much easier or harder. Here’s what you need to get started:
| Material | Why It Matters | Recommended Options |
|---|---|---|
| Oil Paint Colors | More colors let you mix natural greens | Ultramarine Blue, Cadmium Yellow, Yellow Ochre, Burnt Sienna, Sap Green, Titanium White |
| Brushes | Different shapes give different grass effects | Fan, flat, filbert, and small round brushes |
| Mediums | Helps paint flow and dry | Linseed oil, Galkyd, or Turpenoid |
| Surface | Texture affects brushwork | Canvas, canvas board, or gessoed wood panel |
Pro tip: Fan brushes are popular for grass, but don’t rely only on them. Flat and round brushes can add texture and variety.
Mixing Realistic Greens
One of the biggest challenges is creating natural green colors. If you use tube green (like Viridian or Sap Green) alone, grass looks artificial.
Key Mixing Techniques
- Mix your own green: Start with blue (Ultramarine or Phthalo) and yellow (Cadmium Yellow or Lemon Yellow). Adjust with a touch of red or brown for a muted, earthy look.
- Use yellow ochre: This makes greens softer and more natural, perfect for sunlit or dry grass.
- Warm and cool greens: Add more yellow for warm, sunlit grass. Add blue or a little white for cool, shaded areas.
- Avoid pure black: For shadows, mix green with its complement (red or burnt sienna) instead of using black, which can make grass look dull.
| Area | Mix Example | Color Temperature |
|---|---|---|
| Sunny Grass | Cadmium Yellow + Ultramarine Blue + touch of White | Warm |
| Shaded Grass | Sap Green + Ultramarine Blue + Burnt Sienna | Cool |
| Dry Grass | Yellow Ochre + a little Sap Green + Burnt Sienna | Neutral/Warm |
Non-obvious insight: Sometimes, adding a small amount of purple to green can make shadows in grass look deeper and more natural.
Planning Your Painting: Underpainting And Blocking In
A strong grass painting starts with good planning.
Underpainting
Begin with an underpainting—a thin, loose wash of color across your canvas. For grass, use a muted green or brown. This base color helps unify your painting and fills any tiny gaps later.
Blocking In
Next, “block in” the main shapes and areas of grass. Use large brushes and simple colors. Don’t paint details yet. Focus on where dark and light patches are. This stage should be bold and confident, not careful.
Tip: Step back often to check your composition. Squint your eyes to see the main light and dark areas.
Painting Grass: Techniques For Realistic Effects
Once you have your base colors, it’s time to build up the grass with texture and detail.
Layering From Dark To Light
In oil painting, it’s usually best to start with darker values first, then add lighter highlights on top. This mimics how sunlight hits grass in real life.
- Paint shadowed areas with darker, cooler greens.
- Add mid-tone greens to build volume.
- Use lighter, warmer greens for highlights where the sun hits.
Varying Your Brushwork
Grass is never uniform. Mix up your brushstrokes:
- Fan brush: Tap and drag gently for patches of grass. Use lightly for soft fields, press harder for thicker textures.
- Flat brush: Use the edge for sharp blades or pull up for taller grass.
- Small round brush: Perfect for a few sharp, detailed blades in the foreground.
Change direction as you paint. Grass often bends or curves, especially in wind or on hills.
Creating Depth With Color And Value
To make grass look three-dimensional:
- Use cooler, darker greens in the background. These recede visually.
- Add warmer, brighter greens in the foreground. These come forward.
- Include a few pops of color—like yellow or blue—where light bounces or dew sparkles.
Advanced tip: In distant grass, reduce detail and keep brushwork soft. For close-up grass, increase texture and sharper lines.
Adding Details And Final Touches
When the main layers are dry to the touch, you can add details that bring your grass to life.
Highlights And Blades
Use a thin, light green or yellow to paint a few blades of grass in the brightest spots. Don’t overdo it—just enough to suggest detail.
Color Variations
Drop in hints of brown, ochre, or even red for dead patches, wildflowers, or weeds. This adds realism and keeps grass from looking too perfect.
Edges And Transitions
Soften some edges with a dry brush or your finger. In nature, grass rarely has hard lines except for some blades in the foreground.
Common Mistakes To Avoid
- Too much detail everywhere: Focus detail in one area (like the foreground), keep background softer.
- Same green everywhere: Always vary your greens.
- Overusing one brush: Try different brushes for different effects.
- Ignoring light direction: Always ask, “Where is the sun?” Paint shadows and highlights accordingly.
Learning From Masters: Grass In Famous Oil Paintings
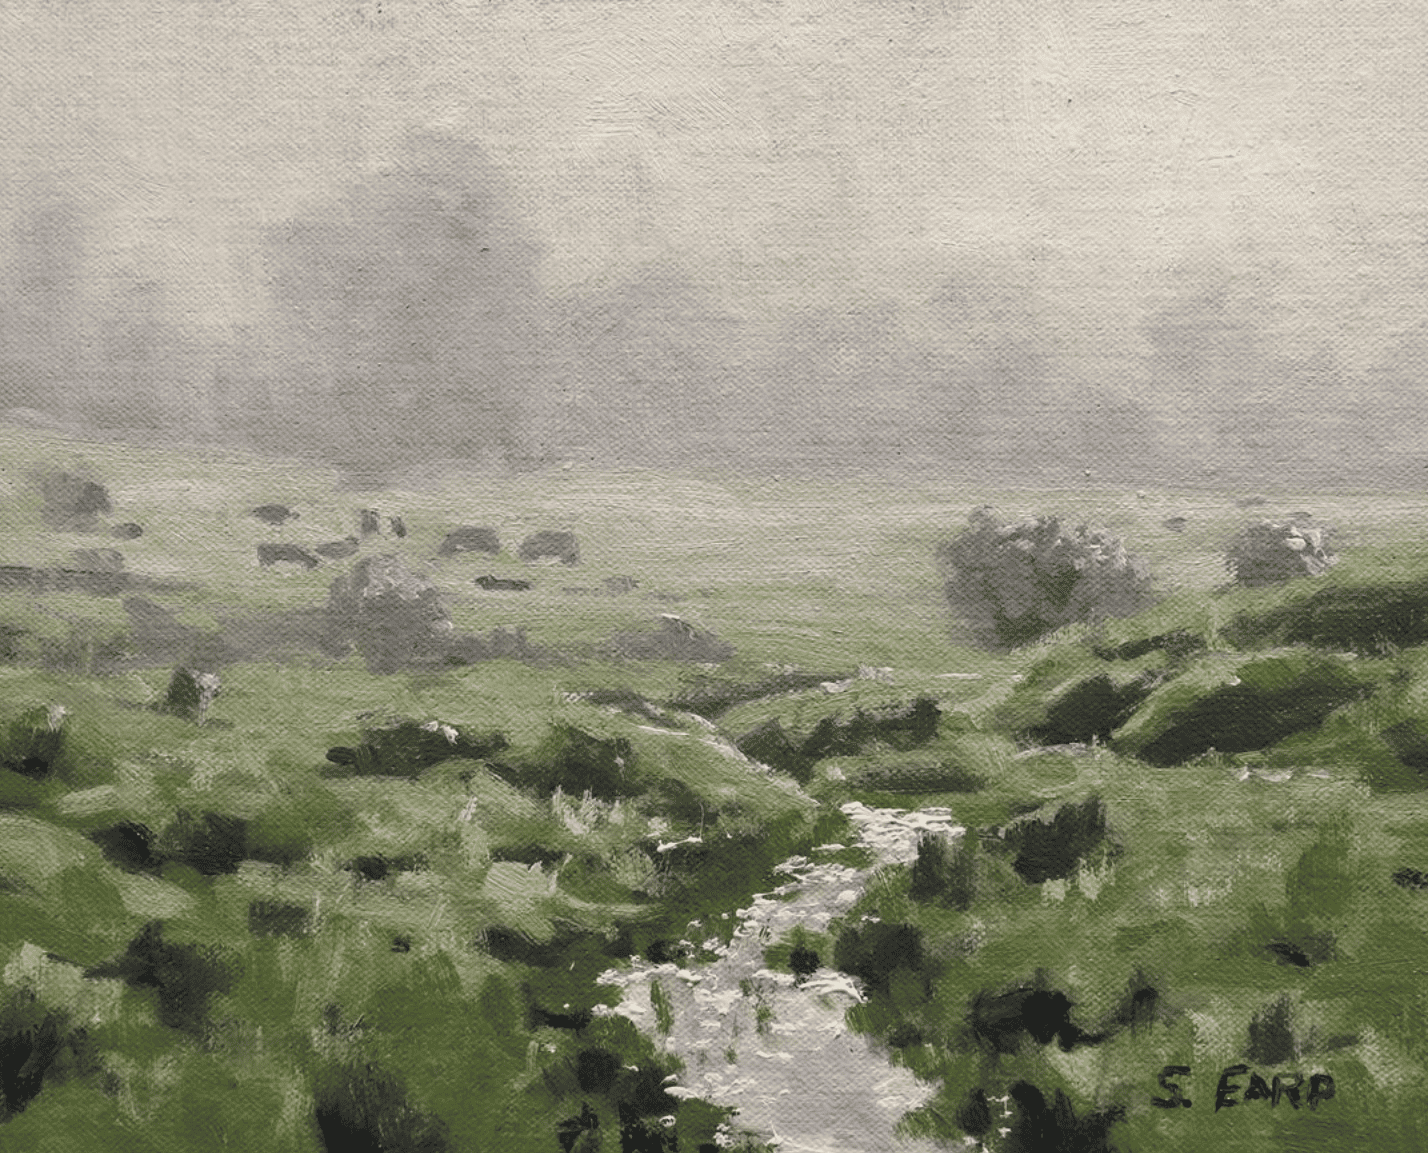
Many great painters use clever tricks for painting grass. For example, Claude Monet often painted grass with loose, colorful strokes, using blues and purples in shadow. John Constable added touches of red and brown for richness.
If you look at their works up close (in museums or online), you will see that grass is not just “green”—it’s a tapestry of many colors and textures.
Practice Exercises For Mastering Grass
Practice is the best teacher. Try these exercises:
- Color matching: Sit outside and try to mix the exact color of a patch of grass. Compare your mix to the real thing.
- Brushwork swatches: On a practice board, test different brushes and strokes for grass effects.
- Light studies: Paint the same grassy area at different times of day—morning, noon, evening—to see how colors change.
- Copy a master: Try recreating a small section of grass from a famous painting. Notice how they use color and brushwork.
Non-obvious insight: Even in a small grass study, your focus should be on light, shadow, and color variety—not just copying blade shapes.

Credit: www.youtube.com
Table: Brush Types And Their Effects On Grass
| Brush Type | Best For | Grass Effect |
|---|---|---|
| Fan Brush | Patches, mass areas | Soft, bushy texture |
| Flat Brush | Edges, tall blades | Sharp, straight lines |
| Round Brush | Individual blades | Thin, pointed marks |
| Palette Knife | Highlights, rough texture | Bold, broken color |
When To Use Glazing For Grass
Glazing is a technique where you paint a thin, transparent layer of color over dry paint. For grass, glazing can:
- Adjust the overall warmth or coolness.
- Add depth to shadows.
- Soften areas without repainting.
Try glazing with a little Sap Green mixed with medium over dry grass to make it richer. Glazing takes patience, as each layer must dry, but the results can be stunning.
Credit: samuelearp.com
How To Fix Common Problems In Grass Painting
Even experienced artists face problems. Here’s how to solve the most common ones:
- Grass looks too flat: Add more color variation and build up layers of light and dark.
- Edges are too hard: Soften with a dry brush or blend gently while wet.
- Too busy or messy: Step back and simplify. Sometimes scraping off and repainting a section is best.
- Paint is too thick or too thin: Oil paint should be like soft butter. If too thick, add a bit of medium. If too thin, use less solvent.
Building Your Own Grass Painting Style
Every artist paints grass a little differently. Some prefer loose, impressionistic grass (like Monet), while others paint every blade in detail. Try different methods and see what feels right for you.
As you practice, pay attention to what makes grass look real to you—maybe it’s the color shifts, the texture, or the way light falls. With time, you’ll develop your own approach.
Credit: samuelearp.com
Further Learning And Inspiration
If you want to dive deeper, consider studying landscape painting books, taking online courses, or joining local painting groups. Museums and websites like the Metropolitan Museum of Art offer high-resolution images of famous grass paintings for close study.
Frequently Asked Questions
How Do I Keep My Greens From Looking Artificial In Oil Painting?
Mix your own greens using blue and yellow, then adjust with a little red, brown, or ochre. Avoid using tube green alone. Look at real grass and match your colors to what you see, not what you imagine.
What Is The Best Brush For Painting Grass In Oil?
A fan brush is popular for soft, bushy grass, but a flat or round brush gives you more control for sharp blades. Try several types to see which works best for your style.
Should I Paint Grass Before Or After Other Landscape Elements?
Usually, block in large shapes (like sky and ground) first, then paint the main areas of grass. Add final details, like sharp blades or highlights, last, so they sit on top of other layers.
How Do I Paint Realistic Grass In The Distance?
Use cooler, bluer, and grayer greens for distant grass. Keep brushwork soft and avoid sharp details. This creates the illusion of depth and helps the foreground stand out.
Can I Use Other Colors Besides Green For Grass?
Yes! Real grass contains hints of yellow, blue, brown, and sometimes even purple or red. Including these makes your painting look more natural and lively.
Painting grass in oil is challenging, but with the right approach, it becomes rewarding. Remember to observe, mix colors carefully, and vary your brushwork. Keep experimenting and learning, and your landscapes will soon have grass that feels full of life.


