Are you ready to bring your creative ideas to life with rich, vibrant colors that last? Learning how to oil paint on canvas can open up a world of artistic possibilities for you.
Whether you’re a complete beginner or have tried it once before, mastering the basics will help you create stunning artworks that stand the test of time. In this guide, you’ll discover simple steps to prepare your canvas, choose the right materials, and apply paint like a pro.
Plus, you’ll learn important tips to avoid common mistakes—so your painting not only looks great but stays beautiful for years. Keep reading, and soon you’ll be confidently turning blank canvases into masterpieces!
Materials And Tools
Starting oil painting requires the right materials and tools. These items affect your painting’s quality and ease. Choosing good supplies helps create vibrant, lasting artwork. This section explains essential materials for oil painting on canvas.
Choosing Quality Oil Paints
Select oil paints with rich pigment and smooth texture. Tubes labeled “artist grade” offer better color and durability. Avoid student-grade paints, as they lack pigment strength. Choose primary colors to mix a wide range of hues. Look for brands that use natural oils for longer drying times.
Selecting Brushes And Mediums
Use brushes made for oil painting, such as hog bristle or synthetic. Flat and round brushes serve different painting styles and details. Mediums like linseed oil or turpentine change paint consistency and drying speed. Linseed oil makes paint glossy and slower to dry. Turpentine thins paint for smooth layers and faster drying.
Preparing The Canvas
Start with a stretched canvas or canvas board. Most canvases come pre-primed with gesso, a white paint base. If not, apply two coats of gesso to prevent oil from damaging fibers. Let each coat dry before painting. A smooth surface helps paint glide and blend easily. Properly prepared canvas ensures your painting lasts for years.

Credit: www.amazon.com
Canvas Preparation
Preparing your canvas properly is the first step to a successful oil painting. A well-prepared canvas ensures your paint adheres well and lasts long. It also prevents the oil from damaging the fabric over time. Taking time to prepare the canvas makes painting easier and more enjoyable.
Priming With Gesso
Priming the canvas with gesso creates a smooth, white surface for painting. Gesso stops the oil paint from soaking into the canvas fibers. Use a flat brush to apply a thin, even layer of gesso. Let it dry completely before adding another coat. Usually, two or three layers give the best results. Sand lightly between coats for a smoother finish.
Sketching The Composition
Sketching your design on the primed canvas helps guide your painting. Use a pencil or thin charcoal for light lines. Keep the sketch simple and clear. This step saves time and reduces mistakes while painting. Make sure the sketch fits well within the canvas space. Adjust shapes and placement before starting with paint.
Oil Painting Techniques
Oil painting techniques shape the look and feel of your artwork. Understanding how to layer and blend paints helps create depth and texture. Careful application improves drying time and prevents cracks. Each technique builds on the previous one to form a strong painting base. Try practicing these methods for better results on canvas.
Applying Thin Layers First
Start with thin layers of paint to create a stable foundation. Thin layers dry faster and prevent cracking later. Use a small amount of oil or solvent to thin your paint. Apply smooth, even strokes to cover the canvas lightly. This approach allows you to fix mistakes easily before adding details.
Building Up Thick Layers
After thin layers dry, add thicker paint for texture and richness. Thick layers catch light and add dimension to your painting. Use more oil in your paint mix to keep it flexible and slow drying. Apply paint with a brush or palette knife for bold, textured strokes. Thick layers make your painting stand out with vibrant color.
Blending And Brushwork
Blending helps smooth transitions between colors and shapes. Work wet paint gently with soft brushes or fingers for smooth edges. Use short, controlled brushwork to add details and texture. Vary your brush strokes to create different effects like roughness or softness. Proper blending and brushwork give your painting a polished, professional look.
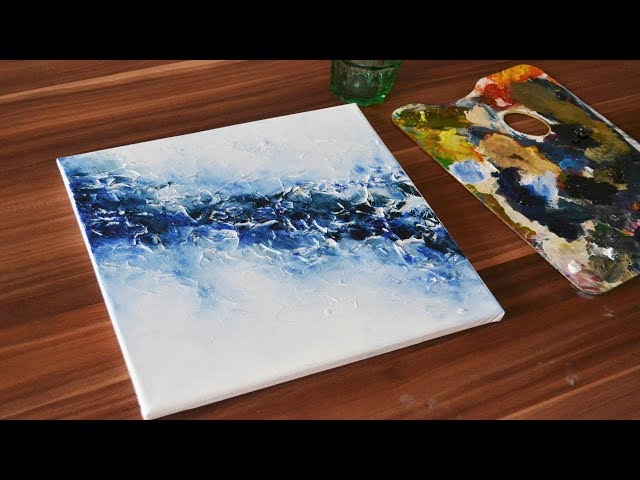
Credit: www.youtube.com
Following The Fat Over Lean Rule
Following the Fat Over Lean rule is essential for successful oil painting on canvas. This rule guides the layering process, ensuring each paint layer adheres well and lasts longer. It helps avoid common issues like cracking and peeling. Understanding and applying this rule improves your painting’s durability and finish.
What Fat Over Lean Means
Fat Over Lean means applying paint layers with increasing oil content. The first layers contain more solvent and less oil. These layers dry faster but are less flexible. Later layers have more oil, making them slower to dry and more flexible. This prevents the paint from cracking as it dries and ages.
Preventing Cracks And Peeling
Painting with Fat Over Lean stops cracks from appearing over time. Thin, lean layers dry quickly and create a stable base. Thicker, oil-rich layers on top remain flexible and move with the canvas. This flexibility reduces stress between layers. Following this rule keeps your painting smooth and durable for years.
Using Colors And Drying Times
Understanding how to use colors and manage drying times is key to successful oil painting on canvas. Oil paints behave differently based on their color pigments and drying speeds. Knowing these traits helps you plan your work and avoid common issues like cracking or muddy colors.
Choosing the right sequence and types of colors allows better blending and layering. Patience during drying phases ensures each layer sets properly. This knowledge makes your painting process smoother and your artwork more vibrant.
Working From Dark To Light
Start your painting with darker colors. Dark tones create a strong foundation and help define shapes early. Lighter colors go on top to highlight and add depth. Oil paint’s transparency allows light colors to shine over dark ones. This technique gives your painting a natural look.
Painting dark to light also prevents muddy colors. Mixing light colors first can dull them when dark paints cover them later. Keep your brushes clean to avoid unwanted color mixing. This method supports clear, bright results.
Choosing Slow And Fast Drying Colors
Oil paints dry at different speeds depending on pigments. Some colors dry fast, like earth tones and certain reds. Others, like whites and blues, dry slower. Use fast-drying colors first. This approach lets layers dry evenly and avoids cracking.
Slow-drying colors work well on top layers. They blend smoothly and allow more working time. Keep your workspace well-ventilated for better drying. Use thin layers to speed up drying times. Understanding drying speeds helps prevent paint damage and keeps colors vibrant.
Credit: www.skillshare.com
Layering And Texture
Layering and texture are key techniques in oil painting on canvas. They bring your artwork to life by adding depth and interest. Building layers allows colors to interact and create richness. Texture gives a tactile feel that invites viewers to explore the painting closely.
Understanding how to control layers and texture improves your painting’s overall impact. It also helps in expressing different moods and styles. Experimenting with these techniques leads to unique and captivating results.
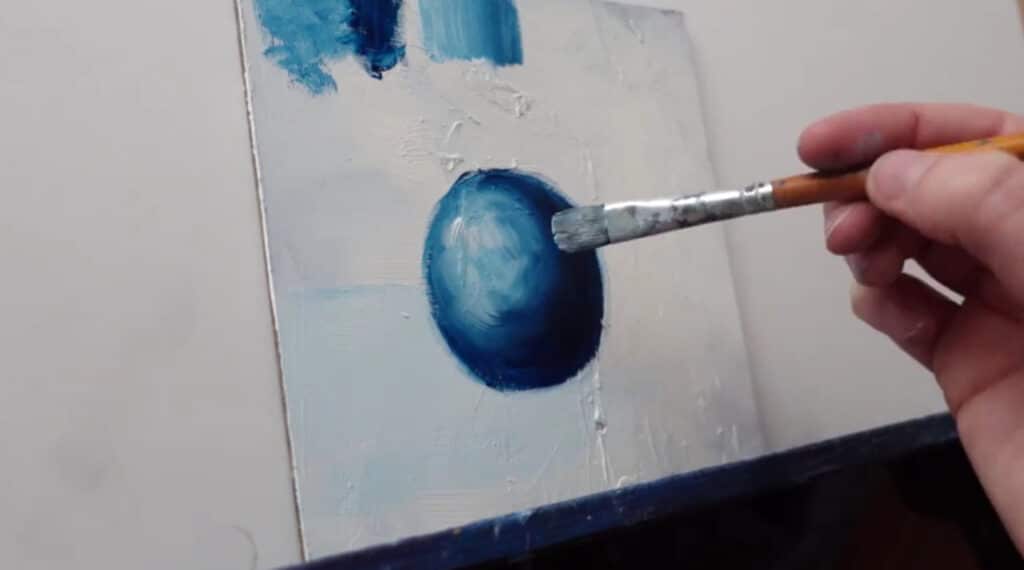
Creating Depth With Layers
Start by applying thin layers of paint to establish basic shapes. Each new layer should add more detail and color variation. Use transparent glazes to let underlying colors show through. This builds a glowing effect and sense of depth.
Wait for each layer to dry before adding the next. Thin layers dry faster and prevent cracking. Gradually increase paint thickness to enhance dimension. Layering helps create realistic shadows, highlights, and textures.
Adding Impasto Effects
Impasto is a technique where paint is applied thickly. This creates raised, textured areas that catch light. Use a palette knife or stiff brush to add impasto. Focus on highlights or important details to make them stand out.
Impasto adds energy and movement to your painting. It also emphasizes brush strokes and the physical quality of paint. Thick textures contrast with smooth layers, enriching the visual experience. Try combining impasto with thin glazes for dynamic effects.
Finishing Touches
Finishing touches bring your oil painting to life and protect it for years. After completing your artwork, it needs careful attention before display. Proper drying and sealing keep colors vibrant and prevent damage. Let’s explore the final steps to make your painting look its best.
Drying And Curing Time
Oil paint dries slowly. It can take days or weeks to feel dry. But drying is only the first step. Curing means the paint hardens completely. This process takes months.
Avoid touching the surface during drying. Dust and dirt stick easily. Keep the painting in a clean, dry place. Good air circulation helps speed drying. Avoid direct sunlight or heat, which can cause cracks.
Patience is key. Wait at least six months before applying varnish. This ensures the paint is fully cured and stable.
Applying Varnish For Protection
Varnish protects your painting from dust, moisture, and fading. It also enhances colors and adds a uniform shine. Choose a varnish made for oil paintings.
Use a soft brush or spray varnish evenly over the surface. Apply thin layers to avoid drips and bubbles. Let each layer dry before adding another.
Work in a dust-free area. Wear gloves to keep oils from your hands off the painting. Proper varnishing keeps your artwork safe and beautiful for decades.
Common Mistakes To Avoid
Starting oil painting on canvas can be exciting but also tricky. Avoiding common mistakes helps improve your work faster. These errors often cause frustration and affect the final look. Knowing what to avoid saves time and materials. Below are two frequent mistakes beginners make and tips to fix them.
Overloading Paint
Applying too much paint on the brush or canvas causes problems. Thick layers take very long to dry and can crack later. Overloaded paint also makes details blurry and colors muddy. Use small amounts and build layers gradually. Thin layers dry faster and create better texture. Control the paint amount on your brush before each stroke.
Skipping Canvas Preparation
Many skip preparing the canvas before painting. A raw canvas absorbs too much oil from the paint. This damages the paint and weakens the artwork over time. Always prime your canvas with gesso or a similar base. It seals the surface and improves paint adhesion. Proper preparation makes your painting last longer and look smooth.
Cleaning And Maintenance
Cleaning and maintenance are key steps in oil painting. They keep your tools ready and your artworks lasting longer. Proper care saves time and money. It also improves your painting experience. Below are simple tips for cleaning brushes and storing finished paintings safely.
Cleaning Brushes Properly
After painting, clean brushes right away. Use a cloth or paper towel to remove excess paint. Then, rinse brushes in a jar with turpentine or mineral spirits. Swirl gently to avoid damaging bristles. Next, wash brushes with warm water and mild soap. Work the soap into the bristles carefully. Rinse thoroughly until water runs clear. Dry brushes flat or hang with bristles down. Store brushes properly to keep their shape.
Storing Finished Paintings
Keep finished paintings in a dry, cool place. Avoid direct sunlight, which can fade colors. Use acid-free paper or glassine to cover the surface. Store paintings upright or flat, not leaning against each other. This prevents warping or damage. If framing, use UV-protective glass. Ensure the painting is fully dry before storage or framing. Proper storage preserves your art’s beauty for years.
Frequently Asked Questions
How To Do Oil Painting On Canvas For Beginners?
Sketch your design lightly on primed canvas. Apply thin oil paint layers, building thickness gradually. Use quality brushes. Let each layer dry before adding more. Finish with varnish to protect and enhance shine. Clean brushes with solvent after painting. Practice patience for best results.
Can You Oil Paint Directly On Canvas?
Yes, you can oil paint directly on canvas if it is properly primed with gesso. Priming prevents paint absorption and improves adhesion. Unprimed canvas may cause paint to sink in and deteriorate. Always prepare your canvas to ensure vibrant colors and durability in your oil painting.
What Are The Three Rules Of Oil Paint?
The three rules of oil paint are: Fat over Lean (more oil in upper layers), Thick over Thin (thicker paint on top), and Slow-Drying over Fast-Drying (use quick-drying colors first). These rules prevent cracking and ensure durable, flexible paint layers.
How Do You Use Oil Paint On Canvas?
Sketch your design on primed canvas. Apply thin oil paint layers, building up thicker layers gradually. Let each layer dry fully. Blend colors with brushes or palette knives. Finish with varnish to protect and enhance shine.
Conclusion
Oil painting on canvas takes patience and practice. Start with a simple sketch and build colors slowly. Remember to apply paint in thin layers first. Let each layer dry before adding the next. Use the fat over lean rule to avoid cracks.
Finish your work with varnish to protect it. Keep practicing, and enjoy the creative process. Your skills will improve with time and effort. Painting on canvas can be relaxing and rewarding. Try new techniques and have fun exploring your style.