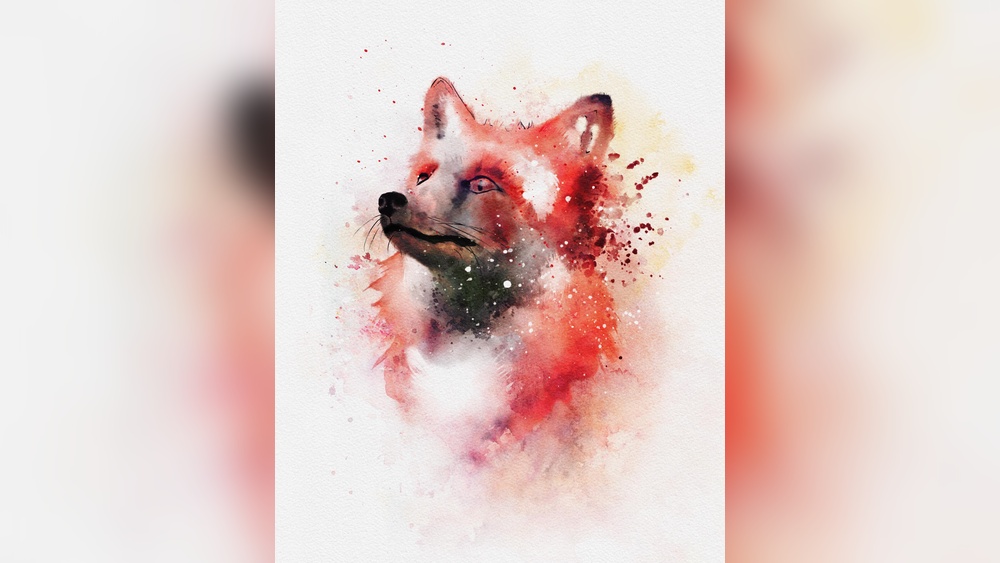
Are you ready to bring the delicate beauty of watercolor painting into your digital art? Learning how to do digital watercolor in Procreate opens up a world where you can create stunning, fluid artwork without the mess or hassle of traditional paints. This guide will help you master digital watercolor Procreate techniques, allowing you to create beautiful art on your iPad.
Whether you’re a beginner or looking to refine your skills, this guide will walk you through the simple steps to master watercolor effects on your iPad. By the end, you’ll have the confidence to make your digital paintings come alive with soft washes, vibrant colors, and natural textures—just like real watercolor on paper.
Keep reading to unlock the secrets that will transform your art and make your creations truly stand out.
Setting Up Procreate
Setting up Procreate is the first step to creating beautiful digital watercolor art. Preparing your canvas, brushes, and workspace correctly helps you paint smoothly and efficiently. This section guides you through essential setup steps to start your digital watercolor journey.
Choosing Canvas Size
Select a canvas size that fits your project needs. Larger canvases offer more detail but use more memory. A common size is 3000 x 4000 pixels for good quality and performance. You can always resize later, but starting right saves time. Adjust resolution to 300 DPI for clear prints. This size works well for most digital watercolor artworks.
Importing Watercolor Brushes
Watercolor brushes give your art a natural look. Procreate supports importing brushes easily. Download brush packs from trusted sources or create your own. Open Procreate, tap the brush icon, and select “Import.” Find your brush file and add it. Test brushes on a new layer to see their effect. Proper brushes mimic watercolor textures and blending.
Organizing Your Workspace
Keep your workspace clean for better focus. Arrange tools and brushes you use most often within easy reach. Use Procreate’s brush favorites to save your watercolor brushes. Create custom palettes with colors you plan to use. Hide unnecessary panels to avoid distraction. A tidy workspace helps you paint faster and with less hassle.
Selecting Watercolor Brushes
Selecting the right watercolor brushes in Procreate shapes your entire digital painting experience. The brush you choose affects how your colors blend and flow. It can give your art a realistic or stylized look. Understanding different brush types and settings helps you paint with more control and creativity. You can also make unique brushes that fit your style perfectly. Let’s explore how to pick and customize watercolor brushes for Procreate.
Types Of Watercolor Brushes
Procreate offers many watercolor brushes that mimic real paint effects. Some brushes create soft washes, while others add texture or rough edges. Flat brushes cover large areas smoothly. Round brushes give more detail and control. Dry brushes add grainy, textured strokes. Wet brushes blend colors softly, like real watercolors. Using different types helps build depth and interest in your artwork.
Customizing Brush Settings
Adjusting brush settings changes how your strokes behave. You can control size, opacity, and flow to suit your needs. Lower opacity creates light washes, while higher opacity makes bold marks. Changing the flow controls how much paint appears with each stroke. You can also adjust wetness to create blending or drying effects. Play with these settings to find the perfect balance for your painting style.
Creating Your Own Brushes
Procreate lets you create custom watercolor brushes from scratch. Start by opening the Brush Studio and selecting “Create new brush.” You can adjust shape, grain, and dynamics to design unique effects. Import textures to add realism or experiment with settings for unusual results. Custom brushes give your art a personal touch and help you stand out. Save your creations for future use and keep refining your digital watercolor toolkit.
Creating A Sketch
Starting with a clear sketch is essential in digital watercolor art. It sets the base for your painting and guides your strokes. In Procreate, sketching feels natural and smooth, making it easy to plan your artwork.
This phase helps you define shapes and forms before adding colors. Keep your lines light and simple to maintain flexibility for changes.
Adding Color and Texture
Once your sketch is ready, it’s time to add color and texture. This step involves using your selected brushes and colors to bring your digital watercolor Procreate artwork to life. Experiment with different techniques to achieve the desired effect.
Layering Colors
Layering colors is crucial in digital watercolor painting. Start with light washes and gradually build up to darker tones. This technique adds depth and dimension to your artwork.
Creating Texture
Use various brush settings and textures to create realistic watercolor effects. Adjust the opacity and flow to mimic the natural look of watercolor on paper.
Related guide: Best Brushes for Digital Painting Procreate
How Digital Watercolour Differs from the Real Thing
Real watercolour is defined by water: pigment spreads, granulates, pools at edges and dries lighter than it goes on. Digital watercolour brushes imitate these effects, but nothing happens on its own. You have to create the edges, the blooms and the transparency deliberately. The advantage is control and an undo button; the challenge is avoiding a result that looks too clean.
The most convincing digital watercolour work borrows the logic of the real medium: work light to dark, keep colours transparent, leave the paper showing for highlights, and let edges vary between hard and soft.
Techniques That Make It Convincing
Use a paper texture
Add a watercolour paper texture as a top layer set to multiply or overlay at low opacity. It unifies the painting and gives the brush marks something to sit in.
Layer transparent washes
Paint each wash on its own layer set to multiply. Overlapping colours then darken and mix the way transparent watercolour glazes do.
Build hard edges deliberately
Real watercolour dries with a darker edge. Brushes with an edge darkening effect, or a thin darker line painted along the boundary of a wash, imitate this convincingly.
Use wet brushes and blending carefully
Wet mix settings let colours bleed into each other. Use them for skies and backgrounds, and switch to drier brushes for details.
Keep the whites
Plan highlights and leave them unpainted rather than adding white on top. Opaque white reads as gouache, not watercolour.
A Simple Workflow
Sketch lightly on a low opacity layer. Lay the lightest washes first over large areas, then add mid tones and darker washes on new multiply layers. Add edges and small details last with a smaller, drier brush. Finish with the paper texture layer over everything.
Studying real watercolour paintings is the best way to improve. Notice where edges are hard and soft, where the paper shows through and where colours granulate, then recreate those decisions digitally.
Frequently Asked Questions
How do I make digital watercolour look realistic?
Use a paper texture layer, paint transparent washes on multiply layers, create darker hard edges, and leave highlights unpainted rather than adding white.
What blend mode is best for watercolour layers in Procreate?
Multiply. Overlapping washes darken and mix the way transparent watercolour glazes do.
Should I use white paint in digital watercolour?
Sparingly. Plan highlights as unpainted areas; opaque white makes the work look like gouache.
Do I need special brushes for digital watercolour?
The built in watercolour and wet brushes are a good start. Specialist packs can add convincing edges and granulation.