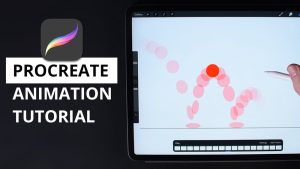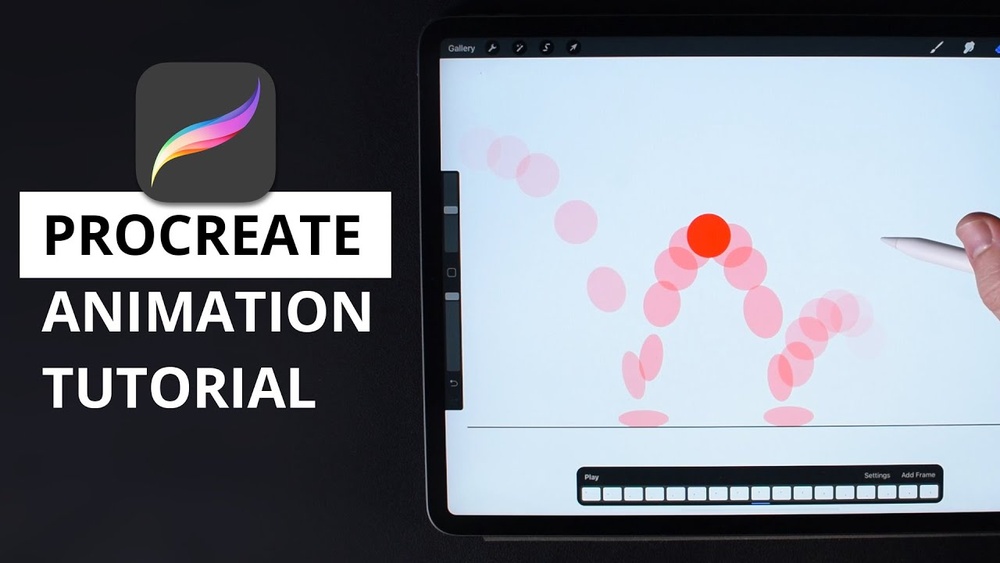
Are you ready to bring your drawings to life? Learning how to animate in Procreate is easier than you might think, even if you’re just starting out.
With a few simple steps, you can create smooth, eye-catching animations right on your iPad. Whether you want to add movement to your characters or make your art stand out on social media, this guide will walk you through everything you need to know.
By the end, you’ll have the confidence and skills to turn your still images into captivating animations. Keep reading to unlock the secrets of Procreate animation and watch your creativity take flight!
Setup Animation Assist
Setting up Animation Assist in Procreate is the first step to creating simple animations. This feature helps you work with frames easily. It organizes your layers into animation frames, making the process clear and smooth.
Before drawing, you must enable Animation Assist and adjust the canvas settings. These steps prepare your workspace for animation. A well-prepared canvas saves time and avoids confusion later.
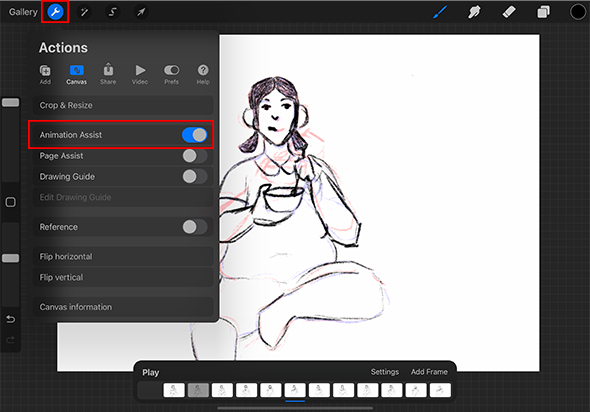
Enable Animation Assist
Open your Procreate app and create a new canvas. Tap the wrench icon to access the Actions menu. Select the Canvas tab, then find and turn on Animation Assist.
Once enabled, you will see a timeline at the bottom of the screen. This timeline shows your animation frames. Each layer now acts as a separate frame for your animation.
Configure Canvas Settings
Choose the right canvas size for your animation project. Smaller sizes work faster and are easier to manage. Use 1080 by 1080 pixels for square animations or 1920 by 1080 pixels for widescreen.
Adjust the frame rate in the Animation Assist settings. The standard rate is 12 frames per second. This speed is smooth and good for beginners.
Organize your layers by naming each one clearly. Each layer is a frame in your animation sequence. This helps you keep track of your work and avoid mistakes.

Credit: www.youtube.com
Create Your Frames
Creating frames is a key step in animating with Procreate. Frames are the individual drawings that form your animation. Each frame shows a slight change from the last. This creates the illusion of movement. Organizing and drawing your frames carefully helps your animation flow smoothly.
Start by setting up your frames before drawing. This makes your work clear and easy to edit later. Follow simple steps to keep your animation neat and effective.
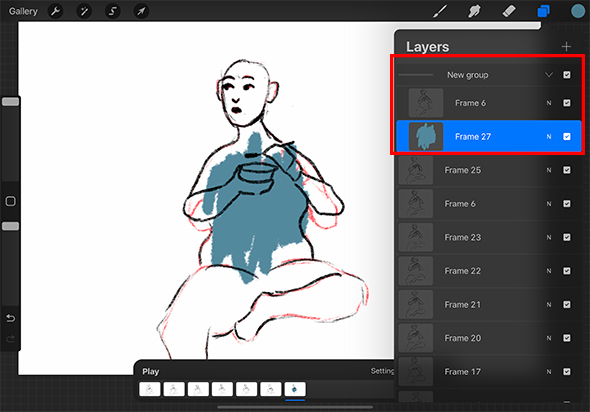
Organize Layers As Frames
In Procreate, each layer acts as a frame in your animation. Name your layers to keep track of them. Group layers that belong to one scene or sequence. Turn off layers you don’t need to see. This avoids confusion and clutter.
Use the Animation Assist feature to see all frames side by side. This helps you check the flow of your animation. Arrange layers in order from first to last frame. You can duplicate layers to keep certain elements consistent across frames.
Draw Key Elements
Key elements are the main parts of your animation. Draw these first on separate layers. This includes characters, objects, or backgrounds that stay mostly the same. Focus on shape and position to guide the motion.
Keep your drawings simple at this stage. Avoid adding details until you finish the key frames. Use light lines to sketch the action. This makes it easier to adjust frames as needed.
Use Onion Skinning
Onion skinning is a vital tool in Procreate animation. It lets you see parts of previous and next frames. This helps create smooth motion and consistent drawings. Beginners find it easier to track changes between frames with onion skinning. It acts like a ghost layer, showing faint outlines of other frames. This visual guide makes frame-by-frame animation clear and manageable.
Activate Onion Skin
Open your animation project in Procreate. Tap on the wrench icon to open Actions. Go to the Canvas tab. Find and enable the Animation Assist option. This turns on animation features, including onion skinning. Once active, look for the Onion Skin button in the timeline. Tap it to activate the onion skin view. You will now see faint images of frames before and after your current frame.
Adjust Onion Skin Settings
After activating onion skin, customize its settings for better control. Tap the Settings icon near the timeline. Use the sliders to change how many frames appear before and after. Adjust the opacity to make ghost frames lighter or darker. This helps you focus on the current frame while still seeing others. Lower opacity reduces distractions, while higher opacity shows clearer frame outlines. Fine-tune these options to suit your drawing style and animation needs.
Credit: www.21-draw.com
Add Frame Timing
Adding frame timing in Procreate is key to smooth animations. It controls how long each frame shows on screen. This step helps you set the pace of your animation. Proper timing makes your movements look natural and lively. Without it, animations may appear too fast or too slow. Understanding how to adjust frame timing will improve your animation skills quickly.
Set Frame Duration
Start by selecting the frame you want to time. Tap the frame in the Animation Assist timeline. Look for the frame duration option, usually shown in seconds or milliseconds. Enter the time length that fits your animation style. Shorter duration means faster movement. Longer duration slows down the action. Adjust each frame’s duration to create the perfect rhythm. Try different timings to see which feels best.
Preview Animation Speed
Use the preview feature to check your animation speed. Tap the play button in the Animation Assist toolbar. Watch how the frames flow together. Notice if the timing feels right or needs tweaking. Pause and adjust frame durations as needed. Previewing helps catch timing issues early. It also lets you experiment with speed changes without redrawing. Keep testing until your animation looks smooth and well-timed.
Refine Your Animation
Refining your animation in Procreate is essential to make it look polished and professional. This step involves carefully adjusting each frame and improving how they flow together. Taking time to refine helps your animation feel smooth and natural. Small changes can have a big impact on the final result.
Focus on details and transitions to enhance your work. This process requires patience but leads to better animations that capture attention and tell your story clearly.
Tweak Frame Details
Look closely at each frame and fix any rough edges. Adjust shapes and lines to keep the motion consistent. Use the eraser and brush tools to clean up areas that seem messy. Add small touches to make movements more believable. Pay attention to character expressions or object positions. This careful tweaking improves the quality of your animation greatly.
Smooth Transitions
Check how frames change from one to the next. Make sure movements flow naturally without sudden jumps. Use onion skinning in Procreate to see multiple frames at once. This helps align drawings and create gradual changes. Adjust timing by adding or removing frames for better pacing. Smooth transitions make your animation easier to watch and more enjoyable.
Export Animated Files
After creating your animation in Procreate, exporting the file is the next step. This process lets you save or share your work in a format that suits your needs. Understanding how to export animated files correctly ensures your animation looks great everywhere.
Choose Export Formats
Procreate offers several export options for animations. You can save your work as a GIF, PNG, or MP4 file. GIFs are perfect for short animations with few colors. PNG sequences save each frame as an individual image. MP4 files are great for smooth video playback. Select the format based on where you want to use the animation.
Share Or Save Animation
Once you pick the export format, decide what to do with the file. You can save it directly to your iPad or cloud storage. Sharing options let you send the animation via email or post it on social media. Procreate also allows exporting to apps like Files or Photos. This flexibility makes it easy to show your animation to others or keep it safe.
Tips For Beginners
Starting animation in Procreate can feel tricky. Simple tips help beginners build confidence and skills. Focus on easy techniques first. This approach makes learning fun and less stressful. Small steps lead to better results and steady progress.
Keep It Simple
Choose a basic subject to animate. Simple shapes like a bouncing ball work well. Avoid complex characters or scenes at the start. Use few frames to keep your animation smooth. This helps you learn without feeling overwhelmed. Simple projects teach key animation principles clearly.
Practice Basic Movements
Start with easy actions like moving, bouncing, or blinking. These basic motions build your understanding of timing and flow. Repeat exercises often to improve your skills. Watch your animation carefully and adjust frame speed. Mastering small movements prepares you for more detailed work later.
Credit: www.21-draw.com
Common Animation Mistakes
Beginners often face common animation mistakes in Procreate. These errors slow down progress and cause frustration. Knowing what to avoid helps improve your animation faster. Simple fixes make your workflow smoother and results cleaner. Focus on these common pitfalls to create better animations from the start.
Avoid Overcomplicating Frames
Many beginners add too many details to each frame. This makes the animation heavy and hard to edit. Keep frames simple and clear. Use basic shapes and minimal lines for each step. This saves time and keeps the motion smooth. Too many elements can confuse the viewer and slow your device.
Check Layer Order
Layer order is crucial for proper animation display. Each frame should be on its own layer, stacked correctly. If layers overlap incorrectly, the animation looks messy or parts disappear. Always arrange layers from first to last frame in order. Double-check the sequence before exporting your animation. Correct layer order ensures your animation plays as intended.
Frequently Asked Questions
Can You Animate In Basic Procreate?
Yes, you can animate in Basic Procreate by enabling Animation Assist in Canvas Settings. Use layers as frames for frame-by-frame animation.
Which Animation Is Best For Beginners?
Blender suits beginners with free, all-in-one 3D tools. Procreate offers simple frame-by-frame animation on iPad. Synfig Studio provides powerful free 2D animation. Choose based on your style: 2D or 3D animation and device preference.
Which Is Better, Canva Or Procreate?
Procreate excels in detailed digital painting and illustration on iPad. Canva suits quick graphic design with templates and layouts. Choose Procreate for custom art and Canva for polished presentations. Both complement each other rather than compete.
Is Procreate Ok For Animation?
Procreate supports frame-by-frame animation using its Animation Assist feature. It’s ideal for simple animations and beginner-friendly projects.
Conclusion
Animating in Procreate is simple and fun for beginners. Start with small projects to practice frame-by-frame drawing. Use the Animation Assist tool to guide your work smoothly. Keep your layers organized to avoid confusion. Experiment with timing to bring your animation to life.
Remember, patience and practice improve your skills. Keep exploring new ideas and enjoy the creative process. Soon, you will create animations that tell your story clearly and beautifully.