Quick answer: To assemble an easel, unpack and identify every part against the instructions, attach the front legs or mast to the base or top yoke first, then fit the rear leg and its stay so the frame stands on its own. Next, slide on the canvas tray and top clamp, tighten all knobs and bolts snugly, and test the frame by pressing on it before loading a canvas. Most A-frame and studio easels go together in 20 to 45 minutes with a screwdriver or the included hex key.
A new easel usually arrives as a long box of wooden sticks, a bag of hardware and a diagram that skips a few steps. The parts make sense once you know what each one does. Learning how to assemble an easel properly matters more than it seems: a frame put together out of order, or with one bolt left loose, will wobble every time you touch a brush to the canvas.
This guide explains the common easel parts, gives step-by-step assembly for the three main styles (A-frame, H-frame and tripod field easel), and covers how to put up, set up and use an easel once it is built. If you are still choosing a frame, our guide to Richeson A-frame easels for home studios compares several popular models.
Know the Parts Before You Start
Easel manufacturers use slightly different names, but nearly every model shares the same basic components. Lay them out on the floor and match them to this list.
| Part | What it does | Typical location |
|---|---|---|
| Front legs | Main support; on A-frames they splay outward | Front of the frame |
| Mast (center post) | Holds the tray and clamp; often slotted or extendable | Between the front legs |
| Rear leg | Props the frame at an angle | Back, hinged at the top |
| Yoke or head block | Joins legs and mast at the top | Top of the frame |
| Canvas tray (ledge) | Supports the bottom of the canvas | Slides on the mast or legs |
| Top clamp (canvas holder) | Grips the top edge of the canvas | Slides on the mast |
| Stay, chain or cross brace | Limits how far the legs spread | Between front and rear legs |
| Knobs, wing nuts, bolts | Lock moving parts in place | Throughout |
Count the hardware against the parts list before starting. It is far easier to report a missing bolt now than to discover it halfway through.
Tools You Will Need
- The hex key or small wrench usually included in the box
- A Phillips screwdriver
- A soft blanket or rug to protect the wood and your floor
- Optional: a rubber mallet for gently seating tight dowels
Avoid power drivers for final tightening. They can strip the threaded inserts used in many wooden easels.
How to Assemble an A-Frame Easel
A-frame easels, sometimes called lyre easels, have two front legs and a center mast arranged like a capital A, with a rear leg holding the angle. They are the most common style for home painters.
- Attach the front legs to the head block. Lay the two front legs on the blanket with their tops toward the head block. Fit the bolts through the head block and legs, add washers and knobs, and leave them finger-tight for now.
- Fit the center mast. Slide the mast into the head block or between the front legs, depending on design. Many masts have a lower section and an extension; join them with the provided bolt, leaving room for later adjustment.
- Install the lower cross brace. Most A-frames have a horizontal brace joining the front legs and mast about a third of the way up. Bolt it on. This brace sets the leg spread, so the frame will start to feel solid here.
- Attach the rear leg. Connect the rear leg to the back of the head block with its hinge bolt. Stand the frame up carefully, swinging the rear leg out.
- Connect the stay. Fit the stay bar, chain or cord between the rear leg and the front frame. On adjustable models, choose a mid-range hole for now.
- Add the canvas tray. Slide the tray onto the mast or legs from below and lock it with its knob at a comfortable height.
- Add the top clamp. Slide the clamp onto the upper mast and lock it loosely.
- Square up and tighten. With the easel standing on a level floor, check that the front legs are evenly splayed and the mast is straight. Then go around and tighten every bolt firmly but not with force.
How to Assemble an H-Frame Studio Easel
H-frames are heavier and usually arrive in fewer, larger pieces. The order matters because the base carries all the weight.
- Build the base first. Join the front and rear base rails, plus any casters or glides. Make sure the base sits flat without rocking.
- Attach the uprights. Bolt the uprights or central mast to the base. Some models use a hinged bracket that lets the mast tilt; leave its locking knob loose until the end.
- Fit the top crossbar. Join the tops of the uprights with the crossbar. This locks the frame square.
- Add the rear support or tilt mechanism. Connect the strut or crank assembly that holds the mast angle.
- Install the canvas tray and clamp. These usually slide onto the mast or uprights. If there is a crank or ratchet, follow the diagram carefully so the tray engages the mechanism.
- Tighten and test. Lock the tilt knob, tighten all bolts, and press firmly on the top of the frame. It should not flex visibly.
How to Put Up an Easel: Tripod and Field Easels
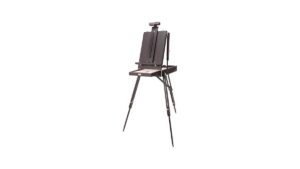
Metal tripod and wooden field (French) easels are usually pre-assembled and simply unfold. Putting one up quickly is more about technique than tools.
- Extend the legs. Unlock the leg clamps or wing nuts, pull out each leg section to the same length, and lock them. Extend the bottom section first so the upper joints stay stronger.
- Spread the legs. Open the tripod until the legs form an even triangle, roughly as wide as the easel is tall at the top of the legs.
- Raise the canvas holder. Slide the top holder or mast up and lock it.
- Set the canvas grips. Position the bottom grips, place the canvas, and lower the top grip onto it.
- Stabilize outdoors. Hang a bag of gear from the center hook if your easel has one. The added weight lowers the center of gravity and helps in wind.
How to Set Up an Easel for Painting
Once it is assembled, a few setup choices make the easel far more comfortable to use.
Choose the height
Raise the tray until the middle of the canvas sits roughly at eye level, or slightly below. You should not need to crouch or reach up to paint the center of the work.
Set the angle
For oil and acrylic, tilt the canvas back slightly, around 5 to 15 degrees from vertical. For watercolor on a convertible easel, lower it closer to flat so washes do not run.
Position the light
Stand so light falls on the canvas from the side opposite your painting hand. Right-handed painters typically want light from the left.
Plan your stepping-back space
Leave a clear path behind you. Stepping back regularly to see the whole painting is one of the most valuable habits in painting.
How to Use an Easel Day to Day
- Clamp, do not just lean. Always bring the top clamp down onto the canvas. A canvas resting only on the tray can tip forward with a single brushstroke.
- Adjust as you work. Move the canvas up or down so the area you are painting is near eye level. This reduces strain on your shoulder and wrist.
- Keep the tray clean. Wipe drips off the tray before they dry, or they will glue the next canvas in place.
- Check knobs before each session. Wood expands and contracts with humidity, which can loosen hardware over time.
- Collapse carefully. On folding easels, remove the canvas, lower the tray and clamp, then fold the rear leg in. Folding with a canvas attached stresses the joints.
Common Assembly Mistakes
- Tightening as you go. If you fully tighten the first bolt, later parts may not line up. Keep everything finger-tight until the frame is complete, then tighten in a final pass.
- Mixing up similar bolts. Many kits include bolts of slightly different lengths. Group them by size before starting.
- Installing the tray upside down. The lip of the tray should face forward and up so the canvas sits against it.
- Skipping washers. Washers spread the clamping force and prevent knobs from digging into soft wood.
- Overtightening. Cranking a knob too hard can strip threaded inserts or crack the wood. Firm hand pressure is enough.
- Assembling on carpet without protection. Carpet fibers can trap small washers and hide them. A flat blanket on a hard floor is ideal.
Troubleshooting a Newly Assembled Easel
The easel wobbles side to side
Check that the front legs are spread evenly and the cross brace is tight. On uneven floors, adjust leg lengths or add a thin felt pad under the short leg.
The tray will not stay put
Make sure the tray knob passes through its slot correctly and the washer is in place. If the wood is very smooth, a small piece of rubber under the knob washer adds grip.
The mast leans forward or backward
Re-check the hinge bolt at the head block and the stay length. On adjustable models, try a different stay hole to correct the angle.
A knob spins without tightening
The threaded insert may be stripped. Many manufacturers offer replacement hardware; until it arrives, a bolt with a nut on the far side can substitute.
How to Build an Easel Instead of Buying One
If you enjoy woodworking, building an easel from plans is a rewarding alternative to assembling a kit. A basic A-frame needs three long legs, a ledge, a hinge and a stay. Easel plans and DIY guides usually call for 1×2 or 2×2 lumber, carriage bolts and wing nuts. The tradeoff is time and precision: commercial easels tend to have smoother sliding parts and more refined adjustments than a first DIY build.
Five-Point Check Before Your First Painting Session
Run through this quick check once assembly is finished. It takes two minutes and catches most problems before paint is involved.
- Press down firmly on the top of the frame. Nothing should creak, shift or flex noticeably.
- Push the mast gently forward and back. The stay or chain should stop movement at the set angle.
- Load a blank canvas and lock the tray and clamp. Tap the canvas with your knuckle; it should not rattle.
- Raise and lower the tray through its full range to confirm it slides without binding.
- Look at the frame from the side and the front. Legs should be evenly spread and the mast straight.
Care After Assembly
- Wipe the frame with a slightly damp cloth after each session.
- Re-tighten knobs every few weeks, especially in humid months.
- Apply a thin coat of paste wax to the mast once or twice a year so the tray slides smoothly.
- Store folding easels upright or flat, away from heaters that can dry and warp wood.
FAQs
How long does it take to assemble an easel?
Most A-frame easels take 20 to 30 minutes. Larger H-frame studio easels with crank mechanisms may take 45 minutes to an hour.
Do I need tools to put up an easel?
Many easels include a hex key and use hand knobs, so no extra tools are needed. A Phillips screwdriver is handy for models with wood screws.
How do you set up an easel for a large canvas?
Lower the tray close to its lowest position, place the canvas, and raise the top clamp high enough to grip the top edge. Spread the rear leg a bit wider for extra stability.
Why is my new easel wobbly?
Usually because one or more bolts are loose, the legs are unevenly spread, or the floor is uneven. Tighten every connection and check the stay or chain is fully extended.
Can you use an easel for watercolor?
Yes, if it tilts close to horizontal. Many field and convertible studio easels do. Fixed A-frames often cannot lie flat enough for loose washes.
How do I take apart an easel for moving?
Remove the canvas, tray and clamp, then reverse the assembly steps. Bag and label the hardware so reassembly is quick.
Final Thoughts
Assembling an easel is straightforward once you know the parts, follow the right order and leave final tightening until the end. Set the height, angle and light correctly, and the same frame becomes much more comfortable to paint at. If you are still choosing a model, our review of the best Richeson A-frame easel picks walks through the options worth a look.