Are you ready to bring your artistic ideas to life with digital painting? Clip Studio Paint is a powerful and user-friendly tool that makes creating stunning digital artwork easier than ever. Whether you’re interested in digital painting Clip Studio Paint offers a comprehensive platform to explore your creativity.
Whether you’re a beginner or looking to sharpen your skills, this guide will walk you through the essential steps to get started and improve your digital painting techniques. By the end, you’ll feel confident using Clip Studio Paint to turn your imagination into vibrant, professional-quality art.
Let’s dive in and unlock your creative potential!
Credit: tips.clip-studio.com
Getting Started With Clip Studio Paint
Starting digital painting in Clip Studio Paint is simple and rewarding. This software offers tools for beginners and pros alike. Before creating art, you need to set up the program properly. Understanding the basics of installation, interface, and workspace customization helps you work faster.
Let’s explore the initial steps to get you ready for your digital art journey.
Installing And Setting Up
First, download Clip Studio Paint from the official website. Choose the version that fits your computer system. After downloading, open the installer and follow the instructions. You may need to create an account or sign in. Once installed, launch the program to start setting preferences.
Set your language, canvas size, and default tools. These choices affect your first drawing experience. You can always change them later, so keep it simple at first.
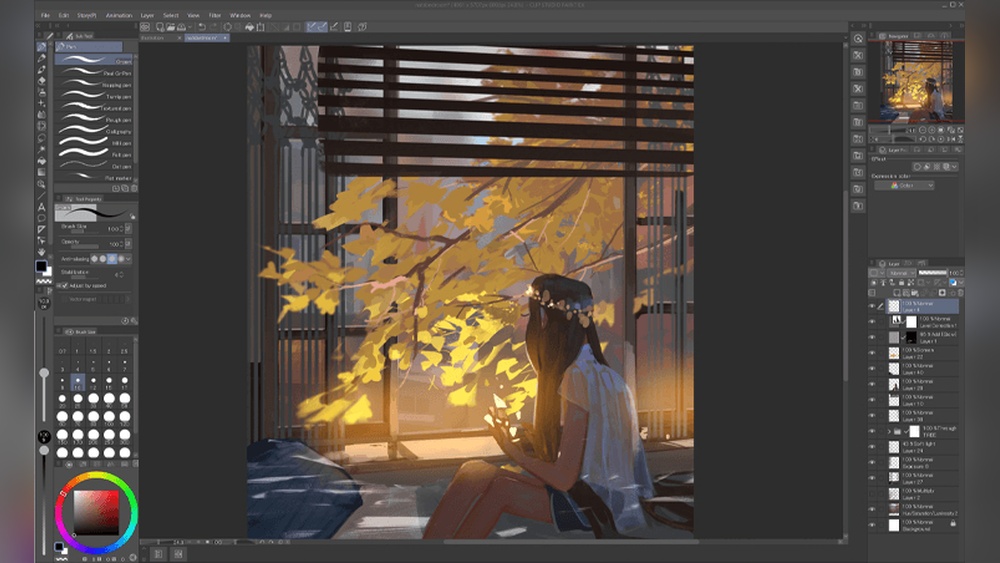
Interface Overview
The interface has many parts but is easy to learn. The main area is the canvas, where you draw. Around it, find toolbars with brushes, colors, layers, and more. Menus at the top give access to file options and settings.
Panels on the side help manage layers and materials. You can open or close panels as needed. Knowing where tools are saves time and keeps you focused on painting.
Customizing Your Workspace
Clip Studio Paint lets you adjust the workspace to fit your style. Drag panels to new places or close those you don’t use. Save your layout so you can return to it anytime. This makes your workspace neat and personal.
You can also set keyboard shortcuts for quick actions. Custom brushes and tool presets help speed up your painting. A clean workspace reduces distractions and improves your workflow.
Credit: www.clipstudio.net
Essential Tools For Digital Painting
Digital painting in Clip Studio Paint requires the right set of tools. These tools help you create smooth strokes, manage your artwork efficiently, and pick colors easily. Understanding these essentials makes your painting process faster and more enjoyable.
Brushes And Pens
Brushes and pens are the heart of digital painting. Clip Studio Paint offers many brush types. Each brush mimics real art tools like pencils, watercolors, and oils. You can adjust size, opacity, and texture. Custom brushes let you create unique effects. Experiment with pressure sensitivity for natural strokes. Using the right brush changes the look and feel of your art.
Layer Management
Layers help you separate parts of your painting. You can work on the background, characters, and details independently. Clip Studio Paint allows unlimited layers. Use layers to add shadows, highlights, or textures without affecting other parts. Naming and grouping layers keep your work organized. Lock layers to avoid accidental changes. This system makes editing simple and clean.
Color Selection And Palettes
Choosing colors is vital for digital painting in Clip Studio Paint. The software provides a wide range of palettes and color selection tools to help you find the perfect hues for your artwork. Understanding color theory and experimenting with different palettes can significantly enhance your digital painting.
Advanced Techniques in Clip Studio Paint
Once you’re comfortable with the basics, you can explore advanced techniques to elevate your digital painting in Clip Studio Paint. These techniques include using blending modes, creating custom textures, and mastering perspective drawing.
Blending Modes
Blending modes allow you to combine layers in various ways to achieve different effects. Experimenting with these modes can add depth and complexity to your artwork.
Custom Textures
Creating custom textures can give your digital paintings a unique look. Clip Studio Paint offers tools to create and apply textures that mimic traditional art materials.
Perspective Drawing
Mastering perspective drawing is crucial for creating realistic scenes. Clip Studio Paint provides perspective rulers and guides to help you achieve accurate proportions and depth in your artwork.