Are you ready to unlock a fun and creative hobby that anyone can enjoy? Rock painting is a simple and relaxing way to express yourself, decorate your space, or even spread kindness in your community.
If you’ve never tried it before, don’t worry—this guide will walk you through every step of DIY rock painting for beginners. You’ll learn how to choose the right rocks, pick the best paints, and create beautiful designs that you’ll be proud of.
Keep reading, and you’ll discover just how easy and rewarding rock painting can be!

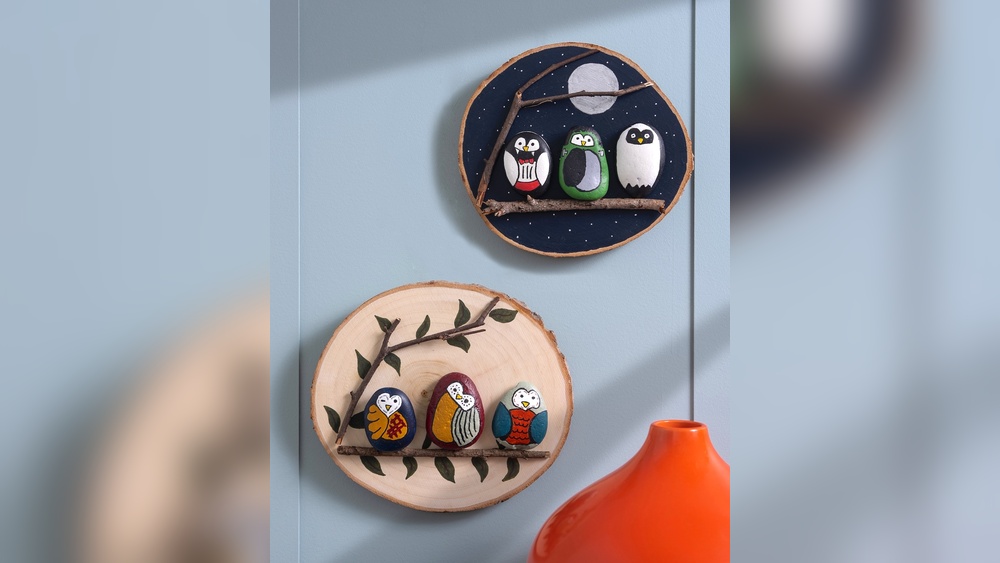
Credit: finecraftguild.com
Gathering Materials
Gathering the right materials is the first step to start rock painting. Choosing good supplies makes your project easier and more fun. Prepare everything before you begin to avoid interruptions.
Choosing The Right Rocks
Pick smooth, flat rocks for easy painting. Avoid rough or crumbly stones. River rocks or beach stones work well. Size matters too. Choose rocks that fit your design ideas. Clean the rocks with water and let them dry.
Selecting Paints And Brushes
Use acrylic paints for bright and lasting colors. They dry fast and stick well to rocks. Get small and medium brushes for details and filling. Paint pens help add fine lines and shapes. Choose non-toxic paints for safety.
Additional Tools And Supplies
Gather a cup of water to clean brushes. Use paper towels or cloth for drying. Have a palette or plate to mix paints. Seal your finished art with clear varnish or spray. This protects the paint and keeps rocks shiny.
Preparing Your Rocks
Preparing your rocks is the first step in any DIY rock painting project. Proper preparation helps paint stick better and last longer. It also creates a smooth surface for your artwork. Taking time to clean, sand, and apply a base coat makes your rocks ready for painting.
Cleaning And Drying
Start by washing your rocks with warm water and mild soap. Use a brush to remove dirt and debris. Rinse the rocks thoroughly to remove soap residue. Let them dry completely before moving to the next step. Dry rocks hold paint better and prevent smudging.
Sanding For Smooth Surface
Use fine-grit sandpaper to smooth rough spots on your rocks. Sanding removes bumps and creates an even surface for painting. Clean the dust off with a damp cloth after sanding. A smooth rock surface helps paint apply evenly and looks more professional.
Applying Base Coat
Apply a base coat of acrylic paint or primer to your rocks. This coat helps colors stand out and prevents paint from soaking into the rock. Use a brush or sponge for an even layer. Allow the base coat to dry fully before adding your design.
Basic Painting Techniques
Basic painting techniques form the foundation of any successful rock painting project. These simple methods help beginners create beautiful, eye-catching designs with ease. Understanding the right tools and how to use them makes the process enjoyable and rewarding.
Start with the right paint and apply it smoothly. Next, try painting simple shapes to build confidence. Finally, add fine details to make your artwork pop. Each step improves your skills and your final design.
Using Acrylic Paints
Acrylic paints are the best choice for rock painting. They dry quickly and offer bright, lasting colors. Use a small brush to apply a base coat evenly on the rock. Let it dry completely before adding more layers. Thin coats prevent paint from cracking or peeling.
Clean your brushes with water after use. This keeps them soft and ready for the next painting session. Acrylic paints are easy to work with and give a smooth finish.
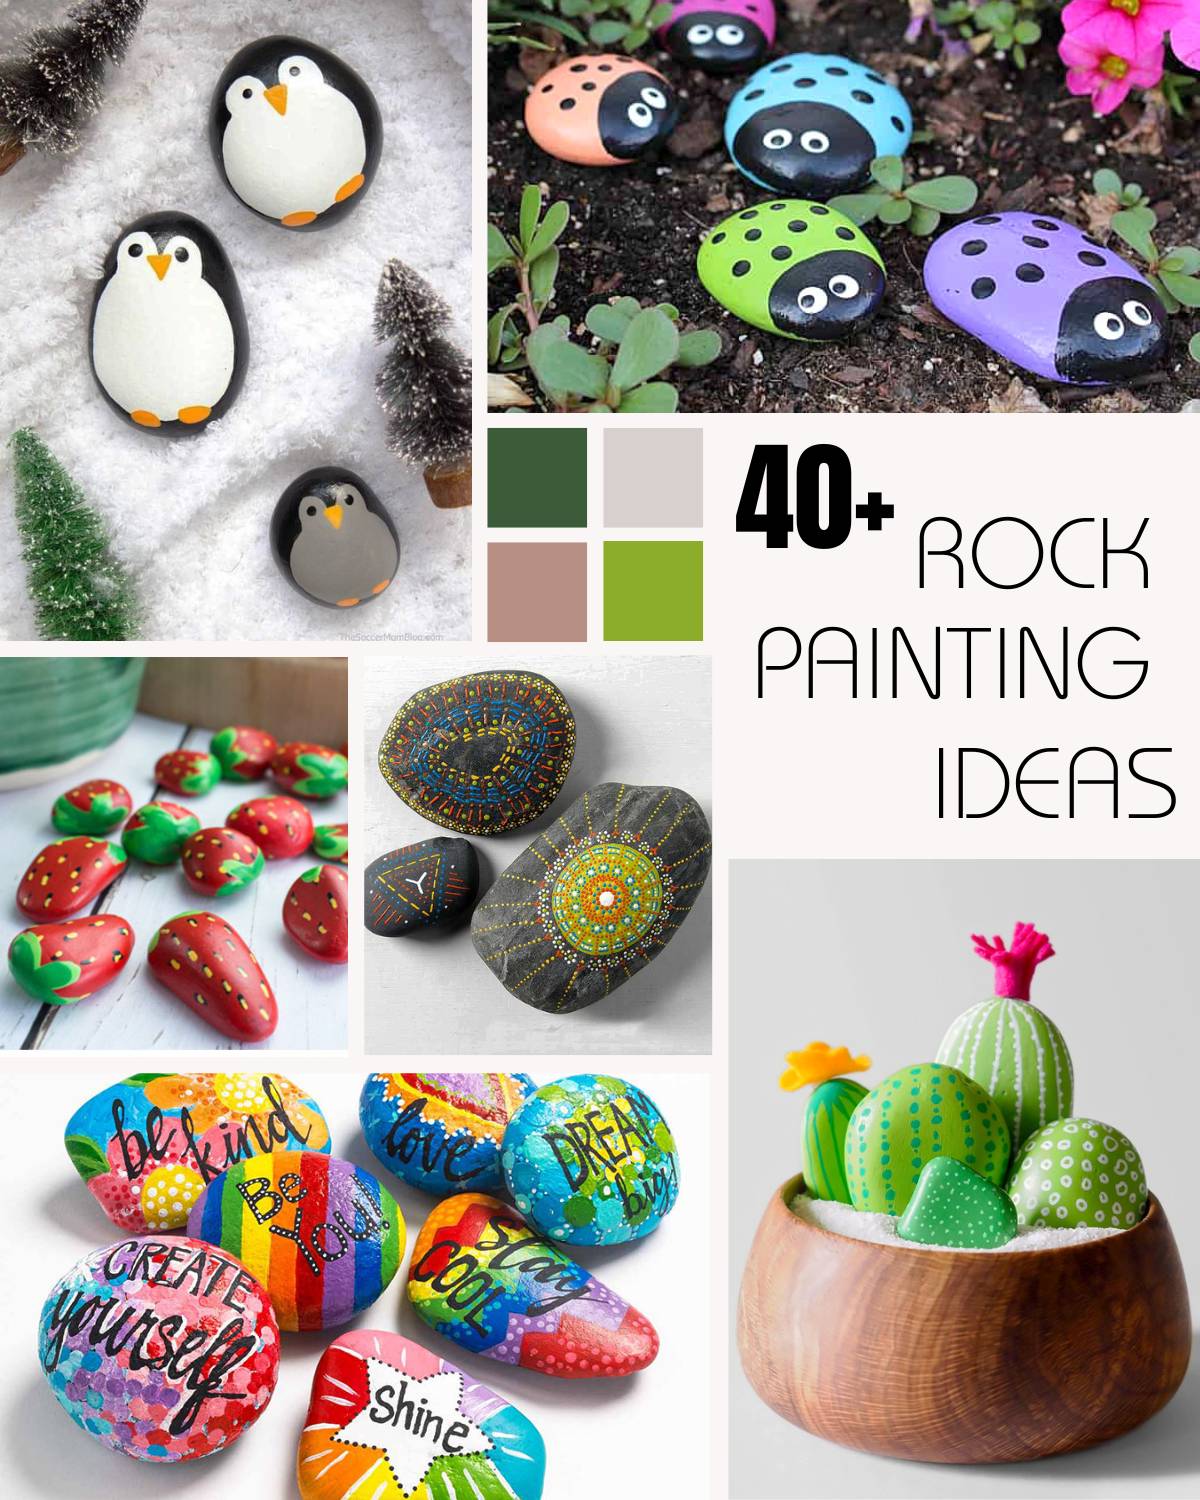
Painting Simple Designs
Begin with basic shapes like dots, stripes, or hearts. These simple designs are easy to paint and look great on rocks. Use a small brush for better control. Paint slowly and allow each layer to dry before adding the next.
Simple patterns help you practice brush strokes and color mixing. Gradually, try combining shapes to create fun and unique designs. Keep your hand steady and enjoy the process.
Using Paint Pens For Details
Paint pens are perfect for adding fine details to your rock art. They work well over acrylic paint once it is dry. Use pens with different tip sizes for varied lines and effects.
Draw outlines, small shapes, or write words clearly. Paint pens make your design sharp and neat. Store them with the cap on to prevent drying. This tool is great for beginners who want precise details.

Credit: jenniferperkins.com
Design Ideas For Beginners
Adding finishing touches to your rock painting brings your artwork to life. It also protects your design from damage. This step ensures your painted rock lasts longer and looks great.
Sealing your rock properly keeps colors bright. It stops the paint from chipping or fading. Let’s explore how to seal your artwork effectively.
Sealing Your Artwork
Apply a clear sealant to protect your painted rock. Choose a sealant that works well with acrylic paint. Spray sealants offer even coverage and dry quickly. Brush-on sealants give you more control but take longer to dry. Always seal in a well-ventilated area. Let the sealant dry completely before handling your rock.
Using Mod Podge Or Varnish
Mod Podge is a popular choice for sealing rock paintings. It dries clear and adds a smooth finish. Use a soft brush to apply Mod Podge in thin layers. Varnish provides a hard, protective coat. Choose between matte or glossy varnish based on your desired look. Apply several light coats, letting each dry fully. Avoid thick layers to prevent cloudiness.
Tips For Longevity
Keep your painted rocks out of direct sunlight. Store them in a cool, dry place to avoid moisture damage. Handle rocks gently to avoid scratches or chips. Reapply sealant every few months for extra protection. Clean rocks with a soft cloth, not harsh chemicals. These simple steps help your artwork stay beautiful for years.
Adding Finishing Touches
Transferring images onto rocks can add unique detail to your DIY rock painting projects. This technique allows you to apply photos, drawings, or text smoothly. It gives your rocks a professional and artistic look without needing advanced painting skills.
There are simple methods to transfer images that work well for beginners. You can use common materials found in craft stores. These steps help keep your design clear and vibrant on the rock surface.
Photo Transfer Techniques
Start by printing your image on regular paper using a laser printer. Inkjet prints may not work as well for transfers. Trim the image close to the edges for easy handling.
Apply a thin layer of gel medium to the rock where you want the image. Place the printed side of the paper down on the gel. Smooth out air bubbles with a flat tool or your fingers.
Let the rock dry for several hours or overnight. After drying, gently rub the paper with a damp cloth. The paper will peel away, leaving the image on the rock.
Using Gel Medium
Gel medium acts as the glue and protective layer for the image. Use an acrylic gel medium for best results. Spread it evenly on the rock’s surface before applying the image.
After placing the image, add another layer of gel medium on top to seal it. This step helps protect the image from scratches and water damage. Allow the rock to dry completely between layers.
Finishing And Sealing
Once the image transfer is dry, apply a clear sealer to protect your work. Use a spray sealer or brush-on varnish designed for outdoor use. This keeps the paint and image safe from weather and handling.
Apply two or more coats of sealer, letting each coat dry fully. This step ensures your rock painting lasts longer and stays vibrant.
Transferring Images
Displaying and sharing your painted rocks brings joy beyond the painting process. It lets you show off your creativity and inspires others to try rock painting. Finding unique ways to display your rocks makes your art stand out. Sharing your creations through gifts and community projects spreads happiness and connection.
Creative Ways To Showcase
Place your painted rocks in flower pots or garden beds to brighten outdoor spaces. Use small shelves or shadow boxes indoors for a neat display. Arrange rocks on a windowsill or coffee table to add color to any room. Group rocks by theme or color for a striking visual effect. Clear glass jars filled with painted rocks make unique decorations.
Gift Ideas
Paint rocks with personalized messages or names for thoughtful gifts. Use them as paperweights or fridge magnets with a glued magnet on the back. Give painted rocks as surprise gifts to friends and family. Include them in gift baskets or party favors for a handmade touch. Small rocks with kind words make perfect tokens of encouragement.
Community Rock Painting
Join local rock painting groups or social media pages to share your work. Hide painted rocks in parks or trails for others to find and enjoy. Participate in rock-painting events or swaps to connect with fellow artists. Donate rocks to community centers, libraries, or hospitals to brighten their spaces. Spread kindness by leaving painted rocks in public places for strangers.
Displaying And Sharing
Rock painting is fun but sometimes tricky. Small problems can slow your progress or affect your design. Knowing how to fix these common issues helps you enjoy the craft more. This section shares simple tips to handle usual troubles in rock painting.
Fixing Paint Mistakes
Paint mistakes happen to all beginners. If you spill paint or colors mix by accident, wait for the paint to dry. Then, use fine sandpaper to gently remove the unwanted paint. You can also paint over the mistake with a matching base color. Let it dry fully before repainting your design. This method hides errors without ruining your work.
Preventing Paint Chipping
Paint can chip if not sealed properly. To stop this, always clean your rock before painting. Use a clear acrylic sealer after your paint dries. Spray thin coats and let each dry well. This layer protects your art from moisture and rubbing. Paint will stay bright and smooth longer with a good seal.
Handling Uneven Surfaces
Rocks often have rough or bumpy spots. These make painting tricky. Start by washing and drying the rock. Use fine sandpaper to smooth the surface gently. If bumps remain, apply a thin layer of white acrylic paint as a base coat. This creates a better surface for your design. Smooth layers help your paint stick and look neat.
Credit: www.craftpassion.com
Frequently Asked Questions
How To Do Rock Painting Step By Step?
Clean the rock thoroughly and let it dry. Apply a base coat of acrylic paint. Sketch your design lightly. Paint your design with acrylics or paint pens. Let it dry completely. Seal with a clear acrylic spray to protect your artwork.
What Kind Of Paint Do You Use To Paint Rocks For Beginners?
Use acrylic paint for beginners; it dries fast and offers vibrant colors. Paint pens work well for detailed designs on rocks.
What Do You Put On Rocks Before You Paint Them?
Clean the rock thoroughly, then dry it completely. Apply a base coat of acrylic paint or primer to create a smooth surface before painting.
How Do I Transfer An Image Onto A Rock?
Print your image on regular paper. Apply gel medium to the rock and place the image face down. Let it dry, then peel the paper off gently. Seal with clear spray to protect the transfer and enhance durability.
Conclusion
DIY rock painting is a fun and simple craft to start. Choose smooth rocks and use acrylic paint for bright colors. Prep your rocks well for best results. Let your creativity guide each design you create. Seal your art to keep it looking fresh longer.
Enjoy this relaxing hobby anytime at home or outside. Keep practicing to improve your skills bit by bit. Sharing your painted rocks can brighten someone’s day. Try new patterns and colors to stay inspired. Rock painting brings joy and calm to beginners and pros.