
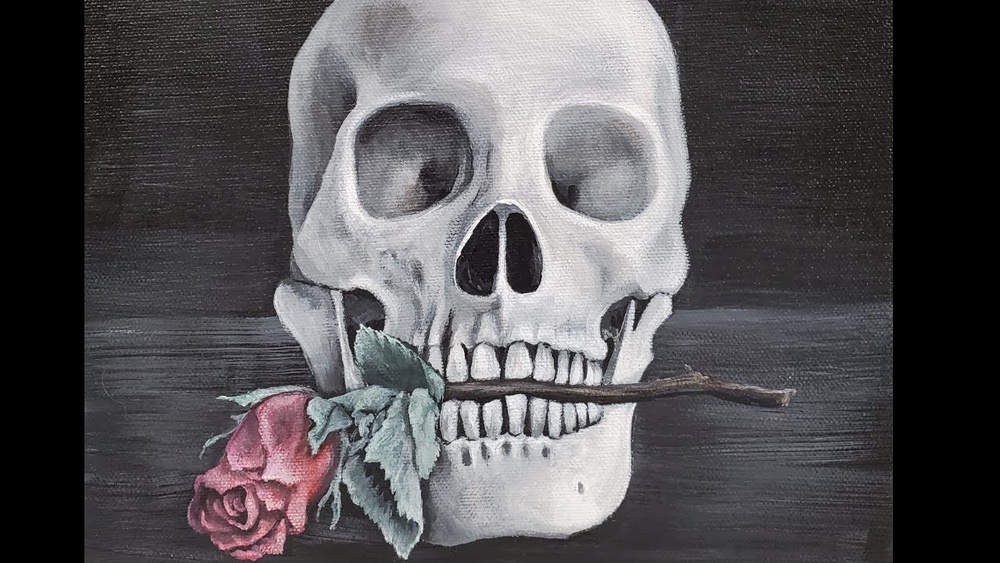
Quick answer: To paint a skull with acrylic paint, start on a dark or mid-tone background, sketch the skull as a large circle for the cranium plus a smaller, squared-off shape for the face and jaw, and block it in with a warm off-white. Then carve out form with value: deep darks in the eye sockets, nose cavity and under the cheekbones, mid-tones along the temples and jaw, and highlights on the brow ridge, cheekbones and the top of the cranium. Real bone is never pure white, so mix ochre, umber and a touch of blue into your whites.
Skulls have been painted for centuries, from Dutch vanitas still lifes to Día de los Muertos art to modern tattoo flash. They’re also one of the best subjects for learning form. A skull has hard planes, deep cavities and smooth domes all in one object, so painting one teaches value control in a way few subjects can.
This guide on how to paint a skull with acrylic paint focuses on a realistic, three-quarter view skull on canvas, then covers a simpler front-facing version and some stylized variations. If you’ve painted a skull before and it came out looking like a cartoon or a ghost, the anatomy and value sections are where the fix usually lives.
Skull Anatomy Every Painter Should Know
You don’t need medical-level anatomy, but a few landmarks prevent the most common errors.
- The cranium is larger than people expect. Seen from the front, the brain case takes up roughly the top two-thirds of the skull’s height. The face fits underneath.
- The eye sockets (orbits) sit at about the halfway point of the full skull height. They’re squarish with rounded corners, not perfect circles, and they’re deep.
- The brow ridge overhangs the eye sockets and catches light.
- The nasal cavity is an upside-down heart or pear shape, centered below the orbits.
- The cheekbones (zygomatic arches) project outward from below the eye sockets and connect toward the ears. They’re often the widest point of the face.
- The upper jaw (maxilla) holds the upper teeth and is fixed to the skull. The lower jaw (mandible) is a separate, horseshoe-shaped bone that hinges near the ear.
- The temples are shallow depressions on each side of the cranium above the cheekbones. They hold soft shadow.
If you can find a reference photo of an anatomical model from several angles, study it before you start. A plastic anatomical skull is also an affordable reference you can light however you like.
Materials
- Canvas or panel, 11×14 or 12×16 inches.
- Brushes: a 1-inch flat for the background, a size 10 and size 6 filbert for blocking in, a size 2 round and size 0 detail brush, and a small liner for cracks and sutures.
- Paints: titanium white, yellow ochre, raw umber, burnt umber, burnt sienna, ultramarine blue, and optionally Payne’s gray and a cool violet.
- A stay-wet palette, glazing medium and a slow-dry medium.
- Pencil or charcoal for the drawing, plus a kneaded eraser.
Mixing bone colors
Pure white makes a skull look like plastic or chalk. Bone is warm, slightly yellow or gray, and picks up color from its surroundings.
| Value | Suggested mix | Where it goes |
|---|---|---|
| Highlight | White + a tiny touch of yellow ochre | Top of cranium, brow ridge, cheekbones, front teeth |
| Light | White + ochre + a hint of raw umber | Main lit planes of the skull |
| Mid-tone | White + raw umber + ochre + touch of ultramarine | Planes turning away from light, temples |
| Shadow | Burnt umber + ultramarine + a little white | Under cheekbones, side of jaw, shadow side of cranium |
| Deepest dark | Burnt umber + ultramarine | Inside eye sockets, nasal cavity, between teeth |
Mixing near-neutral grays from umber, ochre and blue relies on paints with enough pigment to stay clean when you combine three or four of them. Weak paints get muddy quickly in these mixes. Our comparison of the best acrylic paints for mixing clean neutrals and earth tones can help if you’re choosing a palette for this kind of work.
How to Paint a Skull With Acrylic Paint: Step by Step
Step 1: Paint a dark background
A skull reads best against a dark or mid-dark ground. Mix burnt umber with ultramarine and a little white for a deep, cool brown-gray, or use a dark warm red-brown for a classic vanitas mood. Brush it across the whole canvas and let it dry. A dark background means the shadows in the skull can melt into it, which looks more natural than a hard outline.
Step 2: Draw the skull
For a three-quarter view (turned slightly to one side):
- Draw a large circle for the cranium.
- Draw a vertical center line that curves around the circle to show which way the skull faces. In a three-quarter view, it sits off to one side.
- Draw a horizontal line through the circle at about two-thirds of the way down. The eye sockets hang from this line.
- Below the circle, sketch a squared-off shape for the face, narrower than the cranium, ending at the chin.
- Place the eye sockets on either side of the center line. The socket on the far side looks narrower because it’s turning away.
- Add the nasal cavity on the center line, the cheekbone sweeping back toward the ear, and the jaw angle under the cheekbone.
- Draw the teeth as a curved band following the center line, not as a flat row.
Erase construction lines lightly so only the essential contours remain.
Step 3: Block in the shadow shapes
Decide where your light comes from, say the upper left. Then paint every area facing away from that light in your shadow mix: the right side of the cranium, under the brow ridge, under the cheekbone, the side of the jaw, and the cast shadow the skull throws on the surface it sits on.
Paint the eye sockets, nasal cavity and gaps between teeth in the deepest dark. Don’t put any detail inside them yet.
Step 4: Block in the light planes
Fill the remaining areas with your light bone mix. Leave a small gap between light and shadow; you’ll fill it with mid-tones next. Use filbert strokes that follow the form, curving around the dome of the cranium.
Step 5: Add the mid-tones
Paint the transition zones with your mid-tone. This is where the skull starts turning three-dimensional. Pay attention to the temple hollow, the plane change at the side of the brow, and the soft shadow on the upper jaw between the nose and the teeth.
Blend light to mid to shadow while the paint is damp, or glaze across the boundaries once dry. On a curved dome, the transition should be gradual. On sharp edges, like the rim of the eye socket, keep it crisp.
Step 6: Shape the eye sockets
Eye sockets aren’t flat black holes. The rim is a rounded edge of bone: light on the top inner edge where it catches light, dark under the brow. Paint a thin light line along the lower rim and the outer edge facing the light. Leave the interior deep but add a tiny hint of reflected light, a slightly lighter dark, on the inner side wall.
Step 7: Paint the teeth
Teeth are usually a little warmer and more yellow than the rest of the skull. Paint them as a band first, then separate individual teeth with thin, dark lines. Remember that the band curves; teeth on the far side get narrower and closer together.
Highlight the top edge of each front tooth with a warm off-white, and shade the bottom of each tooth slightly where it meets the gum line of the jaw. Some missing or uneven teeth add character.
Step 8: Highlights and texture
Use your brightest mix for crisp highlights on the brow ridge, the top of the cranium, the cheekbone and the chin. Keep highlights small; the skull should be mostly light-to-mid values with only a few bright accents.
Add cranial sutures (the wavy seams where skull plates join) with a liner brush in a thin mid-dark line. A coronal suture across the top of the head and one along the side look convincing. Add a few fine cracks and chips if you want an aged look.
Step 9: Reflected light and cast shadow
Light bounces off the table onto the underside of the jaw and cheekbones. Glaze a faint, slightly warmer light along the bottom edge of the shadow side. It keeps shadows from looking like holes.
Finally, strengthen the cast shadow under the skull. It’s darkest right where the skull touches the surface and softens as it moves away.
A Simpler Front-Facing Skull
If the three-quarter view feels like too much, start with a symmetrical front view:
- Draw a vertical center line and an oval for the cranium.
- Draw a narrower rectangle below it for the face.
- Place two eye sockets symmetrically on each side of the center line, the nose cavity on the line, and teeth below.
- Block in with three values only: light, mid and dark.
- Add a few highlights on the brow and cheekbones.
Fold a piece of tracing paper along the center line to check symmetry, or flip your canvas upside down to spot lopsided sockets.
Stylized Skull Variations
- Sugar skull: a front-facing skull with bright flowers in the eye sockets, a heart-shaped nose, a stitched mouth and decorative swirls. Bold, saturated color on a black background.
- Floral vanitas: a realistic skull surrounded by roses, candles or an hourglass, painted in warm, low-key light.
- Neon or pop art: a skull rendered in two or three flat, high-contrast colors, like hot pink shadows and electric blue highlights.
- Animal skull: cow, deer or ram skulls are popular southwestern subjects and use the same bone mixes.
For bright stylized skulls, fluid paints and inks give crisp, saturated lines. You can read about one ink option in our Daler-Rowney acrylic ink review.
Common Mistakes When Painting a Skull
| Mistake | Result | Correction |
|---|---|---|
| Cranium too small | Looks like an alien or a monkey | Cranium is about two-thirds of the total height |
| Round, shallow eye sockets | Cartoon skull | Squarish sockets, deep darks, lit rims |
| Pure white paint | Plastic, chalky look | Warm off-whites with ochre and umber |
| Flat row of teeth | Skull looks pasted on | Curve teeth around the jaw; narrow at sides |
| Outlined skull | Graphic, flat image | Let shadow sides dissolve into the background |
| Too many highlights | Shiny, wet appearance | Limit bright accents to a few high points |
Tips by Skill Level
Beginners: paint the front-facing skull in burnt umber and white only. Value is the whole lesson, and limiting color keeps the focus on light and shadow.
Intermediate: try the three-quarter view with the full bone palette and a single strong light source. Practice keeping edges crisp on bone rims and soft on the dome.
Advanced: paint a vanitas still life with a skull, a draped cloth and a candle, controlling warm candlelight on the bone and cool shadows in the background.
FAQs
What colors do you use to paint a realistic skull?
Titanium white, yellow ochre, raw umber, burnt umber and ultramarine blue cover nearly every value. Mix warm off-whites for lit areas and umber-blue darks for the sockets and shadows.
How do you shade a skull with acrylic paint?
Pick one light direction, block in shadows on every plane facing away from it, fill the lit planes with a light bone color, and blend mid-tones between them. Add crisp highlights on the brow ridge and cheekbones last.
Why does my painted skull look flat?
Usually because the sockets are too shallow, the lights and darks are too close in value, or there’s no cast shadow. Push the darks deeper, especially in the orbits, and add a cast shadow beneath the skull.
What background works best for a skull painting?
A dark or mid-dark background, such as a deep brown, charcoal or muted red, makes the bone stand out and lets shadow edges soften naturally.
How long does it take to paint a skull?
A simple front-facing skull takes one to two hours. A realistic three-quarter view with texture and reflected light can take four to eight hours across a few sessions.
Can I paint a skull on something other than canvas?
Yes. Acrylic works on wood panels, paper, rocks, fabric with a fabric medium, and primed metal. The same value approach applies on any surface.
Final Thoughts
Skulls teach more about light and form than almost any other single object. Get the proportions right, paint the sockets truly dark, and keep your whites warm, and the skull will look solid enough to pick up.
Bone tones depend on subtle, clean neutral mixes, so the paint you use matters. Before your next skull study, check our guide to the top-rated acrylic paint brands for serious painters to find colors that stay clean through layered mixes.




