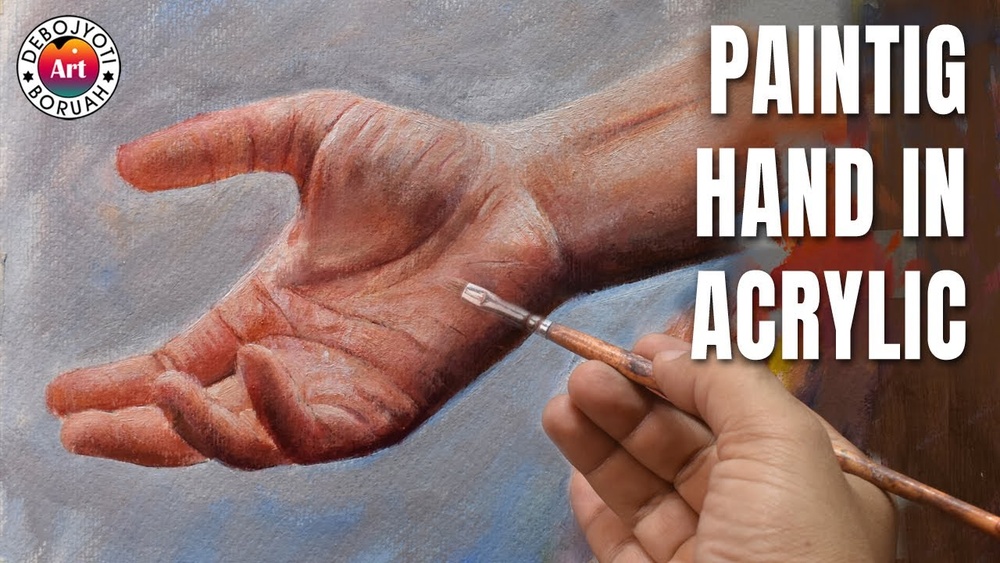
Quick answer: To paint hands with acrylic paint, start with a careful drawing built from simple shapes: a flattened box for the palm, cylinders for the finger segments and a wedge for the thumb. Block in the whole hand in a mid-tone skin color, add shadows on the side away from the light and between fingers, then build highlights on knuckles, fingertips and nails. Keep edges soft where forms turn and crisp only where a finger overlaps something behind it.
Hands are famously difficult, but usually for one reason: painters try to paint what they think a hand looks like rather than the shapes in front of them. Five evenly spaced sausages attached to a square is the symbol of a hand. A real hand is a flexible structure of planes, joints and overlaps.
This guide covers how to paint hands with acrylic paint from structure to finish, including proportions, a step-by-step process, skin tone mixing, common poses, and the mistakes that make painted hands look stiff or swollen.
Hand Structure: Proportions That Matter
You do not need to memorize anatomy, but a few proportional landmarks prevent most errors:
- Palm and fingers are roughly equal. The middle finger is about as long as the palm, measured from wrist crease to the base of the middle finger.
- Knuckles form an arc, not a line. The base knuckles curve; the middle finger knuckle sits highest and the pinky lowest.
- Finger segments shrink. Each finger has three segments, each slightly shorter than the one before it, moving toward the tip.
- The thumb sits lower and to the side. Its base starts near the wrist, and it has only two visible segments plus a large fleshy pad.
- Fingers taper. They are wider at the base than at the tip, and the sides are not parallel.
- The back of the hand is slightly arched. It is not flat; the palm is cupped.
Think in Simple 3D Forms
Before painting, reduce the hand to shapes you can light easily:
| Part | Simple form | Lighting behavior |
|---|---|---|
| Palm / back of hand | Slightly curved, flattened box | Distinct top plane and side plane |
| Finger segments | Tapered cylinders | Light down one side, shadow down the other |
| Knuckles | Small spheres or bumps | Catch highlights when the hand is bent |
| Thumb pad | Rounded wedge | Soft gradation, warmer in shadow |
| Fingernails | Curved shields on a cylinder | Small sharp highlight, follow the finger’s curve |
Supplies
- Heavy body acrylics in titanium white, yellow ochre, cadmium red light, alizarin crimson or a quinacridone red, burnt sienna, burnt umber, ultramarine blue and a small amount of cadmium yellow
- Brushes: size 2, 4 and 6 rounds; size 4 and 8 filberts; a small liner
- Stay-wet palette to keep skin mixes workable
- Slow-dry medium for softer blends
- Primed canvas panel or acrylic paper
- A reference photo or, better, your own hand in a mirror or under a lamp
Skin tones demand paint that mixes cleanly without turning chalky when white is added. Low-pigment student paints often need extra coats and lose warmth. If you paint figures regularly, our guide to acrylic paint brands that mix clean skin tones helps narrow down a reliable palette.
Mixing Skin Tones for Hands
Hands are often redder and more varied in color than faces. Knuckles, fingertips and palms tend to look warmer and pinker because blood vessels are close to the surface, while the back of the hand can look slightly cooler, with visible veins.
| Area | Starting mix (adjust to subject) |
|---|---|
| Base mid-tone (light skin) | White + yellow ochre + a touch of cadmium red light |
| Base mid-tone (medium skin) | Yellow ochre + burnt sienna + a little white |
| Base mid-tone (deep skin) | Burnt umber + burnt sienna + a touch of alizarin, lightened with ochre |
| Warm accents (knuckles, fingertips) | Base + alizarin crimson or cadmium red |
| Shadows | Base + burnt umber + a touch of ultramarine |
| Cool transitions / veins | Base + a little ultramarine and white, applied thinly |
| Highlights | Base + white + a touch of yellow ochre |
Mix a value scale of your skin color before you start: a dark shadow, a mid shadow, the mid-tone, a light and a highlight. Having five ready-mixed values makes it much easier to keep the form consistent as acrylic dries.
How to Paint Hands With Acrylic Paint: Step-by-Step
This sequence paints a relaxed hand resting on a table, lit from the upper left. It suits an 8×10 panel and about 90 minutes of work.
Step 1: Draw Carefully
Hands rarely survive a weak drawing. Lightly sketch the palm box, then the arc of knuckles, then each finger as segmented cylinders. Check proportions: is the middle finger roughly the length of the palm? Is the thumb starting near the wrist? Correct the drawing now; fixing proportions in paint is much harder.
Step 2: Tone the Background
Paint the background in a mid-value neutral. Placing a skin tone on white makes it look darker than it is and throws off your value judgment.
Step 3: Block In the Shadow Shapes
With the mid shadow mix and a small filbert, paint every shadow area as a flat shape: the side planes of fingers facing away from the light, the spaces between fingers, under the palm and the cast shadow on the table. Squint at your reference to simplify these shapes.
Step 4: Block In the Light Shapes
Fill the remaining areas with the mid-tone. At this point, the hand should already read as three-dimensional in two values. If it does not, adjust shapes before moving on.
Step 5: Add Color Temperature
Glaze or paint warm reds into knuckles, fingertips and the base of the thumb. Add a slightly cooler, grayer tone on the back of the hand and wrist. These temperature shifts make skin look alive.
Step 6: Develop Transitions
Using intermediate values, blend where the light plane turns into shadow. Acrylic dries quickly, so work in small areas, mist the surface and use a little slow-dry medium. Alternatively, build transitions with several thin, semi-transparent layers.
Step 7: Define Edges
Decide which edges should be sharp and which soft. Where a finger overlaps another finger or the table, keep the edge crisp. Where a form turns gradually, like the side of a finger, keep it soft. Varied edges are one of the biggest realism upgrades.
Step 8: Paint the Nails
Paint nails slightly lighter and cooler than surrounding skin, with a pinkish base near the cuticle and a lighter free edge. Follow the curve of the finger; nails wrap around the fingertip rather than sitting flat. Add a small sharp highlight on each nail facing the light.
Step 9: Add Knuckle Creases and Highlights
Use a liner and a slightly darker skin tone for a few creases at the joints, keeping them subtle and broken. Then add the brightest highlights on the knuckles, fingertips and top of the hand. Fewer, smaller highlights look more realistic than many.
Step 10: Reflected Light
In the shadow side of fingers, a faint, warmer light often bounces up from the table or the other fingers. Add it carefully, keeping it darker than any area in direct light.
Painting Hands in Common Poses
Open Palm
The palm shows fleshy mounds at the base of the thumb and below the fingers, separated by creases. Paint the mounds as soft, rounded forms with warm color and the center of the palm as a slightly shadowed hollow.
Closed Fist
Knuckles become prominent and form a strong arc. The fingers fold into compact blocks. Shadows between folded fingers are deep and narrow, and the thumb usually wraps across the front.
Holding an Object
Fingers wrap around the object, and parts of them disappear behind it. Paint the object first or simultaneously so you can see the overlaps. Contact shadows where skin touches the object should be small and dark.
Foreshortened Hand Pointing Toward the Viewer
Fingers appear short and wide, with overlaps stacking. Draw the shapes you see, not the length you know fingers have. Strong overlaps and size differences sell the depth.
Lighting Your Reference
The quality of your reference decides how easy the painting will be. Flat, front-on light, such as a phone flash or overhead office lighting, removes shadows and makes hands look like cutouts. A single lamp placed above and to one side of the hand creates clear light and shadow planes, which are what you actually paint.
Try positioning the lamp at roughly 45 degrees, both above and to the side. Squint at the hand: you should see two main shapes, a lit area and a shadow area, with a reasonably clear boundary between them. If the shadows disappear, move the lamp farther to the side. If the shadows swallow most of the hand, move it more to the front.
Painting Hands of Different Ages
| Age | Key traits | Painting approach |
|---|---|---|
| Baby and toddler | Short, plump fingers; dimples instead of knuckles; small nails | Soft edges, rounded forms, warm pinks, very few lines |
| Young adult | Smooth skin, clear but subtle knuckles, even color | Moderate contrast, gentle transitions, minimal creases |
| Older adult | Prominent knuckles and tendons, visible veins, more color variation | Stronger planes, a few well-chosen creases, cool vein glazes and warmer joints |
Even with older hands, suggest wrinkles with a few broken strokes and value shifts rather than tracing every line. The structure underneath matters more than surface texture.
Common Mistakes When Painting Hands
- Fingers all the same length. Each finger is a different length, with the middle finger longest.
- Straight knuckle line. Knuckles follow an arc.
- Outlining fingers. Dark outlines flatten the form. Use value and edge changes instead.
- Skin painted one flat color. Add warm and cool variation.
- Thumb attached too high. The thumb’s base is close to the wrist.
- Too many wrinkles. Over-detailed creases age the hand and look busy.
- Swollen sausage fingers. Fingers taper and have flat planes on top; they are not uniform tubes.
How Hands Fit Into a Portrait
In a full portrait or figure painting, hands are a secondary focal point. Paint them with slightly less detail and contrast than the face, so they support the composition instead of competing with it. A useful rule of thumb is that an adult hand is roughly as long as the face from chin to hairline. Checking that comparison catches hands that are painted too small, which is one of the most common errors in figure work.
Practice Exercises
- Value studies: Paint your own hand in three values only (shadow, mid-tone, light) in 15 minutes. Repeat in different poses.
- Single finger study: Paint one finger as a cylinder with a nail, focusing on smooth transitions.
- Glove study: Paint a white glove. It removes skin color complexity so you can focus on form.
- Limited time series: Paint five small hand sketches at 10 minutes each to train observation.
For delicate glazes over skin, some artists use fluid acrylics thinned with glazing medium. Our review of Daler-Rowney fluid acrylics discusses how they behave in thin, translucent layers.
Related Reading
FAQs
Why are hands so hard to paint?
Hands have many small, overlapping forms and change shape dramatically with each pose. Most problems come from drawing symbolic shapes instead of observing actual proportions and planes.
What colors do I need to paint hands in acrylic?
A versatile skin palette includes titanium white, yellow ochre, cadmium red light, alizarin crimson, burnt sienna, burnt umber and ultramarine blue. These can be adjusted to mix a wide range of skin tones.
How do I make painted hands look realistic?
Start with an accurate drawing, establish clear light and shadow shapes, add warm color at the knuckles and fingertips, vary edge sharpness, and keep highlights small and few.
Should I use reference photos to paint hands?
Yes. Your own hand under a single lamp is an excellent reference because you can adjust the pose. Photos are helpful for complex poses, but be aware they can distort proportions with close-up lenses.
How do I blend skin tones with fast-drying acrylic?
Use a stay-wet palette, mist the painting lightly, add slow-dry medium and work in small sections. Building transitions with thin semi-transparent layers is another effective approach.
How do I paint fingernails?
Paint nails slightly lighter and cooler than the skin, curve them around the fingertip and add one small, sharp highlight. Avoid outlining them heavily.
Final Thoughts
Painting hands with acrylic paint gets easier the moment you stop painting fingers and start painting forms. A careful drawing, two clear value families, warm accents, varied edges and restrained highlights will produce hands that look natural rather than stiff.
Mixing believable skin tones is easier with paints that hold their warmth when lightened. To find a palette that suits figure work, read our comparison of the best acrylic paints for portraits and figures.