Painting fog in oil painting can turn a simple landscape into something mysterious and dreamy. Fog brings softness, depth, and atmosphere to art. But capturing it convincingly with oils is not easy, especially for beginners. The challenge lies in making fog look light and airy, not heavy or dull.
If you want to master this skill, you need more than just technique—you need to understand how fog behaves in nature and how oil paint works on your canvas.
This guide will walk you through everything you need to know about how to paint fog in oil painting. From choosing the right materials to building up your layers and using blending tricks, you’ll learn how artists create realistic, moody fog.
You’ll also discover some key mistakes to avoid and get answers to common questions about painting mist, haze, and atmospheric effects. With practice and patience, you can make your landscapes come alive with the subtle touch of fog.
Understanding Fog In Art
Before you pick up a brush, it helps to know what you’re trying to paint. Fog is a cloud that forms close to the ground. It scatters light, hides details, and softens edges. In art, fog creates a sense of distance and mystery.
A few things to remember about fog:
- Edges become softer as they move back into space.
- Colors fade and become cooler or grayer in the distance.
- Contrast drops—lights are less bright, and darks less deep.
- Fog rarely covers everything equally; it can drift, thin, or thicken in places.
When you study real fog in photos or nature, you’ll notice it’s not just white or gray. There are often hints of blue, purple, or yellow depending on the time of day and the light. This is important to capture in your painting.
Materials And Preparation
To paint fog with oils, you’ll need a basic set of supplies, but some choices can make the process easier and the results better.
Essential Materials
- Oil paints: Choose a quality brand with good coverage and mixing ability.
- Brushes: Use a mix of soft (synthetic or sable) and stiff (hog bristle) brushes.
- Palette knives: For mixing and sometimes blending.
- Mediums: Liquin, linseed oil, or other medium to extend drying time and help blending.
- Canvas or panel: Stretched canvas, canvas board, or wood panel.
- Palette: For mixing colors.
- Rags or paper towels: For wiping brushes and softening paint.
- Easel: To keep your painting at a comfortable angle.
Recommended Colors
For most foggy scenes, you’ll use a limited palette. Some useful colors:
- Titanium White
- Ultramarine Blue
- Payne’s Gray or Ivory Black
- Burnt Umber
- Alizarin Crimson
- Yellow Ochre
You can create many fog effects by mixing these colors in different ways.
Surface Preparation
A toned canvas helps. Many artists tone their canvas with a thin wash of neutral gray or light brown before starting. This helps judge values (light and dark) more easily, which is important for painting fog.
Planning Your Foggy Scene
A good fog painting starts with a clear plan. Think about what you want to show: a forest in the mist, a city street, a mountain in low cloud? Decide where the fog will be thickest and where it will thin out. Place your main subject so it stands out, but still feels part of the misty world.
Make a simple sketch on your canvas. Mark the horizon and main shapes. Don’t worry about tiny details yet. Fog often hides details, so you can keep things loose.
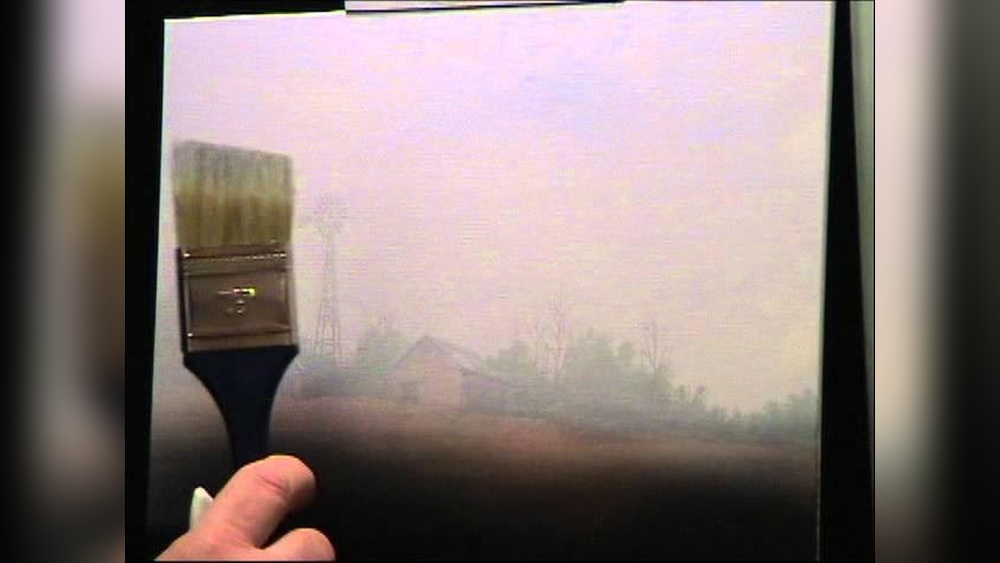
Blocking In The Underpainting
Start by blocking in the main shapes and colors. Work from background to foreground. Use thinned paint to lay down the basic color zones.
Steps To Block In
- Paint the sky and distant background using a mix of white, blue, and a touch of gray.
- Add midground shapes—trees, hills, or buildings—using slightly stronger color but still soft edges.
- Place foreground elements with darker, warmer colors.
At this stage, keep your shapes soft and edges blurry. Use a large brush or even a soft rag to blend transitions. Don’t add sharp lines or details.
Building Up Fog Layers
Fog is all about layers. Each layer adds more atmosphere and depth. Oil paint is perfect for this because it dries slowly, allowing you to blend easily.
How To Build Fog Layers
- Mix a fog color: Usually, a mix of titanium white, a touch of blue, and a little ochre or gray.
- Thin the paint with medium so it’s almost transparent.
- Glaze this fog color over dry areas of your painting. Use a soft brush and gentle strokes.
- Blend the edges: Use a clean, dry brush or soft rag to feather the glaze outward.
Repeat this process, letting each layer dry a bit before adding the next. This way, you can control the thickness of the fog in different parts of your painting.
Example: Painting Fog Over Trees
Suppose you have a row of trees in your landscape. To make them look half-hidden in fog:
- Glaze a thin layer of your fog color over the trees.
- Blend the top and bottom edges so the trees “fade” into the mist.
- Add more fog layers as needed to increase the effect.
Softening Edges And Blending
One of the secrets to convincing fog is soft edges. Hard lines make objects look sharp and close, but foggy scenes need to feel distant and gentle.
Techniques For Soft Edges
- Dry brushing: Use a clean, dry brush to lightly drag over wet paint. This blurs the edge.
- Feathering: Gently tap or wiggle a soft brush where two colors meet.
- Finger blending: Sometimes, the best tool is your finger. Gently smudge the edge for a natural blur.
- Rags or sponges: Dab gently to lift and soften paint.
The more you blend, the more the scene will feel foggy. But don’t overdo it; keep some areas a bit clearer to focus the viewer’s eye.
Using Glazing To Create Depth
Glazing is a classic oil painting technique for fog. It means laying a thin, transparent layer of color over dry paint. Glazing can make distant areas look more misty and push them back in space.
Glazing Steps
- Wait for the previous layer to dry (this might take a day or two).
- Mix your glaze: Lots of medium, a little color.
- Brush it gently over the area you want to fog.
- Let it dry, then repeat if needed.
You can glaze with cool colors (blue, gray) for morning fog, or warmer colors (ochre, pink) for evening haze.
Adjusting Values And Colors
Getting the values (lights and darks) right is key for fog. In real fog, the contrast is lower. That means the darkest darks are lighter, and the brightest lights are dimmer.
Tips For Values And Color
- Squint at your painting: If it looks flat and soft, you’re on the right track.
- Add a touch of the background color to all your mixes. This unifies the scene.
- Don’t use pure white for fog. Mix in a little blue, gray, or yellow so the fog feels natural.
Here is a quick comparison of value ranges in clear vs. foggy scenes:
| Scene Type | Lightest Value | Darkest Value | Contrast |
|---|---|---|---|
| Clear Day | Pure white | Deep black | Very high |
| Foggy Day | Off-white/gray | Mid-gray | Low |
Adding Details Without Losing The Fog Effect
Even in fog, some details should show through, especially in the foreground. But be careful: too many sharp details can break the mood.
How To Add Details Carefully
- Use softer brushes for distant objects, sharper ones for foreground.
- Paint only the suggestion of shapes in the mist—don’t outline everything.
- Keep colors muted and edges soft, even for “detailed” areas.
For example, when painting a road disappearing into fog, make the distant part very soft and light. Only add clear lines and stronger color in the closest section.
Common Mistakes To Avoid
Many artists struggle with fog at first. Here are some mistakes to watch out for:
- Making fog too white: Real fog picks up color from the sky and ground.
- Over-blending everything: Some areas should be clearer, especially in the foreground.
- Using hard lines in the background: This kills the illusion of depth.
- Ignoring layers: Fog looks best when built up gradually, not in one thick layer.
- Forgetting about light source: Fog can glow or darken depending on where the light is.
One non-obvious mistake: using too much paint medium can make the surface sticky and hard to work with. Use just enough for easy blending, but not so much that the paint slides off.
Credit: artstudiolife.com
Practice Exercises For Painting Fog
To get better at painting fog, try these exercises:
- Value studies: Paint a simple landscape using only black, white, and gray. Focus on soft transitions.
- Glazing practice: Over an old painting, add layers of fog using thin glaze and see how the mood changes.
- Edge control: Paint the same object with both hard and soft edges, side by side, to see the effect.
- Color matching: Mix different fog colors from photos and try to match them on your palette.
Consistent practice with these will sharpen your eye and hand for fog effects.
Advanced Tips For Convincing Fog
Once you’re comfortable with basics, you can try more advanced techniques:
- Scumbling: Dragging a small amount of thick, almost dry paint over a dry layer to create a hazy effect.
- Negative painting: Painting around the foggy area, letting the underpainting show through as mist.
- Color temperature shifts: Use cooler blues for early morning fog, warmer pinks for sunset haze.
Another advanced insight: reflected light often plays a role in fog. For example, fog over water might reflect the color of the sky or shoreline. Add subtle hints of these colors in your glazes for realism.
Case Study: Painting Fog In A Mountain Scene
Let’s break down a real example: painting fog drifting between mountain peaks.
- Sketch the mountains lightly on a toned canvas.
- Block in the sky, background peaks, and foreground using muted blues and browns.
- Paint the distant peaks with lighter, cooler colors and soft edges.
- Glaze fog between the peaks using a thin, blue-gray mix.
- Blend the glaze into the mountains and sky, keeping the fog soft.
- Build up more layers where the fog is thickest.
- Add subtle highlights on the top edge of the fog for sunlight.
- Refine the closest peaks with slightly sharper edges and more contrast.
This step-by-step approach will help you manage complexity without losing the feeling of atmosphere.
Here’s how a painting might change as you add fog:
| Stage | Visible Details | Color Intensity | Edge Sharpness |
|---|---|---|---|
| Initial Block-In | High | Strong | Sharp |
| After Fog Layer 1 | Reduced | Softer | Slightly blurred |
| After Multiple Layers | Minimal | Very muted | Very soft |
When To Stop: Knowing Your Painting Is Done
Fog paintings can tempt you to keep blending and adding layers. But too much can make the image flat and lifeless. A good fog painting still has a sense of depth and focus. When the mood feels right and the main subject stands out gently from the mist, it’s time to stop.
Many artists recommend stepping back from your work often—sometimes even leaving it for a day. You’ll see things you missed and avoid overworking the piece.
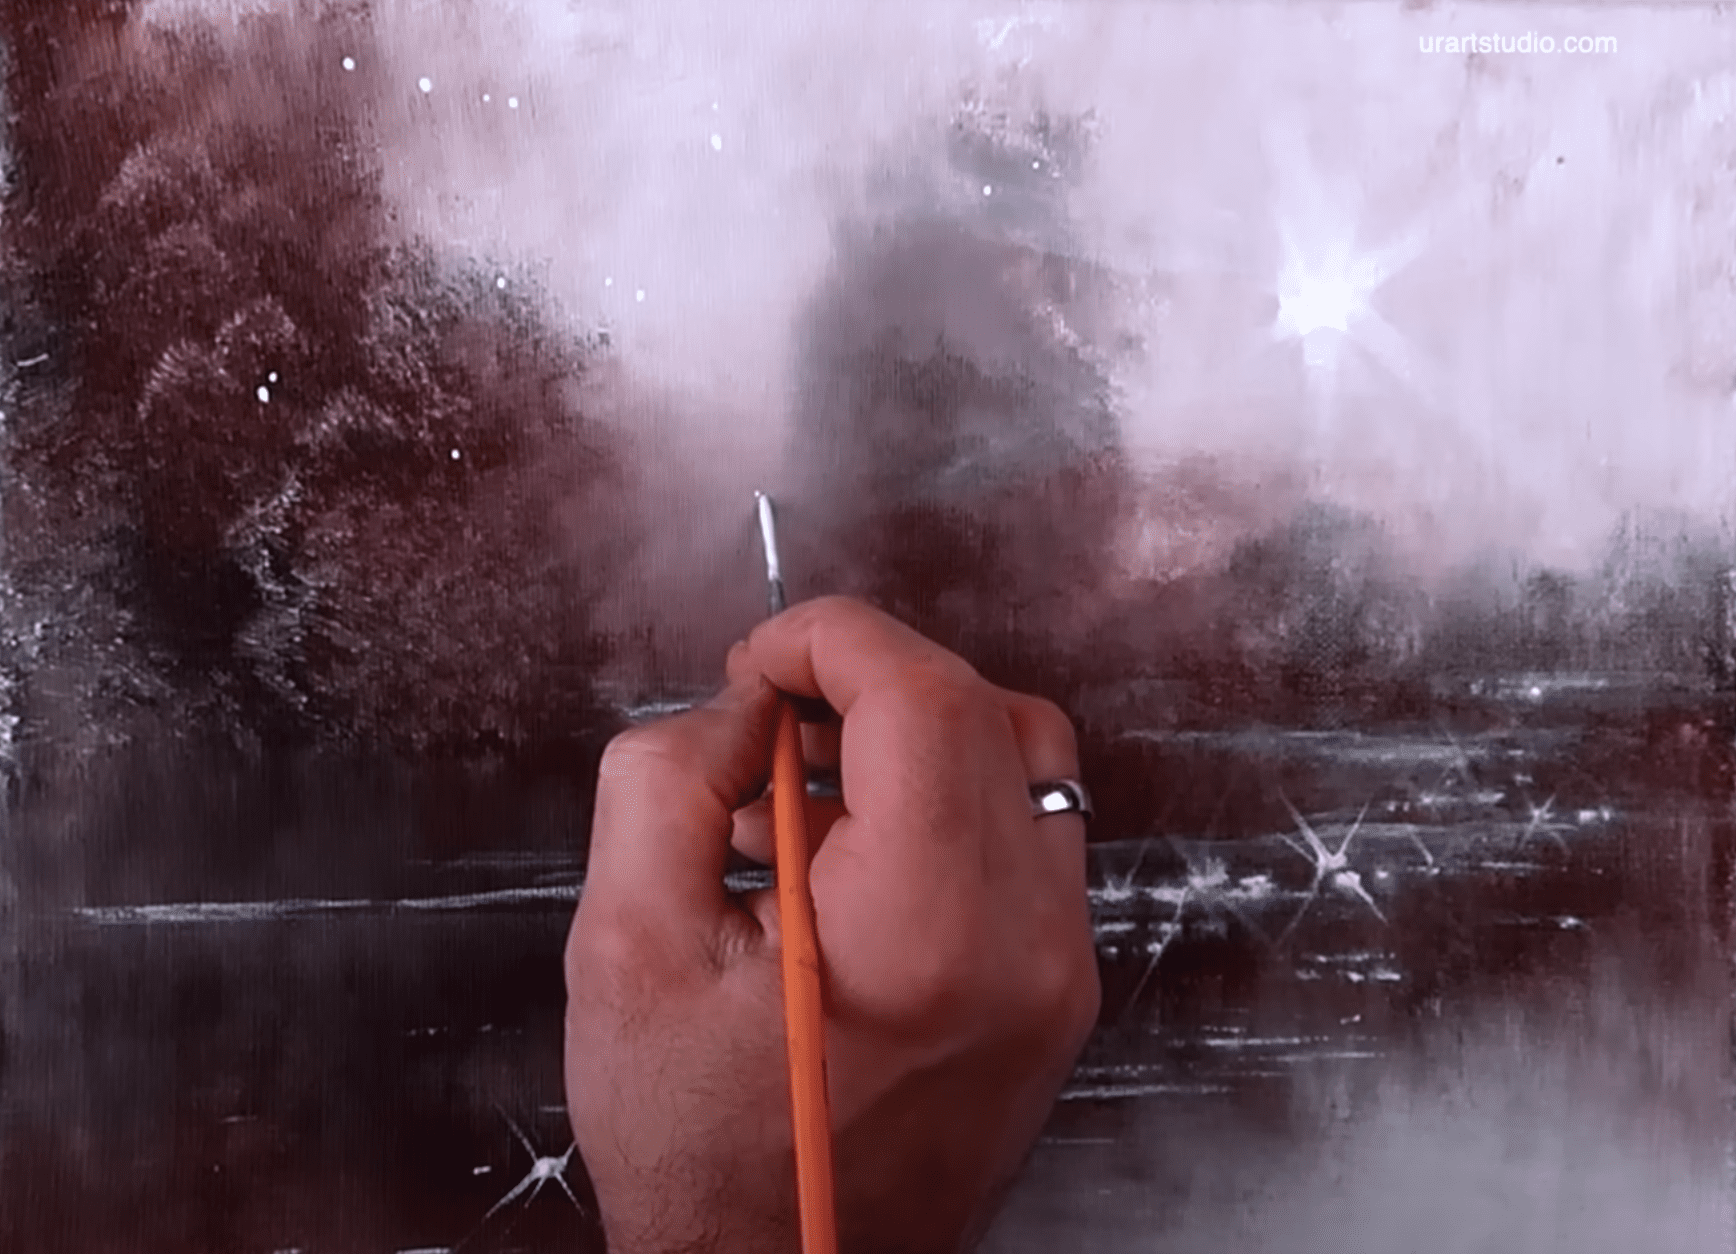
Credit: urartstudio.com
Further Resources
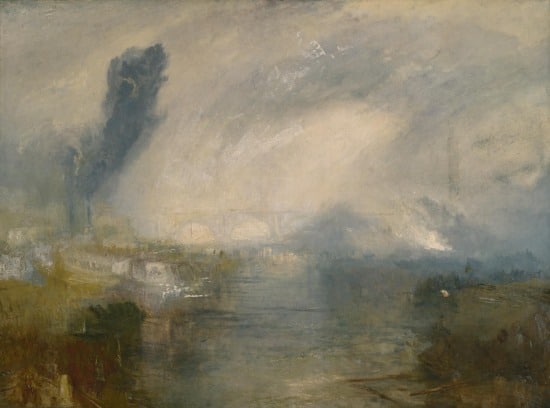
If you want to see fog painting in action, look for videos and tutorials from experienced artists. You can also study works by classic landscape painters like J.M.W. Turner, who was famous for his atmospheric effects. For more on oil painting techniques, this Wikipedia article is a helpful starting point.
Frequently Asked Questions
How Do I Make Fog Look Realistic In Oil Painting?
To make fog realistic, use soft edges, lower contrast, and subtle color changes. Build up fog with thin layers and blend gently. Avoid using pure white; instead, mix in a little blue, gray, or ochre for a natural look.
What Brush Is Best For Painting Fog?
Soft, synthetic brushes are best for blending and glazing fog. Fan brushes and large mop brushes work well for softening edges. Use a clean, dry brush to feather out your fog layers.
How Do I Paint Fog Over Water In A Landscape?
Paint the water first, then glaze thin layers of fog color (usually a light blue-gray) over it. Blend the edges where the fog meets the water, and add subtle reflections of the fog in the water for realism.
Can I Use Acrylics Instead Of Oil For Fog Effects?
You can, but oil paints blend more smoothly and dry slower, which helps with soft transitions. With acrylics, use glazing medium and work quickly, as they dry fast. The principles for fog are similar in both mediums.
How Long Does It Take To Paint Fog With Oils?
It depends on the size and detail of your painting. Blocking in shapes may take a few hours. Building up layers of fog can take several days, as you need to let each glaze dry before adding the next for best results.
Painting fog in oil is a rewarding skill that adds mood and atmosphere to your art. With patience and practice, you’ll master the subtlety and softness that make foggy scenes so magical. Let each painting teach you, and soon you’ll be creating landscapes full of mystery and light.

Credit: www.youtube.com