Painting with oil colors on canvas is a rewarding experience for many artists. The rich colors, subtle blending, and texture are hard to match. However, one challenge comes with oil painting: drying time. Oil paint can take days, sometimes weeks, to fully dry, which can slow down your creative process. If you want to finish a commission faster, add a second layer, or ship your artwork soon, you need ways to speed dry oil paint on canvas. Thankfully, there are tested methods that can help you shorten the wait. This article offers practical tips, explains how oil paint dries, and reveals common mistakes to avoid so you achieve the best results safely and efficiently.
How Oil Paint Dries
Understanding why oil paint dries slowly is the first step to solving the problem. Unlike acrylic or watercolor, oil paint does not dry by evaporation. Instead, it dries through a process called oxidation. The oil (usually linseed, safflower, or walnut) reacts with oxygen in the air and slowly hardens. This chemical reaction takes time—sometimes a thin layer dries in a day, but thicker sections might need a week or more.
The drying time also depends on:
- The type of oil used
- The thickness of the paint
- The colors (some pigments dry faster)
- The painting medium added
- The temperature and humidity in the room
For example, titanium white and cadmium yellow are known for drying slowly, while burnt umber and cobalt blue usually dry faster.
Factors That Affect Drying Time
Several factors influence how quickly your oil paint dries on canvas. Understanding these can help you make better choices for your art projects.
Type Of Oil
Some oils dry faster than others:
- Linseed oil dries faster (usually within 2–3 days for thin layers).
- Safflower and poppy oil dry slower, sometimes over a week.
Paint Thickness
A thin layer will dry much faster than a thick, impasto application. If you use a palette knife and create heavy textures, expect a longer wait.
Pigment Differences
Certain pigments contain minerals that speed up or slow down drying. For example, earth tones like burnt umber dry quickly, while ivory black and alizarin crimson are famous for their slow drying rates.
Room Conditions
Dry, warm air helps oil paint cure faster. In contrast, high humidity and cold temperatures slow the process.

Credit: studiowildlife.com
Proven Methods To Speed Dry Oil Paint
If you want to finish your painting quickly, try these expert-approved strategies. Each method has its pros and cons, so choose what fits your style and materials.
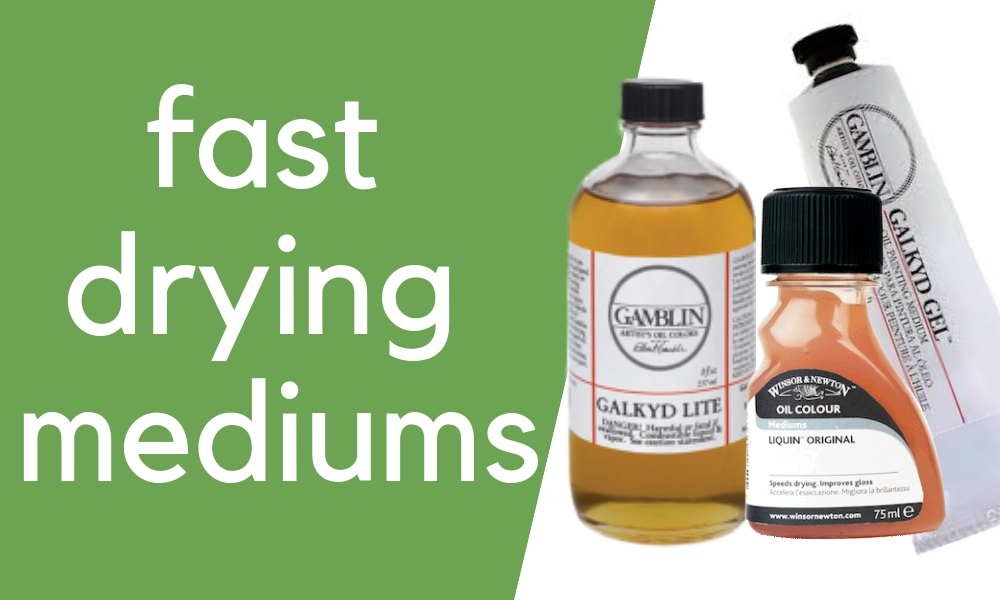
1. Use Fast-drying Mediums
Adding a fast-drying medium to your paint can cut drying time by half or more. Alkyd mediums are a popular choice for this purpose.
| Medium | Main Benefit | Typical Dry Time |
|---|---|---|
| Alkyd Medium | Speeds up drying | 12–24 hours |
| Liquin | Smooths brushstrokes, dries fast | 24 hours |
| Galkyd | Increases gloss and dries quickly | 24 hours |
Add a small amount (follow the label instructions) to your oil paint and mix well. Do not add too much, or your paint could become brittle over time.
2. Paint In Thin Layers
This method is simple but effective. The thinner the paint, the faster it dries. Use less paint on your brush and avoid building up heavy textures if you need a quick-drying canvas. This technique is also known as “fat over lean”—apply lean (less oil) layers first, then thicker layers later.
3. Choose Fast-drying Pigments
Select colors that naturally dry faster for your underpainting or first layers. Earth tones like raw sienna, burnt umber, and cobalt blue are great choices.
4. Increase Airflow
Good ventilation helps oil paint dry. Place your painting in a room with circulating air or near an open window. A simple fan can also speed up the process.
- Do not blow air directly onto the paint from close distance to avoid dust.
- Use a ceiling fan on low speed to keep air moving gently.
5. Use Heat Carefully
Warmth helps oil paint cure. You can place your painting in a warm (not hot) room, or use a heat lamp from a safe distance.
- Ideal room temperature: 20–25°C (68–77°F)
- Never use a hairdryer or oven—too much heat can damage the canvas or cause cracking.
6. Use An Oil Paint Dryer (siccative)
Siccatives are chemical additives that speed up drying. The most common is cobalt drier. Add just a drop to your paint—too much can ruin your painting.
- Use only as directed, and test on a small section first.
- Do not mix with every color, as some pigments may react poorly.
7. Absorb Excess Oil
If you accidentally add too much oil to your paint, blot the surface with absorbent paper (like a paper towel or blotting paper). This removes surface oil and allows faster drying.
- Lay the paper gently on the wet paint for a few minutes, then lift.
8. Place Painting In A Dry, Warm Room
Humidity slows oxidation. Keep your painting in a space with low humidity and stable temperature.
- Avoid basements and bathrooms.
- A dehumidifier can help if your climate is damp.
9. Prime Your Canvas Properly
A well-primed canvas keeps oil paint on the surface, where it can react with air more easily. Use an acrylic gesso primer and let it dry fully before painting.
10. Avoid Adding Too Much Oil
Beginners often add extra oil to make paint smoother, but this can double the drying time. Use just enough oil for workability and no more.
11. Drying Cabinet Or Dry Box
Professional artists sometimes use a drying cabinet—a closed box with gentle heat and airflow. This method is safe and effective but requires extra equipment.
12. Sunlight—with Caution
Natural sunlight can help dry oil paint, but use it carefully:
- Place the painting in indirect sunlight to avoid fading and warping.
- Do not leave it outdoors overnight.
13. Use Alkyd Paints
Alkyd oil paints are formulated to dry much faster than traditional oils, often in 24 hours. They look and feel like regular oil paint but are ideal for artists in a hurry.
Practical Example: Speed Drying A Portrait
Imagine you finished an oil portrait and need it dry in two days for delivery. Here’s a practical approach:
- Start with a thin underpainting using burnt umber and an alkyd medium.
- Paint the main colors with fast-drying pigments where possible.
- Add a drop of cobalt drier only to slowest-drying colors (like titanium white).
- Place the painting in a warm, ventilated room with a ceiling fan running.
- Check after 24 hours. Most thin layers will be touch-dry. Thicker highlights may need a little longer.
This method uses several strategies together for best results.
Common Mistakes To Avoid
Even with these tips, some pitfalls can make drying problems worse:
- Using too much oil or medium: More oil means slower drying and risk of yellowing.
- Overusing siccatives: A few drops are enough; too much causes wrinkling or cracking.
- Placing paintings in direct sunlight or near heat sources: This can warp the canvas or fade colors.
- Leaving paint too thick: Deep impasto sections can remain tacky for weeks.
- Not priming your canvas: Raw canvas absorbs oil, leaving paint underbound and slow to dry.
Comparing Drying Methods
Here’s a comparison of different methods to speed dry oil paint, with estimated results:
| Method | Drying Time (Thin Layer) | Best For |
|---|---|---|
| Alkyd Medium | 12–24 hours | All painting styles |
| Heat Lamp | 12–36 hours | Small paintings |
| Dry, Warm Room | 24–48 hours | Large canvases |
| Sunlight (Indirect) | 24–72 hours | Earth tones/fast-drying pigments |
| Absorbing Oil | 24–36 hours | Over-oiled paint |
Non-obvious Insights Artists Miss
- Layer Sequence Matters: Applying fast-drying colors first helps underlayers set faster, but adding slow-drying paints on top can still slow the whole process. Plan your color layers for maximum efficiency.
- Oxygen Exposure Is Key: Covering your painting with plastic or glass slows drying because oxidation needs air. Leave your painting uncovered in a safe, dust-free area.
Safety Considerations
While speeding up drying is useful, always keep safety in mind:
- Use siccatives and solvents in well-ventilated areas.
- Keep chemicals out of reach of children and pets.
- Do not use ovens or microwaves—they are fire hazards for oil paintings.
When To Varnish
Even if a painting feels dry to the touch, oil paint can take months to fully cure. Wait at least 6 months before applying a final varnish, unless you use a special “retouch varnish. ” Applying varnish too early can trap solvents and cause cloudiness.
How To Test If Paint Is Dry
Gently press your fingernail into the paint in an unimportant area. If it leaves a mark, the paint is still soft. If not, it is dry to the touch, but may not be fully cured inside.
Credit: www.leannerathart.com
Useful Resources
For further reading on materials and safety, visit the Winsor & Newton Oil Colour Drying Times page.
Frequently Asked Questions
How Long Does Oil Paint Usually Take To Dry On Canvas?
A thin layer of oil paint can take 2–5 days to dry under normal conditions. Thicker layers or slow-drying colors might need a week or more. Using fast-drying mediums or warm, dry conditions can speed this up.
Can I Use A Hairdryer To Dry Oil Paint?
No, using a hairdryer is not safe. The hot air can damage the canvas, cause cracking, or blow dust onto the wet paint. It also does not help oil paint’s chemical drying process, which needs oxygen, not heat.
What Is The Safest Way To Speed Dry Oil Paint?
The safest way is to use thin layers, choose fast-drying pigments, and improve airflow in a warm, dry room. Adding a small amount of alkyd medium can also help without risking damage.
Does Acrylic Gesso Primer Help Oil Paint Dry Faster?
Yes, using an acrylic gesso primer prevents the oil from soaking into the canvas, keeping the paint layer thin and exposed to air, which helps it dry faster than painting on unprimed canvas.
Is There A Downside To Using Siccatives Or Driers?
Yes, overusing siccatives can cause the paint to wrinkle, crack, or become brittle. Always follow the manufacturer’s instructions and use them sparingly, only when needed.
Speed drying oil paint on canvas is possible with the right techniques and a bit of planning. Use fast-drying mediums, thin layers, the right pigments, and smart studio conditions to achieve great results without sacrificing your art’s quality or safety.
With experience, you’ll learn the best combination for your own style and environment.

Credit: www.whataportrait.com