Are you looking for a fun and creative way to make your reading time even more special? Making your own DIY painted bookmarks is easier than you think, and it lets you add a personal touch to every book you open.
Whether you love bright colors, delicate designs, or simple patterns, these easy tips will help you create beautiful bookmarks that stand out. Keep reading to discover simple techniques that anyone can master, plus clever tricks to make your bookmarks last longer and look professional.
Ready to turn a simple strip of paper into a work of art? Let’s get started!
Materials Needed
Creating DIY painted bookmarks starts with the right materials. Choosing quality supplies makes your bookmarks look great and last longer. Gather everything you need before starting for a smooth crafting process.
Best Paper Types
Thick paper holds paint without warping. Watercolor paper works best for vibrant colors. Cardstock is sturdy and easy to handle. Avoid thin printer paper as it may tear or wrinkle.
Recommended Paints
Watercolor paints offer soft, blendable colors. Acrylic paints give bright, bold finishes. Use non-toxic paints for safe crafting. Test paints on scrap paper first to check colors.
Additional Tools
Brushes of different sizes help with details and coverage. A pencil and eraser let you sketch designs lightly. A ruler ensures straight edges for neat bookmarks. Seal your work with Mod Podge or clear varnish to protect the paint.

Credit: www.amazon.com
Basic Painting Techniques
Basic painting techniques form the foundation of creating beautiful DIY painted bookmarks. These simple skills help you control colors, shapes, and textures. Start with easy methods before trying complex designs. Practice is key to improving your art and making each bookmark unique. Below are essential tips to guide you through watercolor, acrylic painting, and brush use.
Watercolor Tips
Watercolor paints create soft, transparent effects. Use clean water to dilute colors for light shades. Apply paint on damp paper for smooth color blending. Avoid using too much water to prevent paper wrinkles. Let each layer dry before adding another to keep colors vibrant. Experiment with salt or plastic wrap to make interesting textures. Use light strokes to keep colors bright and fresh.
Acrylic Painting Basics
Acrylic paints dry fast and offer solid colors. Thin the paint with water for a smooth finish. Apply multiple thin layers instead of one thick coat. Use a palette to mix colors and create new shades. Clean brushes quickly to avoid paint drying on them. Acrylics work well for bold designs on bookmarks. Try adding details after the base layer dries for a sharp look.
Using Brushes Effectively
Choose brushes with different shapes and sizes for variety. Flat brushes help paint large areas smoothly. Round brushes are perfect for details and fine lines. Hold the brush lightly for better control. Use gentle strokes to avoid damaging the paper. Clean brushes in water between colors to keep paints pure. Practice brush techniques to add texture and depth to your bookmarks.
Creative Design Ideas
Creative design ideas add charm to your DIY painted bookmarks. They make your bookmarks stand out and reflect your style. Simple touches can turn plain bookmarks into art pieces. Experiment with different themes and techniques for unique results.
Nature-inspired Themes
Nature offers endless inspiration for bookmark designs. Paint leaves, flowers, or trees with soft colors. Use watercolor to create gentle gradients and textures. Small animals like birds or butterflies also look lovely. These themes bring calm and beauty to your reading time.
Abstract Patterns
Abstract patterns let you play with shapes and colors freely. Create stripes, dots, or swirls in vibrant hues. Mix contrasting colors for a bold effect. Use brushes or sponges for different textures. Abstract designs suit every taste and brighten any book page.
Personalized Lettering
Add a personal touch with custom lettering on your bookmarks. Paint names, favorite quotes, or inspiring words. Use simple fonts or practice calligraphy for elegance. Highlight letters with colors or small decorations. Personalized lettering makes bookmarks meaningful gifts too.
Step-by-step Painting Process
Creating your own painted bookmarks is a fun and rewarding craft. The painting process is simple and enjoyable. Following clear steps will help you achieve beautiful results. This guide breaks down the painting process into easy parts.
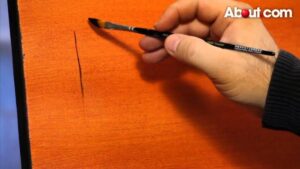
Preparing The Paper
Start with a thick paper or watercolor paper. Cut the paper into bookmark-sized strips. Lightly sand the surface for better paint grip. Use a pencil to mark light outlines if needed. Make sure the paper is clean and dry before painting.
Applying Base Layers
Wet the paper slightly with clean water to avoid harsh edges. Apply a light wash of color as your base layer. Use broad, even strokes to cover the entire bookmark. Let each layer dry before adding another. Multiple thin layers create a smooth, rich background.
Adding Details
Use fine brushes for small designs and patterns. Paint simple shapes like flowers, leaves, or abstract lines. Let the paint dry between colors to avoid mixing. Add highlights and shadows for depth. Finish with a clear sealant to protect your artwork.
Sealing And Finishing
Sealing and finishing your DIY painted bookmarks protects your artwork. It keeps colors bright and stops smudging. Proper sealing also makes bookmarks last longer and feel smooth. This step is simple but important for a neat, professional look.
Using Mod Podge
Mod Podge is a popular sealant for handmade bookmarks. Use a small brush to apply a thin coat over the paint. Let it dry completely before adding a second coat. This creates a clear, protective layer that stops paint from rubbing off. It also adds a soft shine to your bookmark.
Laminating Bookmarks
Laminating gives strong protection to your bookmarks. You can use a home laminator or self-adhesive laminating sheets. Place your bookmark between two sheets and seal it. This method makes bookmarks waterproof and very durable. It also keeps edges clean and crisp.
Edge Finishing Tips
Neat edges make bookmarks look polished. After sealing, trim edges carefully with scissors or a craft knife. Round the corners to prevent them from bending or tearing. For extra strength, add a strip of washi tape or clear tape along the edges. This stops fraying and adds style.
-min.jpg)
Credit: www.doodlecraftblog.com
Advanced Techniques
Advanced techniques can elevate your DIY painted bookmarks from simple to stunning. These methods add depth, texture, and artistic flair. They help create unique, eye-catching bookmarks perfect for gifts or personal use.
Mixed Media Effects
Mixed media combines different art materials on one bookmark. Use watercolor with ink or colored pencils for contrast. Layer torn paper or fabric pieces to add interest. Glue small embellishments like sequins or beads carefully. This approach creates a rich, dynamic look that stands out.
Embossing And Textures
Embossing raises parts of your bookmark, adding a tactile feel. Use embossing powders and a heat tool for raised designs. Try texture paste or modeling paste to create patterns. Press leaves or lace into wet paste for natural textures. These techniques give your bookmarks a professional, artistic touch.
Incorporating Calligraphy
Calligraphy adds elegance and personal style to bookmarks. Practice simple lettering with brush pens or markers. Write favorite quotes or words that inspire you. Use contrasting colors to make the text pop. Calligraphy makes each bookmark special and more meaningful.
Diy Bookmark Ideas For Kids
DIY bookmark projects are perfect for kids. They inspire creativity and make reading more fun. Kids enjoy crafting their own unique bookmarks. These simple ideas help children explore colors and shapes. Plus, they are easy to do with common art supplies. Try these fun DIY bookmark ideas for kids at home or school.
Finger Painting Fun
Finger painting lets kids use their hands to create art. They can dip fingers in paint and press on paper strips. This method produces bright, colorful bookmarks. Kids love the tactile experience of finger painting. It encourages imagination and free-form designs. Let the paint dry before using the bookmark to avoid smudges.
Simple Stamping Methods
Stamping is a quick way to decorate bookmarks. Use stamps with shapes like stars, hearts, or animals. Kids can press the stamp on ink pads and then onto the paper. This makes consistent, neat patterns easily. Homemade stamps from sponges or potatoes work well too. Stamping adds a fun texture and look to bookmarks.
Easy Doodle Designs
Doodling is perfect for kids who like drawing. Give them markers or colored pencils to sketch on bookmark strips. Simple shapes, smiley faces, or patterns work great. Doodles let kids express their style freely. These bookmarks become personal and special. Encourage kids to add their names or favorite words.
-min.jpg)
Credit: www.doodlecraftblog.com
Troubleshooting Common Issues
Troubleshooting common issues can help make your DIY painted bookmarks look better and last longer. Small problems often occur during painting. Fixing these problems early saves time and keeps your bookmarks neat.
Here are some tips to handle common problems like paper warping, paint smudges, and color bleeding. Follow these simple steps to improve your bookmark-making process.
Preventing Paper Warping
Paper warping happens when too much water soaks the paper. Use less water to keep the paper flat. Paint in thin layers and wait for each layer to dry before adding more.
Place your painted bookmarks under a heavy book to press them flat. Use thick watercolor paper or cardstock to reduce warping. Avoid soaking the paper completely to keep it steady.
Fixing Paint Smudges
Paint smudges occur when paint is still wet and touches other surfaces. Let the paint dry fully before touching or stacking bookmarks. Use a hairdryer on low heat to speed up drying.
If smudges happen, gently wipe the area with a damp cloth before it dries hard. For stubborn smudges, lightly sand the surface with fine sandpaper and repaint the spot carefully.
Avoiding Color Bleeding
Color bleeding happens when wet paint mixes with other colors. Paint one color at a time and let it dry before adding another. Use a small brush for detailed areas to control paint flow.
Mix colors on a palette, not directly on the paper. Seal your bookmarks with a thin coat of clear varnish or Mod Podge to keep colors from running after drying.
Display And Gift Tips
Displaying and gifting your DIY painted bookmarks can make the experience more special. Thoughtful presentation adds charm and shows care. It also inspires others to enjoy your creative work.
Creative Packaging Ideas
Wrap bookmarks in clear cellophane bags for a neat look. Add a ribbon or twine to secure the top. Use small kraft paper envelopes for a rustic style. Include a personalized note or tag for a warm touch. You can also slide bookmarks into handmade paper sleeves. Decorate sleeves with stamps or stickers that match the bookmark design.
Bookmark Gift Sets
Combine several bookmarks into a set for a fuller gift. Choose a theme, like nature, quotes, or abstract art. Tie the set with a colorful ribbon or place them in a small box. Add a matching card or a book to complete the gift. Sets encourage recipients to try different designs and styles. They make perfect presents for book lovers, teachers, or friends.
Using Bookmarks In Journals
Bookmarks work well in journals and planners. Use them to mark important pages or sections. Painted bookmarks add a splash of color to plain journal pages. You can create custom bookmarks for daily motivation or goals. They also help keep your place while reading multiple books. Gift bookmarks to journal lovers as practical and pretty tools.
Frequently Asked Questions
What Is The Best Material For Diy Bookmarks?
The best material for DIY bookmarks is thick cardstock or watercolor paper. These offer durability and hold paint well. Laminating adds extra protection and longevity.
How Do You Seal Handmade Bookmarks?
Seal handmade bookmarks by applying two thin coats of Mod Podge with a foam or craft brush after paint dries. Let each coat dry fully. This protects the paint and prevents scratches.
How To Make A Bookmark With Paint?
Wet the paper lightly with clear water, then paint your design using watercolor or acrylics. Let it dry fully. Seal with Mod Podge or clear varnish for durability. Cut to desired size, and optionally laminate for extra protection. Your painted bookmark is ready to use.
How To Make Your Own High Quality Bookmarks?
Design your bookmark using Canva or paint by hand on thick paper. Add watercolor or illustrations. Seal with Mod Podge for durability. Laminate if possible. Cut to size and enjoy your unique, high-quality bookmark.
Conclusion
Creating DIY painted bookmarks brings joy and creativity to your reading time. Use simple supplies and follow easy steps for best results. Personalize each bookmark with colors and designs you love. Seal your artwork to keep it bright and lasting longer.
Handmade bookmarks also make thoughtful gifts for friends and family. Keep practicing to improve your painting skills and try new techniques. Enjoy the process and have fun adding art to your books!