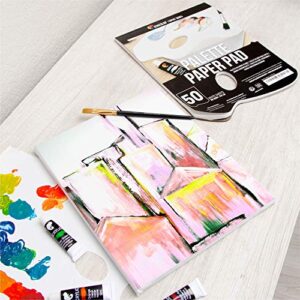
Acrylic painting is a rewarding hobby, but it can also be frustrating when your paint dries too quickly on the palette. This is where a wet palette comes in. Many artists buy expensive wet palettes from art stores, but you can easily make your own at home. In fact, a DIY wet palette can be just as effective as commercial options, and you can customize it to fit your workspace and style.
Let’s explore why a wet palette is important, what you need to build one, and step-by-step instructions to create your own. By the end, you’ll have everything you need to keep your acrylics workable and your painting sessions more enjoyable.
Why Use A Wet Palette For Acrylics?
A wet palette keeps acrylic paints moist for hours or even days. This is especially useful for blending colors, glazing, and working on detailed miniatures. Here are some benefits you’ll notice:
- Slower paint drying: The palette keeps moisture in the paint, giving you more time to work.
- Better color mixing: Paints stay soft and blendable.
- Less waste: You don’t have to throw away dried lumps of paint.
- Cost savings: You use less paint and avoid buying new supplies as often.
Many beginners don’t realize that the type of palette can affect how their art turns out. Using a traditional plastic or wooden palette can cause acrylics to dry in under 10 minutes. With a wet palette, you can paint at your own pace.
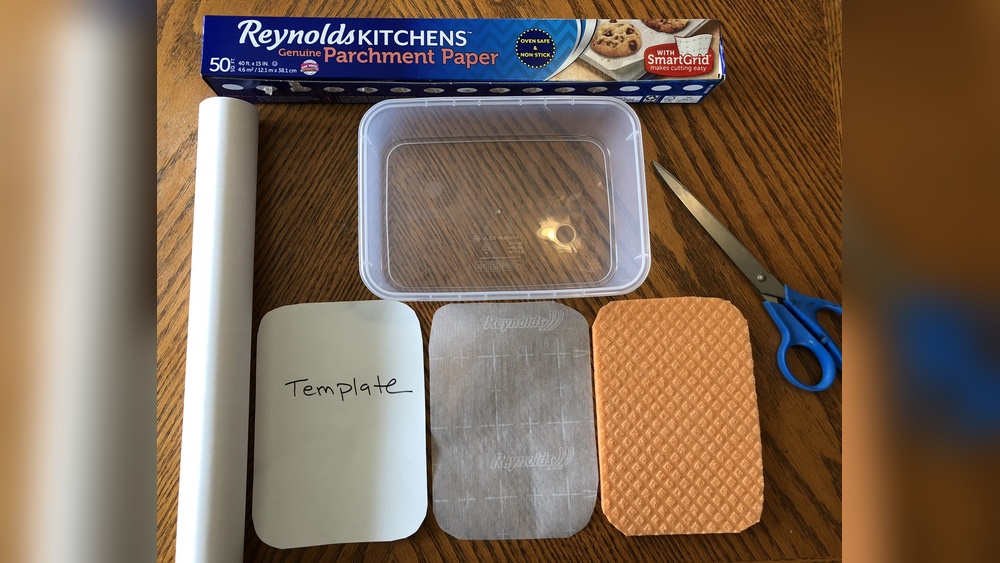
Materials Needed To Make A Diy Wet Palette
You probably have most of the materials at home. Choose the best options for your needs, and don’t worry about being perfect the first time. Here’s what you’ll need:
- A shallow, airtight container (food storage box, Tupperware, or takeout box)
- Baking parchment paper (not wax paper)
- Absorbent material (kitchen paper towels, cellulose sponge, or microfiber cloth)
- Clean water
- Scissors
- Ruler or tape measure
- (Optional) Small spray bottle for misting
- (Optional) Pen for marking sizes
Choosing the right size matters. Most artists find that a container about 7–10 inches wide is perfect, but you can go larger or smaller. The container should close tightly to keep moisture inside.
Comparing Container Types
You may wonder if it’s worth buying a special box or just using what’s in your kitchen. Here’s a quick comparison:
| Container Type | Pros | Cons |
|---|---|---|
| Plastic food box | Cheap, airtight, easy to find | May stain over time |
| Glass lunch box | Doesn’t stain, easy to clean | Heavier, breakable |
| Takeout container | Free, lightweight | Lid may not be fully airtight |

Credit: cherylboglioli.com
Step-by-step Guide: Building Your Wet Palette
Let’s get practical. Here’s how to make your own wet palette in less than 10 minutes.
1. Prepare The Container
Wash your container with soap and water. Dry it completely. If you’re using a recycled takeout box, make sure there’s no leftover smell or oil.
2. Cut The Absorbent Layer
Take your paper towels, sponge, or cloth. Cut it to fit the bottom of your container. It should lay flat with no wrinkles. If you use a sponge, make sure it’s not too thick—less than half an inch is best.
Pro tip: Use 2–3 layers of paper towels for extra water retention.
3. Add Water
Pour cold, clean water over the absorbent layer until it’s fully soaked but not swimming in water. Tilt the box to pour out any extra water. You want the layer damp, not flooded.
4. Cut And Place The Baking Parchment
Cut a piece of baking parchment to fit the inside of the box. Place it on top of the wet paper towels or sponge. The parchment should lie flat and touch the wet surface below.
Many beginners accidentally use wax paper, which repels water. Always use baking parchment—it lets water vapor move through and keeps paint moist.
5. Test The Surface
Touch the parchment. It should feel cool and slightly damp, but not soggy. If it’s dry, add a bit more water under the parchment. If it’s too wet, lift the parchment and remove some water.
6. Add Paint And Start Mixing
Now, squeeze out your acrylic paints directly on the parchment. The paint will stay usable much longer. Mix colors as you normally would. If you close the lid between sessions, your paint will last even longer.
Tips To Keep Your Wet Palette Working Well
A homemade wet palette is easy to use, but there are some tricks that make it even better.
Change The Water Regularly
After a few days, the water can get cloudy or grow mold. Change the paper towels and water every 3–4 days to keep things fresh.
Keep It Airtight
Always close the lid tightly when not painting. This keeps the moisture inside and your paints soft.
Control The Humidity
In very dry climates, your wet palette can dry out faster. Mist the parchment with a spray bottle if needed.
Don’t Overload With Paint
Use only as much paint as you need for the session. Thick piles can become watery if left for days.
Add A Drop Of Preservative
Some artists add a tiny drop of dish soap or a pinch of baking soda to slow mold growth. This is optional but can help if you live in a hot climate.
Example: How Long Does Paint Last?
On a regular plastic palette, acrylic paint dries in 10–30 minutes. On a good DIY wet palette, it can stay workable for 8–24 hours, sometimes even longer with the lid closed. Here’s a comparison:
| Palette Type | Open Time (approx.) |
|---|---|
| Plastic palette | 10–30 minutes |
| DIY wet palette | 8–24 hours |
| Commercial wet palette | 12–36 hours |

Credit: www.youtube.com
Common Mistakes And How To Avoid Them
Even a simple project like this can go wrong if you miss some details. Here’s what to watch out for:
- Using wax paper instead of baking parchment. Wax paper won’t let water vapor through, and your paint dries out fast.
- Too much or too little water. If there’s a pool of water, the paint will get runny. If it’s too dry, the paint will dry out as usual.
- Mold growth. If you leave your palette for over a week, mold can appear. Clean your palette often and replace the paper.
- Container not airtight. If air gets in, water evaporates quickly and the palette dries up.
- Parchment paper wrinkles. Paint can sink into folds and mix with water. Always lay parchment flat.
Upgrades And Customizations
Once you’re comfortable with the basics, you can experiment with upgrades for your DIY wet palette.
Try Different Absorbent Layers
Some artists use cellulose sponges for a longer-lasting damp base. Others prefer microfiber cloths, which don’t break down as quickly as paper towels.
Add A Divider
If you paint miniatures, you might want separate sections for different colors. Use strips of parchment to divide the palette.
Create A Travel Version
Choose a small, flat container with a secure lid. This makes it easy to bring your wet palette to classes or painting sessions with friends.
Use Colored Parchment
Light gray parchment can make it easier to judge color values, especially with whites and pale colors.
Experiment With Additives
Some advanced painters add a drop of acrylic retarder to the water layer, which slows drying even more. Be careful—too much can make your paint sticky.

Credit: www.youtube.com
Cleaning And Maintenance
A wet palette is reusable if you keep it clean. Here’s how to keep yours in top shape:
- Replace the parchment and paper towels or sponge every week or when you see mold.
- Wash the container with mild soap. Avoid harsh chemicals that could affect your paints.
- Let everything dry completely before storing for a long time.
A well-maintained wet palette can last for months or even years with regular care.
When To Replace Your Wet Palette Materials
Not sure when it’s time to start fresh? Here are signs you need to change things out:
- Paint soaks through the parchment and mixes with the water layer.
- Paper towels start to break down or smell odd.
- Mold or mildew appears.
- Parchment becomes stained or too wrinkled to use.
Don’t wait too long—fresh materials give the best results.
Is A Diy Wet Palette As Good As A Store-bought One?
Many artists wonder if making your own wet palette is worth it. The answer is yes, especially for beginners and hobbyists. A commercial wet palette may last longer or have special features, but most DIY versions perform just as well.
Plus, you save money and can easily make another if needed.
Here’s a quick comparison:
| Feature | DIY Wet Palette | Commercial Wet Palette |
|---|---|---|
| Cost | $2–$10 | $15–$40 |
| Customizable size | Yes | Limited |
| Replacement cost | Very low | High |
| Performance | Excellent | Excellent |
Non-obvious tip: Many commercial wet palettes use the same materials—plastic box, absorbent pad, and parchment paper—but charge much more. Your DIY version works the same for most painting needs.
Frequently Asked Questions
What Is The Ideal Thickness For The Absorbent Layer?
A layer about 1/4 inch thick is usually perfect. If you use paper towels, stack 2–3 sheets. For sponges, cut them thin. Too much thickness can hold too much water and make the paint runny.
Can I Use Wax Paper If I Don’t Have Baking Parchment?
No. Wax paper repels water and won’t let moisture through to the paint. Your acrylics will dry just as fast as on a regular palette. Always use baking parchment or “parchment paper” (the kind used for baking).
How Do I Stop Mold From Growing In My Wet Palette?
Change the water and absorbent layer every few days. Wash the container weekly. You can also add a small drop of dish soap or a pinch of baking soda to slow mold growth. Keep the palette in a cool, dry place when not in use.
Can I Store My Wet Palette In The Fridge?
Yes, placing your wet palette in the refrigerator can keep paint fresh for up to a week. Be sure the container is airtight and label it clearly so no one mistakes it for food.
Where Can I Learn More About Wet Palettes?
For more details on using and maintaining wet palettes, you can visit Wikipedia’s Wet Palette article, which explains the science and different art uses.
A DIY wet palette is a simple tool that can transform your acrylic painting. With a few household materials and these practical steps, you’ll save time, money, and frustration. Whether you’re painting miniatures or large canvases, this project gives you better color control and more creative freedom.
Enjoy your painting sessions—your palette is now as ready as you are!