
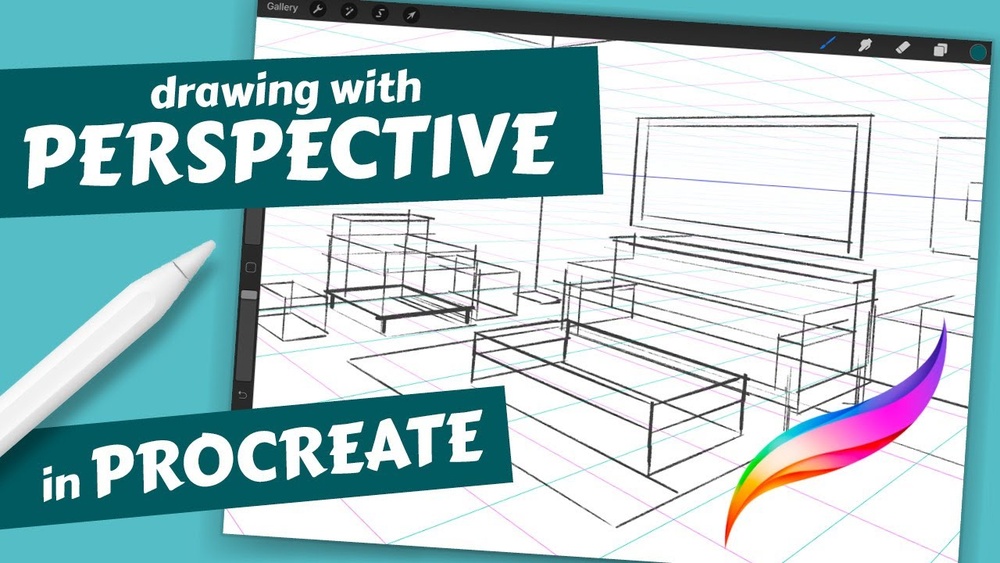
Are you ready to transform your digital art with stunning depth and realism? Mastering perspective painting in Procreate can elevate your creations from flat sketches to dynamic scenes that pull viewers right into your world.
Whether you’re drawing cityscapes, interiors, or landscapes, understanding how to use Procreate’s powerful perspective tools will make your work look professional and captivating. In this guide, you’ll learn simple, step-by-step techniques to set up perspective grids, position vanishing points, and create believable depth—all tailored for artists like you who want to unlock the full potential of Procreate.
Stick with me, and by the end, you’ll be painting with confidence and precision, making your art truly stand out. Let’s dive in!
Setting Up Perspective Guides
Setting up perspective guides in Procreate helps create accurate and realistic drawings. These guides assist in aligning objects and shapes according to one or more vanishing points. Proper setup saves time and improves the overall look of your painting.
Follow simple steps to access and customize these guides before you start sketching. This section explains how to find the drawing guides, select perspective types, and adjust vanishing points.
Accessing Drawing Guides
Open your canvas in Procreate. Tap the Actions menu, shown as a wrench icon. Select the Canvas tab, then tap “Edit Drawing Guide.” This opens the drawing guide options. Turn on the drawing guide toggle to activate the guides on your canvas.
Choosing Perspective Types
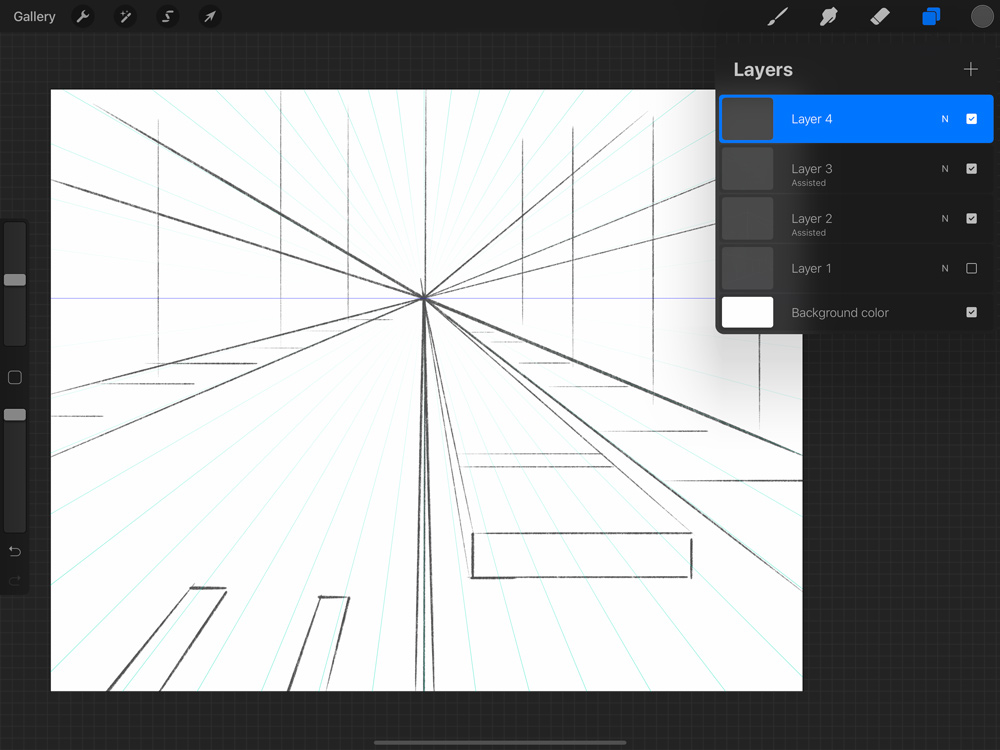
At the bottom of the drawing guide screen, tap “Perspective.” You will see options for 1-point, 2-point, and 3-point perspective guides. Each type sets different vanishing points for your drawing. Choose the type that fits your project needs.
Adjusting Vanishing Points
Drag the vanishing points on the screen to place them where you want. Moving these points changes the direction and depth of your perspective. Adjust them carefully to match the scene you want to create. This step is key to making your painting look natural.
Credit: bardotbrush.com
Using Drawing Assist For Precision
Using Drawing Assist in Procreate helps you create clean, precise perspective lines. It guides your strokes along perspective grids automatically. This feature makes complex angles and vanishing points easier to handle. You can focus more on your artwork and less on technical adjustments. Drawing Assist improves accuracy in perspective painting and speeds up your workflow.
Enabling Drawing Assist
First, open your canvas in Procreate. Tap the Actions menu, then choose Canvas. Select Edit Drawing Guide to open guide settings. Tap the Perspective option to activate the perspective grid. Adjust the grid to fit your scene’s vanishing points. Exit the menu and tap the layer you want to use. Turn on Drawing Assist from the layer’s options.
Aligning Strokes To Perspective
With Drawing Assist active, your brush strokes snap to the grid lines. This keeps all lines aligned with the perspective vanishing points. Draw straight edges and shapes without worrying about manual corrections. It helps maintain consistent angles across your artwork. This precision brings depth and realism to your painting.
Switching Between Vanishing Points
Procreate allows multiple vanishing points in one perspective guide. You can switch between them by moving the grid handles. Drag the vanishing points to new positions as your scene changes. Drawing Assist will adjust your strokes to the active vanishing point. This flexibility lets you create complex perspective setups easily.
Creating Depth With Size And Overlapping
Creating depth in your Procreate perspective paintings makes your artwork look realistic and engaging. Two simple techniques help achieve this: size variation and overlapping. Both guide the viewer’s eye and add a sense of space. They turn flat images into scenes that feel alive and three-dimensional.
Applying Size Variation
Size variation means changing the size of objects based on their distance. Objects closer to the viewer should be larger. Objects farther away should appear smaller. This size difference creates a natural depth effect. For example, draw a tree large in the foreground and smaller trees in the background. This trick tricks the eye into seeing space.
Using Overlapping Objects
Overlapping means placing one object in front of another. When one object covers part of another, the brain understands which is closer. Overlapping adds layers to your painting. It shows clear distance between objects. For example, a person standing in front of a building will overlap the building. This overlap creates a strong sense of depth.
Enhancing Three-dimensional Feel
Combine size variation and overlapping to boost the 3D effect. Use Procreate’s layers to organize objects by distance. Paint larger, detailed objects in front layers. Paint smaller, less detailed objects in background layers. Shadows and light also help enhance depth. Use darker shadows on closer objects and lighter tones on distant ones. This mix makes your scene pop with realism.
Mastering One-point Perspective
Mastering one-point perspective in Procreate helps create depth in your paintings. It makes flat images look three-dimensional. This technique uses a single vanishing point on the horizon line. All lines guide toward this point, creating a realistic sense of space.
This method is perfect for beginners and useful for many scenes. Follow these steps to draw accurate and balanced perspective art.
Setting Up Horizon Line
Start by opening your canvas in Procreate. Tap the Actions menu, then select Canvas. Choose Edit Drawing Guide and tap Perspective. A grid with a vanishing point appears.
Drag the horizon line up or down to set eye level. This line represents where the sky meets the ground. Adjust the vanishing point along the horizon to suit your composition.
The horizon line anchors your perspective and guides all elements in your painting.
Drawing Objects Along Vanishing Point
Use the vanishing point to draw shapes like roads, buildings, or hallways. Start with simple boxes or rectangles. Connect their edges to the vanishing point using straight lines.
These guide lines help keep objects aligned in space. Objects get smaller as they approach the vanishing point, showing distance. Use the Drawing Assist feature to snap your strokes to the guide.
Keep shapes consistent with the perspective for a natural look.
Common Use Cases
One-point perspective works well for scenes facing the viewer directly. Examples include streets, railway tracks, and rooms. It also suits objects like furniture or vehicles viewed head-on.
Artists use this technique to create depth quickly and clearly. It helps in storytelling by guiding the viewer’s eye toward a focal point.
Practice this method to improve your spatial understanding and drawing skills.
Exploring Two-point Perspective
Two-point perspective is a popular drawing method to create depth and dimension. It uses two vanishing points on the horizon line. This technique makes objects look more realistic and natural. Artists often use it to draw buildings, streets, and other angled structures.
Procreate offers easy tools to help you work with two-point perspective. Learning to place vanishing points and sketch lines correctly improves your artwork. This section breaks down the steps to use two-point perspective effectively.
Positioning Dual Vanishing Points
Start by enabling the drawing guide in Procreate. Choose the perspective option and select two-point perspective. Place the two vanishing points far apart on the horizon line. The distance between these points affects the angle and depth of your drawing.
Keep the horizon line at eye level. You can move the vanishing points to fit your scene. Proper placement creates a balanced and believable perspective.
Sketching Angled Structures
Use the vanishing points to draw angled lines. Start with vertical lines for walls or edges. Connect the top and bottom of these lines to each vanishing point. This forms the basic shape of your structure.
Add details by drawing more lines that follow the vanishing points. Use Procreate’s drawing assist feature to keep lines straight and aligned. This helps maintain accuracy and clean edges.
Tips For Realism
Vary the sizes of objects to show distance. Closer objects should appear larger, and farther ones smaller. Add shadows and highlights to enhance the 3D effect. Use overlapping shapes to create depth in your scene.
Keep your lines light during the sketch phase. Refine and darken them in the final drawing. Practicing these steps will improve your perspective skills quickly.
Working With Three-point Perspective
Working with three-point perspective in Procreate gives your artwork a sense of height and depth. This technique adds a vertical vanishing point to the usual two points. It creates more realistic and dramatic views, especially for tall buildings or objects.
Three-point perspective can feel tricky at first, but Procreate’s tools make it easier. You set up three vanishing points that guide your lines and shapes. This method helps you draw objects that look natural and dynamic.
Understanding Vertical Vanishing Point
The vertical vanishing point controls how objects appear to rise or fall. It sits above or below the horizon line, depending on the viewer’s angle. Lines that go up or down will meet at this point. This creates the illusion of height or depth in your drawing.
In Procreate, you can move this point to change your angle. Pull it higher for a bird’s-eye view or lower for a worm’s-eye view. This flexibility lets you design scenes with strong perspective effects.
Creating Dramatic Angles
Three-point perspective is perfect for dramatic angles. It bends lines toward three points instead of two. This bends the eye and adds excitement to your composition. Buildings seem taller and spaces feel bigger.
Use this perspective to show steep towers or deep streets. It works well for cityscapes, fantasy art, and complex scenes. In Procreate, use the drawing guide to place all three vanishing points. This helps keep your lines crisp and accurate.
When To Use Three-point Perspective
Use three-point perspective when you want more realism in height and depth. It suits scenes with tall objects or extreme viewpoints. For example, looking up at a skyscraper or down from a cliff.
This perspective adds drama and scale that two-point perspective cannot. Avoid it for simple scenes or flat landscapes. Three-point perspective is best when you want to impress with striking views.
Adding Details With Perspective Layers
Adding details with perspective layers enhances the realism of your painting. These layers help create a sense of depth and space. Each layer can represent different planes in your artwork. This separation makes it easier to manage and refine elements. Details like shading, textures, and lighting respond better to perspective when organized properly. Using perspective layers in Procreate keeps your work clean and flexible.
Organizing Layers For Depth
Arrange your layers based on distance from the viewer. Place background elements on lower layers and foreground elements on top layers. Name each layer clearly for easy identification. Lock layers that are finished to avoid accidental changes. Group related layers to keep your workspace tidy. This organization helps maintain the illusion of depth in your painting. It also speeds up your workflow by reducing confusion.
Shading And Lighting Effects
Apply shading that matches the perspective of your scene. Shadows should follow the angle of light sources and recede into the distance. Use softer, lighter shading for faraway objects. Darker and sharper shadows work well for close objects. Add highlights to surfaces facing the light to boost realism. Adjust opacity and blending modes on layers to achieve smooth lighting effects. Consistent shading and lighting unify the painting’s perspective.
Incorporating Textures
Textures add richness and detail to your painting’s surfaces. Use different brushes to mimic materials like wood, stone, or fabric. Scale textures smaller for distant objects to maintain perspective. Larger, detailed textures suit foreground elements. Place texture layers above base colors to preserve depth. Blend textures subtly to avoid overpowering the scene. Textures make your perspective painting more engaging and believable.

Credit: www.reddit.com
Common Challenges And Fixes
Perspective painting in Procreate offers many creative possibilities but also brings challenges. These issues can slow down your workflow and affect the quality of your artwork. Knowing common challenges and how to fix them helps you paint with more confidence and ease. This section covers key problems and practical solutions for smooth perspective painting in Procreate.
Correcting Perspective Distortions
Perspective distortions happen when lines or shapes do not align with vanishing points. This makes objects look warped or unnatural. To fix this, use Procreate’s Perspective Drawing Guide. Adjust the vanishing points carefully to match your scene.
Use the Drawing Assist feature to snap your brush strokes to the guide. This keeps lines straight and consistent. If distortion appears, select the affected part and use the Transform tool. Move or warp elements to align them properly with the perspective grid.
Managing Complex Compositions
Complex scenes with many objects can be hard to manage. Overlapping elements may confuse the perspective. Break the scene into layers. Assign each layer to a different part of the composition, such as foreground or background.
Label layers clearly to avoid confusion. Lock layers that are finished to prevent accidental changes. Use grouping to keep related objects together. This helps maintain order and makes editing easier as you progress.
Using Undo And Redo Effectively
Undo and redo are essential tools when painting in Procreate. They let you quickly fix mistakes or try different ideas without worry. Use undo for small errors or unwanted strokes. Redo helps if you change your mind after undoing.
Avoid relying too much on undo. Take time to plan your strokes and layers carefully. This reduces mistakes and keeps your workflow steady. Learn shortcut gestures for undo and redo to speed up your painting process.
Tips For Smooth Workflow
Working smoothly in Procreate helps you focus on your art. A good workflow saves time and reduces frustration. Simple habits and smart tools keep your painting process clean and clear. Use these tips for smooth perspective painting.
Customizing Brush Settings
Adjust brush settings to suit your style and the project. Change size, opacity, and streamline for cleaner lines. Use a steady brush to draw crisp perspective lines. Save these settings for quick use later. This keeps your strokes consistent and neat.
Saving Perspective Templates
Create perspective grids that match your scene and save them as templates. Load these templates to start new paintings faster. It avoids redrawing guides every time. Templates help keep your vanishing points and horizon lines consistent. This saves time and keeps your work accurate.
Using Reference Images
Import reference images into Procreate to guide your perspective. Place photos beside your canvas for easy checking. It helps you capture real-world angles and proportions. Lock the reference layer so it won’t move by mistake. Reference images improve the realism and depth of your work.

Credit: www.youtube.com
Frequently Asked Questions
How To Do Perspective In Procreate?
Open Actions > Canvas, tap Edit Drawing Guide, select Perspective. Adjust vanishing points and enable Drawing Assist for accurate perspective drawing.
Can You Do 4 Point Perspective In Procreate?
Procreate supports up to 3-point perspective natively. For 4-point perspective, use custom grids or manual drawing techniques.
How To Set Up A 3 Point Perspective?
Set three vanishing points: two on the horizon and one above or below. Draw lines converging to each point. Use these lines to guide your shapes and maintain accurate 3-point perspective.
How To Add Perspective To Painting?
Add perspective by drawing a horizon line and vanishing points. Use converging lines to guide object placement. Vary object size and overlap elements to create depth. Apply shading and detail to enhance three-dimensional effects.
Conclusion
Practice regularly to improve your perspective painting skills in Procreate. Use the drawing guides to keep lines accurate and clean. Remember to vary object sizes and overlap elements for depth. Keep exploring different vanishing points to create dynamic scenes. Stay patient and enjoy the creative process step by step.
Your artwork will gain more realism and interest over time. Perspective painting becomes easier with each digital sketch you make. Keep experimenting and have fun bringing your ideas to life.


