Are you ready to bring a touch of nature’s charm to your art collection? Painting a mushroom with acrylics is a fun and rewarding way to practice your skills while creating something truly unique.
Whether you’re a beginner or looking to add new techniques to your toolkit, this guide will walk you through every step. You’ll learn how to mix vibrant colors, create realistic textures, and capture the whimsical details that make mushrooms so fascinating.
Stick with me, and by the end, you’ll have a beautiful mushroom painting that you’ll be proud to display or gift. Let’s dive in and make your next acrylic masterpiece come to life!
Materials Needed
Gathering the right materials is key to a smooth painting experience. Preparing your tools before you start helps keep your focus on the creative process. Below are the essential materials you need to paint a mushroom with acrylics.
Acrylic Paints
Choose vibrant acrylic paints for bold colors. Basic colors like red, white, brown, yellow, and green will cover most mushroom shades. Pick high-quality paints to get smooth coverage and strong pigmentation. Acrylics dry fast, so working quickly is important.
Brush Types
Select a mix of brush shapes and sizes. Use flat brushes for covering large areas and round brushes for details. Small detail brushes work well for fine lines and texture. Synthetic brushes hold acrylic paint better and last longer.
Canvas And Palette
Pick a canvas size that suits your project. Small canvases are great for practice, while larger ones give more space to add detail. Use a palette for mixing colors. A plastic or glass palette is easy to clean after painting.
Additional Supplies
Keep water and paper towels nearby to clean brushes. Use a palette knife for mixing thick paint. Have a cup or container for rinsing brushes. Optional supplies include a pencil for sketching and masking tape to protect edges.
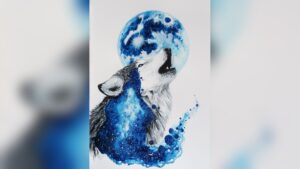
Credit: www.reddit.com
Preparing Your Workspace
Preparing your workspace is the first step to a smooth painting session. A well-organized area helps you focus on painting your mushroom with acrylics. It reduces distractions and keeps your tools ready. This section guides you through setting up your canvas, arranging paints and brushes, and creating a comfortable space with good lighting.
Setting Up Canvas
Choose a clean, flat surface for your canvas. Secure it on an easel or table to keep it steady. Make sure your canvas is the right size for your mushroom painting. Wipe it gently to remove dust or dirt. This helps the paint stick better and keeps your work neat.
Organizing Paints And Brushes
Arrange your acrylic paints by color for easy access. Use a palette to mix colors smoothly. Place brushes nearby, sorted by size and type. Keep a cup of water and a cloth handy for cleaning brushes. This setup saves time and prevents mess while painting.
Lighting And Comfort
Good lighting shows true colors and details clearly. Use natural light or a bright lamp focused on your canvas. Sit comfortably on a supportive chair to avoid strain. Keep your workspace tidy and quiet to stay relaxed. Comfort helps you paint better and enjoy the process.
Sketching The Mushroom
Sketching the mushroom is the first step before painting with acrylics. It helps create a clear plan for your artwork. A good sketch guides your brush and shapes the final piece. Start simple and build your drawing gradually. Use light pencil strokes so you can change details easily.
Focus on the main form of the mushroom. Observe its shape carefully. Keep your lines soft and loose to stay flexible. The sketch does not have to be perfect. It just needs to capture the basic structure and feel of the mushroom.
Basic Shapes
Begin by drawing the mushroom’s basic shapes. Most mushrooms have a round cap and a cylindrical stem. Use circles or ovals for the cap. Draw a straight or slightly curved line for the stem. These simple forms help you block out the mushroom’s size and position. Work lightly to avoid dark marks that are hard to erase.
Adding Details
Next, add details that make your mushroom unique. Draw the edges of the cap with gentle curves. Include gills under the cap using thin lines. Sketch small spots or textures on the cap if your mushroom has them. Add the ground or any nearby grass to place the mushroom in its environment. Keep these details light for easy corrections later.
Correcting Proportions
Look over your sketch to check proportions. The cap should not be too big or too small compared to the stem. Make sure the stem is straight or naturally bent. Adjust shapes to look balanced and natural. Use an eraser to fix any mistakes. Correct proportions help the mushroom look realistic and pleasing.
Base Colors
Starting with base colors is essential in acrylic mushroom painting. These colors form the foundation for your entire artwork. They set the mood and define the mushroom’s shape. Using the right base colors makes the painting process smoother and more enjoyable.
Choosing Color Palette
Pick colors that match the mushroom species you want to paint. Reds, browns, and creams often work well. Earthy tones create a natural look. Consider the background and lighting while choosing colors. Keep your palette limited for simplicity and balance.
Applying Background Colors
Begin by painting the background with broad, even strokes. Use muted or soft colors to avoid overpowering the mushroom. Let the background dry before moving on. This step helps the mushroom stand out clearly. Blend colors gently for a smooth backdrop.
Painting The Mushroom Base
Start with a mid-tone color to fill the mushroom’s main shape. Apply acrylic paint evenly using a medium brush. Avoid heavy layers to keep details visible. Let this layer dry before adding shadows or highlights. This base guides the next painting steps.
Adding Shadows And Highlights
Adding shadows and highlights brings your mushroom painting to life. It creates a sense of volume and makes the mushroom look three-dimensional. This step helps your artwork stand out with realistic lighting effects.
Creating Depth
Start by identifying the darkest areas on the mushroom. Use a darker shade of your base color to paint shadows. Focus on the underside of the cap and near the stem. This contrast makes the mushroom appear solid. Shadows add dimension and prevent the painting from looking flat.
Blending Techniques
Blend shadows smoothly into the base color for a natural look. Use a dry brush or soft brush strokes to soften edges. Gradually build layers, mixing lighter and darker tones. Blending creates a subtle transition between light and shadow. Avoid harsh lines for a more realistic effect.
Light Source Considerations
Decide where the light hits your mushroom. Paint highlights on the parts facing the light source. Use a lighter color or white to add highlights on the cap and stem. This shows reflection and adds brightness. Consistent light direction makes the painting believable and clear.
Detailing The Cap And Stem
Detailing the cap and stem gives your mushroom painting character and depth. This step focuses on texture, patterns, and subtle features. These details bring the mushroom to life and make your artwork stand out.
Texture Techniques
Use a dry brush to create rough textures on the cap. Dab lightly with a stiff brush for natural-looking bumps. Thin layers of paint help build up texture gradually. Mix a little white with your base color for highlights. This adds a soft shine and roundness to the cap. For a smooth stem, apply paint in thin, even strokes. Vary brush pressure to mimic natural surface changes.
Painting Spots And Patterns
Many mushrooms have spots or unique patterns on their caps. Use a small round brush to paint these details. Start with the base color, then add spots using white or lighter shades. Vary the size and shape for a natural look. Add faint shadows around spots to create depth. Patterns can be random or symmetrical, depending on the mushroom type.
Stem Details
Highlight the stem’s shape with subtle shading. Use light and dark tones to show curves and texture. Add thin lines to suggest fibrous strands or ridges. Use a small brush to paint tiny spots or marks on the stem. This detail adds realism and interest. Keep the stem’s color slightly lighter or darker than the cap for contrast.
Final Touches
Adding the final touches to your mushroom painting brings your artwork to life. This stage sharpens the overall look and highlights the tiny details. Small changes here can make your mushroom appear more realistic and vibrant. Follow these steps carefully to complete your acrylic mushroom painting with style and finesse.
Refining Edges
Use a fine brush to clean up the edges of your mushroom. Smooth any rough lines or uneven shapes. This step makes your mushroom stand out sharply against the background. Be patient and steady with your brush strokes for the best results.
Adding Small Details
Focus on tiny dots, lines, and textures on the mushroom cap and stem. These small marks add depth and character. Use a thin brush or even a toothpick for precision. Highlights and shadows here bring your mushroom closer to a natural look.
Sealing Your Painting
Protect your painting with a clear acrylic sealer. Choose a matte or glossy finish based on your preference. Spray or brush the sealer evenly over the surface. This step preserves colors and prevents damage from dust or moisture.
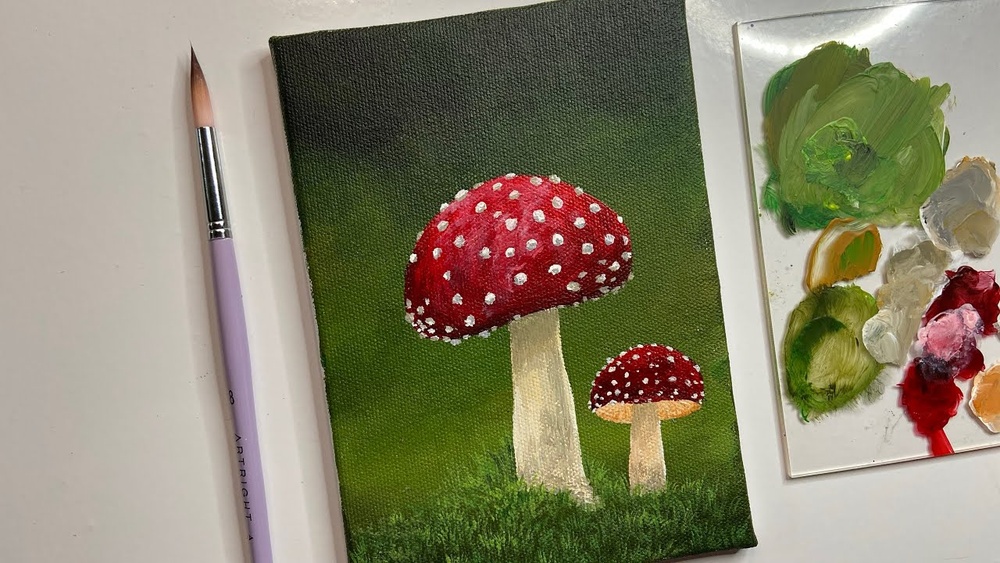
Credit: theartsherpa.com
Common Mistakes To Avoid
Painting mushrooms with acrylics can be fun and rewarding. Avoiding common mistakes helps keep your artwork clear and vibrant. These errors often cause frustration and dull results. Focus on simple techniques to improve your painting skills quickly.
Overworking The Paint
Overworking means applying too many brush strokes on the same area. This can make colors muddy and details blurry. Acrylic paint dries fast, so work confidently and avoid excessive blending. Let layers dry before adding new paint for better texture and depth.
Ignoring Light Direction
Light direction sets the mood and form of your mushroom. Without a clear light source, your painting looks flat and unrealistic. Decide where light hits the mushroom and where shadows fall. Use lighter tones on the lit side and darker shades in shadow areas to create volume.
Using Incorrect Brush Sizes
Choosing the wrong brush size affects detail and coverage. Large brushes are good for backgrounds and broad strokes. Small brushes work best for fine details like gills and spots on the mushroom cap. Use a mix of brush sizes to balance precision and smooth coverage.
Tips For Beginners
Starting to paint mushrooms with acrylics can feel tricky. Beginners often find it hard to get shapes and colors right. These tips will help you enjoy the process and improve your skills quickly. Keep your brush ready and your mind open.
Simple steps lead to great results. Focus on learning the basics first. This will build your confidence and prepare you for more detailed work.
Practice Simple Shapes
Mushrooms have clear, basic shapes like circles and ovals. Start by sketching these shapes lightly on your canvas. Use easy forms to build the mushroom’s cap and stem. This makes painting less overwhelming. Repeat this step with different sizes and angles. Practice improves your hand control and understanding of mushroom shapes.
Experiment With Colors
Acrylic paints offer many color options. Try mixing reds, browns, yellows, and whites to find natural mushroom colors. Test colors on a scrap piece before applying them to your main painting. Play with light and dark shades to create depth. Don’t be afraid to use bright or unusual colors. This helps you learn how colors work together.
Patience And Layering
Acrylic paint dries fast but takes time to build textures. Paint thin layers and let each dry before adding the next. This layering creates realistic shadows and highlights on your mushroom. Rushing can mix colors and make your work look messy. Take breaks and look at your painting from a distance. Patience leads to better control and beautiful results.

Credit: www.youtube.com
Frequently Asked Questions
What Supplies Do I Need To Paint A Mushroom With Acrylics?
You need acrylic paints, various brushes, a canvas or paper, a palette, water, and a cloth. Optional supplies include a pencil for sketching and a palette knife for mixing colors.
How Do I Start Painting A Mushroom With Acrylics?
Begin by sketching the mushroom shape lightly on your canvas. Then, apply a base coat of acrylic paint to establish the mushroom’s main colors and shapes.
What Techniques Work Best For Acrylic Mushroom Painting?
Use layering and blending techniques for realistic shading. Dry brushing adds texture, while highlights and shadows create depth and dimension on your mushroom.
How Can I Make My Acrylic Mushroom Painting Look Realistic?
Focus on light source and shading. Use smooth gradients and add fine details like spots or gills. Vary brush strokes for natural textures and colors.
Conclusion
Painting a mushroom with acrylics can be fun and rewarding. Use simple shapes and bright colors to bring it to life. Take your time layering paint for depth and texture. Practice helps improve your skills and confidence. Keep experimenting with different shades and brush strokes.
Enjoy the process and watch your artwork grow. This guide gives you a solid start to create charming mushroom paintings. Try it today and add a touch of nature to your art collection.