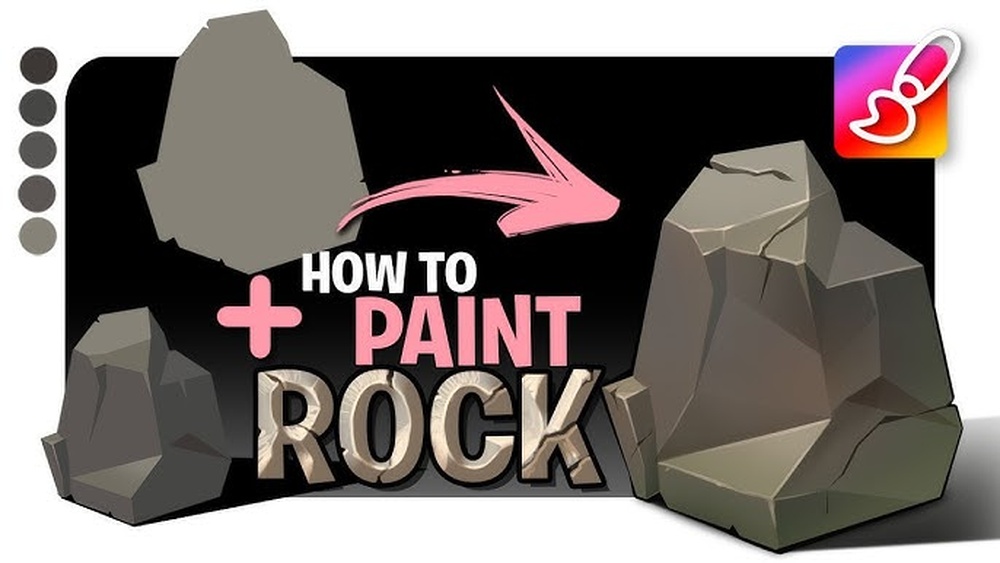
Quick answer: Knowing how to paint digital rocks and stone starts with a blocky silhouette made of flat planes; then shade those planes in three clear values: a top plane in light, side planes in half-tone and a deep shadow side. Break the large planes into smaller facets and cracks, add surface texture with a grainy brush only in the light and half-tone, and finish with environmental details like moss, wet patches and cast shadows. Rocks look real when their planes are clear; texture comes last.
Rocks look easy because they have no fixed shape. That is exactly why so many digital rocks end up as gray potatoes: round, soft blobs covered in random speckles. Real stone breaks along planes, and those planes are what make it read as heavy and hard.
This guide covers how to paint digital rocks and stone that look solid and believable, from boulders and cliffs to pebbles and carved stone. The steps apply to any painting app with layers, and they lean on the same plane-based thinking that concept artists use for environment work.
Why Rocks Look Fake
Most unconvincing rocks share the same problems:
- Round forms. Soft, rounded shading makes rocks look like clay or sponge. Most rocks show angular planes, even when weathered.
- Texture before form. Speckle brushes applied to a flat shape do not create volume.
- Uniform color. Real stone varies in color: warm and cool patches, mineral streaks, stains, lichen.
- No grounding. Rocks that do not sit in the ground, with no contact shadow or surrounding debris, look like they are floating.
Fixing these is mostly about working order. Silhouette, planes, light, facets, texture, then environment.
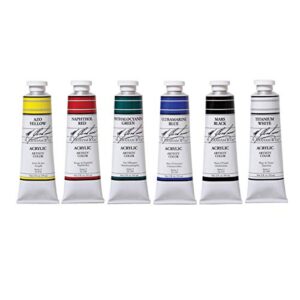
The same plane logic applies whether the stone lives on a screen or in your hand. Artists who decorate real stones often find that studying how light breaks across a rock’s facets helps them place designs where they read best, and choosing paint made for rock surfaces matters just as much as brush choice does digitally. This guide stays focused on the digital side.
Know Your Rock Types
Different rock types break and weather differently. You do not need to be a geologist, but a few patterns help:
| Rock type | Visual character | Painting approach |
|---|---|---|
| Granite and igneous boulders | Blocky with rounded weathered edges; speckled | Large clear planes, soft edges on top, fine speckle texture |
| Sandstone and layered sedimentary | Horizontal bands and layers; warm colors | Paint strata as horizontal stripes following the form |
| Slate and shale | Thin, sharp, flat layers that flake | Sharp edges, stacked flat plates, cool gray tones |
| Basalt | Can form columns with straight sides | Strong vertical planes, dark values |
| River pebbles | Smooth, rounded by water | Soft shading allowed; strong specular highlights when wet |
| Limestone cliffs | Pale, with cracks and vertical weathering | Light values, dark crack lines, streaky stains |
Brushes for Stone
- Hard flat or chisel brush: for blocking planes with clean edges.
- Lasso fill: faster than brushing for crisp facets.
- Textured, chalky or dry brush: for breaking up surfaces.
- Speckle or spatter brush: for grain and mineral flecks, used lightly.
- Small hard round: for cracks and edge highlights.
How to Paint Digital Rocks: Step by Step
1. Design an interesting silhouette
Start with a flat silhouette in a mid-tone. Use straight lines and angles rather than smooth curves. Aim for a mix of long and short sides and avoid symmetry. A good rock silhouette reads as heavy: wider at the base, with a clear top.
Lasso tools are perfect here. Make angular selections and fill them.
2. Define the major planes
Decide where the light comes from, then divide the rock into three main plane groups:
- Top planes facing the sky receive the most light.
- Side planes facing the light receive partial light.
- Shadow planes facing away from the light are darkest.
Fill each with a flat value. If you squint and the rock already looks three-dimensional, you are on track.
3. Add the cast shadow and contact shadow
Paint the shadow the rock casts on the ground, and a very dark, thin contact shadow where the rock meets the ground. This grounds it instantly. Partially bury the base in soil or grass so it sits in the scene rather than on top of it.
4. Break planes into facets
Now subdivide each big plane into smaller facets, chips and steps. Keep each facet consistent with its parent plane: facets on the top plane stay light, facets on the shadow side stay dark. This adds complexity without destroying the big read.
5. Paint cracks and edges
Cracks are dark lines, but they need a light edge too: the lip of the crack facing the light catches a thin highlight. Paint the crack with a dark, thin line, then a lighter line along one side. Edges between planes can get a subtle highlight where they face the light, which makes the stone feel sharp.
6. Add color variation
Use a Color or Overlay layer, or paint directly, to add variation: warmer tones on lit surfaces, cooler on shadows, patches of rust, ochre or green. Reflected light from the ground often adds a warm glow to the lower shadow planes.
7. Texture in the light
Apply texture with a grainy brush, mainly in the lit and half-tone areas. Shadows show less texture because there is less light to reveal surface detail. Follow the plane direction with your strokes.
8. Environmental details
Add moss or lichen on the tops and shaded, damp sides, small pebbles and debris around the base, water stains streaking downward, and grass growing around the edges. These make the rock belong to a place.
A Starter Palette for Stone
Gray rocks painted with pure grays look lifeless. A more natural approach is to build stone from slightly warm and slightly cool grays, then add accents. A flexible starting palette:
| Role | Color direction | Where to use it |
|---|---|---|
| Lit top plane | Warm light gray, slightly yellow or peach in sunlight | Surfaces facing the sky or sun |
| Half-tone side | Neutral mid gray-brown | Planes turning away from light |
| Core shadow | Cool dark gray, leaning blue or violet | Planes facing away from light |
| Reflected light | Warm muted ochre or ground color | Lower shadow planes near sunlit ground |
| Accents | Rust, ochre, olive, muted green | Stains, minerals, lichen, moss |
Under an overcast sky, reduce the temperature difference: lit planes become more neutral and shadows softer. At sunset, push lit planes toward orange and shadows toward deep blue-violet.
Edge Control on Stone
Edges tell the viewer what kind of stone they are looking at. Fresh breaks and slate have sharp, crisp edges. Weathered granite has rounded corners on top but still shows clear plane changes. River stones have soft, gradual edges all round. Mix edge types on a single rock: sharp edges where planes meet in strong light, softer edges in shadow and where weathering has worn the stone. Using only one edge type across the whole rock makes it look either plastic or cut from paper.
Pebbles, Gravel and Scree
Small stones are where many environment paintings get noisy. Painting every pebble as a fully rendered rock takes forever and clutters the image. Instead:
- Paint the ground plane first with its overall color and lighting.
- Suggest gravel with a spatter or scatter brush in two or three values close to the ground color.
- Add a handful of larger pebbles near the foreground, each with just a light top and a small dark shadow beneath.
- Let pebble detail fade with distance until the ground becomes a simple texture.
Scree slopes, the loose rock at the foot of cliffs, follow the same idea: a few defined stones near the viewer, and a broken texture that flows down the slope in the direction gravity would carry it.
Painting Wet Stone
Water changes stone dramatically:
- Wet stone is darker and often more saturated than dry stone.
- Highlights become sharper and brighter, reflecting the sky or light source.
- Puddles in hollows reflect the sky.
- River rocks may have a dry top and a wet, darker band near the waterline.
Paint the dry rock first, then darken wet areas on a Multiply layer and add sharp highlights on a top layer.
Moss, Lichen and Snow on Rocks
Growth and weather settle on rocks in logical places, and placing them correctly does a lot of storytelling. Moss prefers damp, shaded sides and the crevices where water collects, so paint it in soft, rounded clumps on the shadow side and in cracks, with a lighter yellow-green on the tops of the clumps. Lichen grows as flat, crusty patches in pale green, gray, yellow or orange, often on exposed upper surfaces. Snow settles on the top planes and ledges, leaving vertical sides mostly bare, and its edges follow the rock’s facets. In each case, give the growth its own small light and shadow so it sits on the surface instead of looking stamped on.
Cliffs and Large Rock Formations
For cliffs, the same plane logic applies at a bigger scale. Treat the cliff as a few huge planes, then break each into large blocks, then smaller cracks. Add atmospheric perspective: the distant parts of a cliff are lighter and lower in contrast. Vertical streaks of staining and horizontal strata both help sell scale.
Carved and Built Stone
Stone walls, steps and statues follow the same rules with more regular shapes. Each block has a top, side and shadow plane. Mortar lines are slightly recessed, so they catch shadow on one side and light on the other. Weathering softens edges and corners first, and dirt collects in recesses and at the base.
From Digital Rocks to Painted Rocks
Studying how light hits stone digitally also helps if you enjoy painting on real rocks, a popular craft for garden stones, mandalas and gifts. When you paint designs on an actual stone, the stone’s own planes and curves affect how your design reads, and choosing outdoor-friendly paint matters. Our guide to the best paint for rock painting compares acrylic, paint pens and outdoor options for real stones. For pattern ideas, the DIY mandala rock painting tutorial shows how dot designs wrap around a stone’s surface.
Common Mistakes
Blobby shapes. Rounded silhouettes look soft. Use angles and straight edges.
Texture without form. Speckles cannot fix a flat shape. Establish planes first.
Gray everything. Stone has color. Add warm and cool variation, stains and minerals.
Black cracks without highlights. Cracks need a lit edge to look carved into the surface.
Floating rocks. Always add contact shadows, partial burial and debris.
Same rock repeated. Copy-pasting rocks across a scene is obvious. If you duplicate, rotate, flip, resize and repaint parts.
Tips by Skill Level
Beginners
Paint single rocks with three clear values. Practice simple silhouettes and plane shading in grayscale before adding color.
Intermediate
Paint groups of rocks with overlapping forms and consistent lighting. Experiment with wet stone, moss and different rock types.
Advanced
Paint cliffs and rock formations in full environments with atmospheric perspective. Develop custom brushes for specific rock textures and study real geology for convincing breaks and weathering.
Practice Exercises
- Paint ten rock silhouettes in five minutes each, using only lasso fills.
- Take three of them and shade them with top, side and shadow planes.
- Paint the same rock dry, wet and moss-covered.
- Paint a small rocky stream scene with pebbles, boulders and water.
FAQs
How do you paint realistic rocks digitally?
Start with an angular silhouette, divide it into top, side and shadow planes with clear values, break those into facets and cracks, then add color variation and texture mainly in lit areas. Ground the rock with contact shadows and debris.
What brush is best for painting rocks?
A hard flat or chisel brush and lasso fills for planes, plus a chalky or grainy brush for texture. A small hard brush helps with cracks and edge highlights.
How do I make rocks look wet?
Darken and slightly saturate wet areas, add sharp, bright highlights reflecting the sky, and paint small puddles in hollows. Keep a visible line between dry and wet areas on river stones.
Why do my digital rocks look soft?
Usually because the silhouette is rounded and the shading is blended smoothly. Use angular shapes, flat planes and crisp edges between light and shadow.
What colors are rocks?
Rocks range from gray to brown, red, ochre and nearly black, often with mixed warm and cool areas. Lit surfaces lean warm in sunlight, shadows lean cool, and stains or lichen add greens and oranges.
How do I paint rocks quickly for environments?
Use lasso fills for planes, a few reusable rock texture brushes, and paint distant rocks with fewer facets and less texture. Atmospheric perspective lets background rocks stay simple.
Final Thoughts
Rocks are one of the best subjects for learning planes and light, and that knowledge transfers to every hard surface you paint. If the subject has you curious about painting on actual stones, see our picks for paints that hold up on real rocks, including options that survive outdoors.