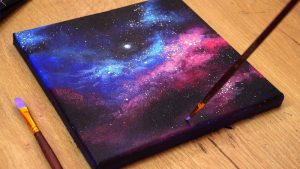
Have you ever wanted to create a stunning galaxy painting that looks like it’s bursting with stars and colors? Painting galaxies with acrylic paint might seem tricky, but with the right tips and techniques, you can make your own cosmic masterpiece.
Imagine holding a brush and turning a blank canvas into a swirling universe full of deep blues, bright whites, and glowing purples. In this guide, you’ll discover simple steps that will help you bring the magic of space right to your fingertips.
Ready to unlock your creativity and paint your own galaxy? Let’s dive in!

Credit: stepbysteppainting.net
Materials Needed
Painting a galaxy with acrylic paint needs the right materials. Choosing the right supplies helps create bright, colorful space scenes. This list covers what you need to start your galaxy painting.
Essential Acrylic Paints
Pick basic colors like black, white, blue, purple, and pink. These shades blend well to make stars and nebulae. Use high-quality paints for smooth mixing and vibrant colors. A few metallic or glitter paints add sparkle to your galaxy.
Brush Types And Sizes
Use a mix of brushes for different effects. A large flat brush covers wide areas quickly. Small round brushes help add stars and details. A fan brush creates soft, cloudy textures. Keep brushes clean to keep colors bright.
Additional Tools And Supplies
Have a palette for mixing colors. Use a spray bottle with water to keep paint moist. Paper towels help wipe brushes and fix mistakes. A canvas or thick paper works best for acrylic paints. Optional: a toothbrush for splattering tiny stars.
Preparing Your Canvas
Preparing your canvas is the first step in painting a galaxy with acrylic paint. It sets the stage for your colors and shapes. A well-prepared canvas helps the paint stick better and last longer. It also makes your painting look smooth and vibrant. Let’s explore how to get your canvas ready.
Choosing The Right Surface
Pick a surface that suits your painting style. Canvas boards and stretched canvases are great choices. Canvas boards offer a firm surface and are easy to handle. Stretched canvases have a textured feel and hold paint well. You can also use thick paper or wooden panels for a different effect. Make sure the surface is clean and dry before starting.
Priming And Base Colors
Priming your canvas improves paint adhesion and protects the surface. Use a white or black acrylic gesso for priming. Apply one or two thin layers and let it dry completely. For galaxy paintings, dark base colors like black or deep blue work best. They create a night sky effect and make stars stand out. Spread the base color evenly with a brush or sponge. Allow it to dry fully before adding details.
Creating The Galaxy Background
Creating the galaxy background is the first step in painting a stunning space scene. This stage sets the mood and depth of your artwork. Use acrylic paints that blend well and dry quickly. Start with a dark base color to mimic the vastness of space.
Layering colors thoughtfully helps build a realistic galaxy effect. Use a mix of dark blues, purples, and blacks for the base. Bright colors like pink, white, and light blue add vibrancy and star-like highlights.
Blending Techniques
Blending is key to smooth color transitions in your galaxy. Use a soft brush or sponge for gentle blending. Work quickly to blend wet paint before it dries. Circular or dabbing motions create a natural, cloudy look. Avoid hard edges between colors to keep the background soft. Blend the light colors into dark areas for a glowing effect.
Adding Depth With Colors
Use multiple layers of color for a deep, rich galaxy. Start with the darkest shades as a base. Add mid-tone colors on top, then highlight with lighter shades. This layering creates dimension and interest. Paint small patches of bright colors to simulate distant stars and nebulae. Light touches of white or pale blue bring stars to life. Vary color intensity to avoid flatness in your painting.
Painting Stars And Nebulae
Painting stars and nebulae brings galaxies to life on your canvas. These small details create depth and wonder in space art. Using simple techniques, you can mimic the vastness of the night sky. Start with basic shapes and build up layers for more effect. Focus on how stars twinkle and how nebulae swirl in space.
Using Spattering For Star Effects
Spattering is a quick way to add many tiny stars. Dip a stiff brush in white or light paint. Flick the brush over your dark background gently. This creates small dots that look like distant stars. Change brush size and flicking speed for different star sizes. Let some areas be dense with stars and others sparse. This mimics how stars cluster in the real sky.
Detailing Nebula Shapes
Nebulae look like colorful clouds floating in space. Use soft brushes to paint round, blurry shapes. Blend colors like pink, blue, and purple for a natural look. Work in layers, starting with light colors, then adding darker shades. Use a dry brush or sponge to soften edges. Add small highlights to show glowing gas and light inside nebulae. This gives your painting a dreamy, three-dimensional feel.
Enhancing With Highlights And Shadows
Enhancing with highlights and shadows brings depth to galaxy paintings. It makes stars and nebulae look alive and bright. Shadows add mystery and space, while highlights create light and energy. This balance helps your acrylic galaxy painting feel real and vibrant.
Layering Light And Dark Tones
Start by painting dark areas like space background with deep blues and blacks. Add layers of lighter colors over dark ones to build depth. Use a soft brush to blend these layers gently. Light tones show where stars shine or where gases glow. Dark tones give space its vast and endless feel. Layering these tones carefully adds richness to your galaxy.
Creating A Glowing Effect
Use white or very light colors to add tiny dots for stars. Paint small, soft halos around bright spots to mimic glowing stars. Blend the edges of these halos softly into the background. This makes the stars appear to shine and glow. Use a dry brush or sponge for smooth, glowing transitions. Glowing effects bring your galaxy to life and make it sparkle.

Credit: www.youtube.com
Finishing Touches
Finishing touches bring your galaxy painting to life. They protect the colors and enhance the look. A few steps here make a big difference. Protecting your work helps it last longer and stay bright.
Sealing Your Artwork
Sealing your galaxy painting stops dust and moisture. Use a clear acrylic spray sealer. Spray in thin, even layers. Let each layer dry before the next. This keeps colors vivid and prevents fading. Avoid over-spraying to stop paint from running. Use a matte or glossy finish based on your style. Sealing also adds a smooth surface to your painting.
Tips For Displaying Your Galaxy Painting
Choose a place with soft light for display. Direct sunlight can fade your painting fast. Frame your artwork for a clean look. A simple black or white frame works well. Hang it at eye level for the best view. Group with other space-themed art for impact. Keep it away from damp or hot spots. These steps keep your galaxy painting stunning longer.
Common Mistakes To Avoid
Painting galaxies with acrylics is fun but tricky. Many beginners make simple mistakes. These errors can affect the final look of your galaxy. Avoiding them helps create a brighter, clearer painting. Here are common mistakes to watch out for.
Not Using Enough Paint
Using too little paint can make colors dull. Galaxies need bright, vibrant colors to look real. Apply enough paint to cover the canvas well. Thick layers help blend colors smoothly.
Skipping Layer Drying Time
Rushing to add new layers causes colors to mix badly. Wait for each layer to dry before painting more. This keeps colors clear and distinct. Patience improves the overall effect.
Over-blending Colors
Blending too much can make the galaxy look muddy. Keep some contrast between colors for a starry effect. Light, gentle blending works best for smooth transitions.
Ignoring Star Details
Stars add depth and realism to galaxies. Leaving them out makes the painting less interesting. Use a small brush or toothbrush to create tiny dots. Vary star sizes for a natural look.
Using Too Many Colors
Too many colors confuse the painting’s focus. Stick to a few main colors for a strong look. This keeps the galaxy simple and beautiful.

Credit: www.amazon.com
Inspiration And Variations
Finding inspiration and exploring variations are key to painting beautiful galaxies. Each galaxy painting can tell its own story through colors and shapes. Experimenting with different styles keeps the process exciting and fresh.
Exploring Different Color Schemes
Colors create mood and depth in galaxy paintings. Try mixing bright blues with deep purples for a cool, calm effect. Warm reds and oranges can make a galaxy feel alive and energetic. Adding white or light colors helps to highlight stars and clouds. Using unexpected colors like pink or green adds a unique twist. Play with gradients to create smooth transitions between colors. Each combination creates a new cosmic world on your canvas.
Incorporating Other Cosmic Elements
Stars and nebulae add realism and magic to galaxy art. Use small dots of white or silver paint for sparkling stars. Try painting swirling clouds to show gas and dust in space. Planets or moons can give your galaxy a story and focus point. Comets or shooting stars bring movement and life to the scene. Adding light glows around stars makes them stand out more. These elements build a rich, detailed universe in your artwork.
Frequently Asked Questions
What Materials Do I Need To Paint Galaxies With Acrylics?
You need acrylic paints, brushes, sponges, a palette, water, and canvas or paper. Optional tools include toothbrushes and glitter for star effects.
How Do I Create Galaxy Colors With Acrylic Paint?
Mix dark blues, purples, pinks, and blacks. Blend smoothly on the canvas using sponges or brushes to mimic cosmic clouds.
What Techniques Help Paint Realistic Galaxy Stars?
Use a toothbrush to flick white paint for tiny stars. Add larger dots with a fine brush for bright stars and planets.
Can Beginners Easily Paint Galaxies With Acrylics?
Yes, galaxy painting is beginner-friendly. Simple blending and splattering techniques create beautiful effects without advanced skills.
Conclusion
Painting galaxies with acrylics is fun and rewarding. Start with simple colors and shapes. Practice blending and layering to create depth. Don’t rush; take your time to add details. Each brush stroke brings your galaxy to life. Keep experimenting with colors and effects.
Enjoy the process and learn as you go. Soon, you’ll create beautiful, unique space scenes. Remember, every painting is a new adventure. Grab your brushes and paint your own galaxy today!