You’ve poured your heart into creating your oil painting, capturing every detail with care. Now, it’s time to protect and enhance your masterpiece by varnishing it—but how do you varnish an oil painting correctly?
Applying varnish is more than just a finishing touch; it safeguards your artwork from dust, UV rays, and aging, while bringing out the true vibrancy of your colors. If you want your painting to look stunning and last for years to come, you need to follow the right steps.
In this guide, you’ll discover simple, clear tips to varnish your oil painting like a pro, avoid common mistakes, and ensure your art remains flawless. Ready to make your artwork shine? Let’s dive in.
Choosing The Right Varnish
Choosing the right varnish is a key step in finishing your oil painting. Varnish protects the surface and enhances colors. It also affects the painting’s final look and texture. Understanding the options helps you pick the best varnish for your work. Consider the finish, material, and base of the varnish carefully.
Glossy Vs Matte Finishes
Glossy varnishes create a shiny and reflective surface. They make colors look bright and sharp. Light bounces off easily, giving a vibrant effect. Matte varnishes produce a flat, non-reflective finish. They reduce glare and soften colors. Matte varnishes hide brush strokes better than glossy ones. Your choice depends on the mood and style of your painting.
Types Of Varnish Materials
Natural resin varnishes come from tree sap and offer a classic look. They age beautifully but can yellow over time. Synthetic varnishes are made from modern chemicals. They stay clear and resist yellowing. Some varnishes dry hard, while others remain flexible. Flexibility helps prevent cracking on older paintings. Check the varnish label to match your painting’s needs.
Solvent-based Vs Water-based Varnishes
Solvent-based varnishes use chemicals like turpentine or mineral spirits. They dry quickly and are very durable. These varnishes have strong fumes and need good ventilation. Water-based varnishes use water as the main solvent. They are safer and easier to clean up. Drying time is longer and durability may be less. Choose based on your workspace and health preferences.

Credit: www.youtube.com
Preparing The Painting Surface
Preparing the painting surface is a key step before applying varnish. The surface must be clean, dry, and free of particles. Proper preparation helps the varnish stick well and protects the artwork. Taking time on this step improves the final look and durability of the painting.
Ensuring Complete Dryness
Oil paintings need to dry fully before varnishing. This can take weeks or months, depending on the paint thickness and environment. Touch the surface gently to check for stickiness. Any tackiness means more drying time is required. Varnishing too soon can trap moisture and cause damage later.
Cleaning Dust And Debris
Dust and dirt ruin the varnish finish. Use a soft, dry brush or a clean microfiber cloth to remove particles. Avoid liquids or cleaners that might damage the paint. Work gently across the surface, removing all visible debris. A clean surface ensures a smooth varnish layer.
Testing Small Areas First
Test the varnish on a small, hidden area first. This reveals how the varnish reacts with your painting. Watch for changes in color or texture. Testing prevents surprises and helps choose the best varnish type. Always wait for the test spot to dry before full application.
Essential Tools For Varnishing
Varnishing an oil painting protects its surface and enhances colors. Using the right tools helps achieve a smooth, even coat. Quality tools make the varnishing process easier and prevent damage to the artwork. Preparing your materials carefully before starting ensures the best results.
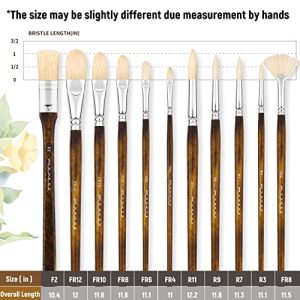
Selecting The Proper Brush
Choose a soft, wide brush made of natural hairs or synthetic fibers. A flat or angled brush works well for even coverage. Avoid stiff or worn brushes to prevent streaks and scratches. Clean the brush thoroughly before use to remove dust or debris. Use a separate brush dedicated to varnishing only.
Using A Varnish Bowl Or Container
Pour the varnish into a shallow, wide container for easy access. A glass or ceramic bowl is ideal because it won’t react with the varnish. Avoid metal containers as they can cause unwanted chemical reactions. The container should be large enough to hold enough varnish for your painting’s size. This helps avoid repeated dips, reducing brush marks.
Alternative Application Methods
Besides brushes, you can use spray varnishes for a thin, even coat. Spraying works well for large or textured surfaces. Use a spray in a well-ventilated area and follow safety instructions. Another option is applying varnish with a soft cloth for small or detailed areas. Dab gently to avoid lifting paint or creating uneven layers.
Applying Varnish Correctly
Applying varnish correctly is essential to protect and enhance your oil painting. The varnish layer adds depth and richness to colors. It also guards against dust, dirt, and light damage. Careful application ensures a smooth, even finish without streaks or bubbles. This process requires patience and the right technique. Follow these steps to apply varnish with precision and care.
Brushing Techniques
Use a clean, soft brush made for varnishing. Avoid stiff or worn brushes. Dip the brush lightly into the varnish. Remove excess varnish on the side of the container. Apply with long, gentle strokes. Do not overload the brush. Avoid going back over dry areas to prevent marks. Keep your hand steady and relaxed. Let the brush glide smoothly across the surface.
Applying Thin And Even Coats
Thin coats dry faster and prevent drips. Pour a small amount of varnish. Spread it evenly in one direction. Avoid pooling or thick spots. Wait for the first coat to dry fully before adding another. Multiple thin layers give the best protection and finish. Thin coats reduce the risk of cloudiness or cracking. Patience is key to a flawless varnish layer.
Direction And Stroke Control
Apply varnish strokes in the same direction. Horizontal or vertical strokes work well. Avoid circular or random movements. Consistent direction helps create a uniform sheen. Start from one side and move steadily across. Overlap strokes slightly to cover the entire surface. Keep your brush strokes smooth and controlled. This technique ensures a clean, professional look.
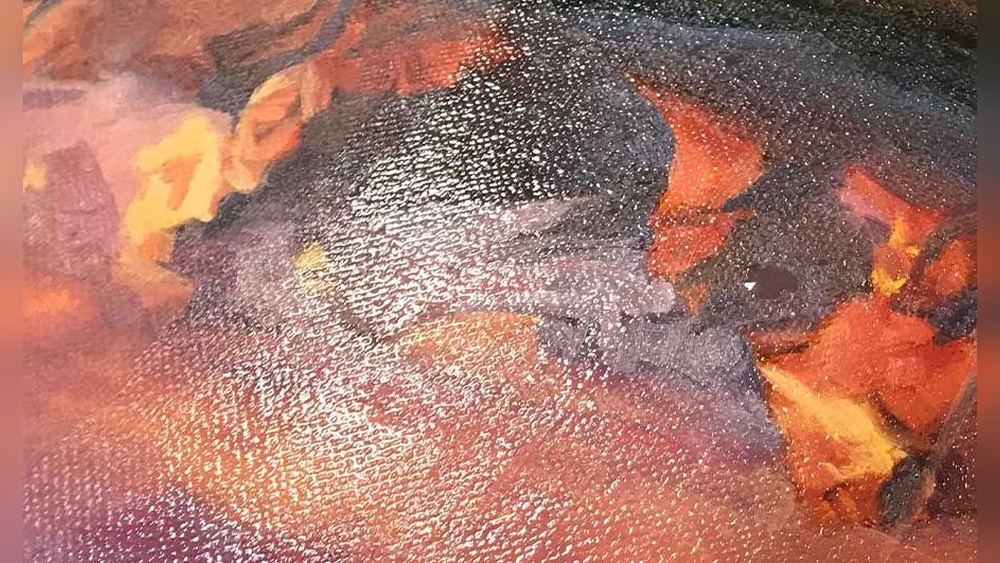
Common Varnishing Mistakes
Varnishing an oil painting adds depth and protects the artwork. Yet, many artists make simple mistakes that can ruin this final step. Avoiding common errors ensures a smooth, even finish and long-lasting beauty. Understanding these pitfalls helps preserve your painting’s true colors and texture.
Over-brushing And Uneven Coverage
Brushing too much damages the varnish layer. It creates streaks and uneven spots. One or two smooth coats are enough. Apply varnish gently in one direction. Let each layer dry fully before adding another. Uneven coverage can dull parts of the painting and spoil its look.
Varnishing Too Early
Applying varnish before the paint dries causes problems. Wet paint traps moisture under the varnish. This leads to cloudiness or cracking later. Wait at least six months for drying. Some thicker paintings may need longer. Patience protects your work and ensures a clear finish.
Ignoring Environmental Conditions
Temperature and humidity affect varnishing results. High humidity can cause the varnish to dry slowly or unevenly. Too much heat dries it too fast, causing cracks. Work in a clean, dust-free, and well-ventilated space. Ideal conditions help the varnish settle smoothly and last longer.
Drying And Curing Tips
Drying and curing are crucial steps before varnishing an oil painting. Proper handling during this phase ensures a smooth and lasting finish. Patience and the right conditions help your artwork shine without damage or dust marks. Follow these tips to protect your painting as it dries and cures fully.
Optimal Drying Environment
Keep the painting in a warm, dry place with good airflow. Avoid direct sunlight, which can cause uneven drying. A room temperature around 70°F (21°C) is ideal. Humidity should stay low to prevent slow drying and mold growth. Use fans gently to improve air circulation without blowing dust.
Avoiding Dust During Drying
Dust can ruin a fresh varnish or paint surface. Cover your painting with a clean, breathable cloth or a large cardboard box. Make sure the cover does not touch the surface. Place the painting away from open windows and vents. Keeping the environment clean helps prevent dust particles from settling.
Time Required Before Revarnishing
Wait at least six months before applying a second varnish layer. Oil paint needs time to cure fully beneath the first varnish. Rushing this step can trap moisture and cause cloudiness or cracking. Check the paint surface for dryness by gently pressing with a clean finger. Only varnish again if the paint feels hard and dry.
Maintaining Varnished Paintings
Maintaining varnished paintings ensures their beauty lasts for years. Proper care preserves the varnish’s protective layer and keeps colors vibrant. Regular attention prevents damage and extends your artwork’s life.
Cleaning Without Damage
Dust your varnished painting gently with a soft brush. Avoid using water or cleaning sprays. Use a dry, clean microfiber cloth to wipe away light dirt. Do not rub hard or scrub the surface. If the painting is very dirty, consult a professional restorer.
When To Revarnish
Revarnish your painting only when the varnish looks dull or yellowed. Check for cracks or flaking in the varnish layer. Wait at least six months after the last varnishing before applying a new coat. Applying varnish too soon can trap moisture and damage the paint.
Storage And Display Advice
Keep varnished paintings away from direct sunlight. Sunlight can fade colors and harm the varnish. Store paintings in a cool, dry place with stable humidity. Avoid areas with extreme temperature changes. Use acid-free materials when storing or framing the artwork.

Credit: blog.youtalent.com
Expert Tips For Longevity
Applying varnish correctly extends your oil painting’s life and appearance. Expert advice ensures your artwork stays vibrant and protected for years. Follow these key tips to varnish your oil painting with care and skill.
Following Fat Over Lean Principle
The fat over lean rule helps your painting dry properly. Each new layer must have more oil than the one below. This avoids cracking and peeling over time. Varnish acts as the final layer, so ensure the painting is fully dry first. If layers dry unevenly, the surface may become brittle and damaged.
Layering Varnish For Protection
Apply varnish in thin, even coats. Start with a light layer to seal the paint surface. Let it dry completely before adding more layers. Multiple layers build strong protection without trapping moisture. Avoid thick layers that dry slowly and cause cloudiness or uneven shine.
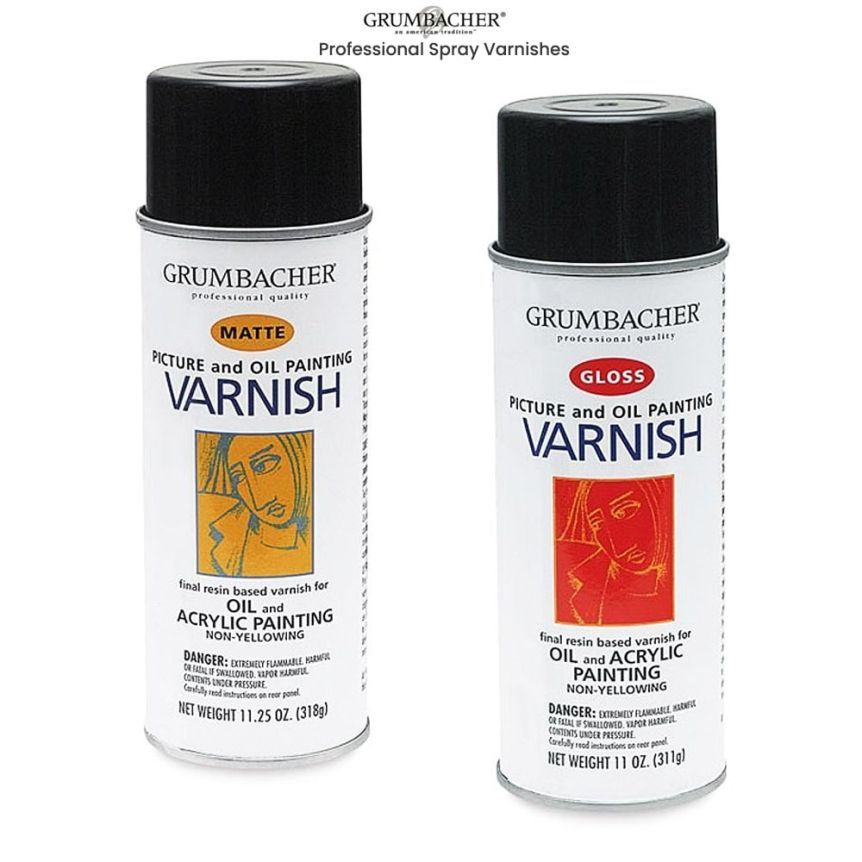
Using Quality Materials
Choose varnishes made for oil paintings only. Look for non-yellowing, removable varnishes with UV protection. Use clean, soft brushes or spray applicators for smooth application. Cheap materials can harm the painting or change its colors. Quality products maintain your painting’s beauty and value.
Credit: www.jerrysartarama.com
Frequently Asked Questions
What Is The Best Way To Varnish An Oil Painting?
Clean the dry oil painting gently. Use a soft brush to apply a thin, even varnish layer in one direction. Choose a removable varnish for future cleaning. Allow the varnish to dry completely before adding additional coats. Avoid thick or uneven layers to prevent cracking.
What Is The Golden Rule Of Oil Painting?
The golden rule of oil painting is “Fat Over Lean. ” Apply paint layers with increasing oil content to prevent cracking and ensure durability.
How Many Coats Of Varnish Should I Put On An Oil Painting?
Apply 1 to 3 thin coats of varnish on an oil painting. Allow each coat to dry fully before adding the next. This protects and enhances the artwork’s colors and longevity.
Should You Varnish Oil Paintings Gloss Or Matte?
Choose gloss varnish to enhance color vibrancy and detail. Select matte varnish for a non-reflective, subtle finish. Both protect the painting effectively.
Conclusion
Varnishing your oil painting protects and enhances its beauty. Apply varnish evenly and wait for the right drying time. Choose the correct varnish type for your artwork. Avoid rushing the process to prevent damage. Proper varnishing keeps colors vibrant and adds a professional finish.
Take your time and enjoy the results of careful work. Your painting will look better and last longer with proper care. Keep practicing to improve your varnishing skills with each painting.