
Oil paintings are precious. They can last a long time. But they need care. Varnishing is a great way to protect them. This guide will help you varnish and protect your oil paintings.
Why Varnish Your Oil Paintings?
Varnishing has many benefits. Here are some:
- Protection: Varnish protects from dust, dirt, and scratches.
- Enhancement: It makes colors look richer and more vibrant.
- Longevity: Varnish helps paintings last longer.

Credit: www.youtube.com
Materials You Will Need
Before you start, gather these materials:
| Item | Purpose |
|---|---|
| Varnish | Protects and enhances the painting |
| Varnish Brush | For applying the varnish |
| Soft Cloth | For cleaning the painting |
| Newspaper | To protect your work area |
| Protective Gloves | To keep your hands clean |
Credit: www.portraitsociety.org
Step-by-Step Guide to Varnishing
Step 1: Prepare Your Painting
Make sure your painting is dry. Oil paint can take months to dry. Check if it’s ready by touching a hidden part. If it feels dry, you can proceed.
Step 2: Clean The Painting
Gently wipe the painting with a soft cloth. Remove any dust or dirt. This will make the varnish stick better.
Step 3: Set Up Your Work Area
Lay down newspapers to protect your table. Put on your gloves to keep your hands clean. Make sure the room is well-ventilated.
Step 4: Choose The Right Varnish
There are different types of varnish. Some are glossy, some are matte. Choose the one that you like best. Make sure it’s made for oil paintings.
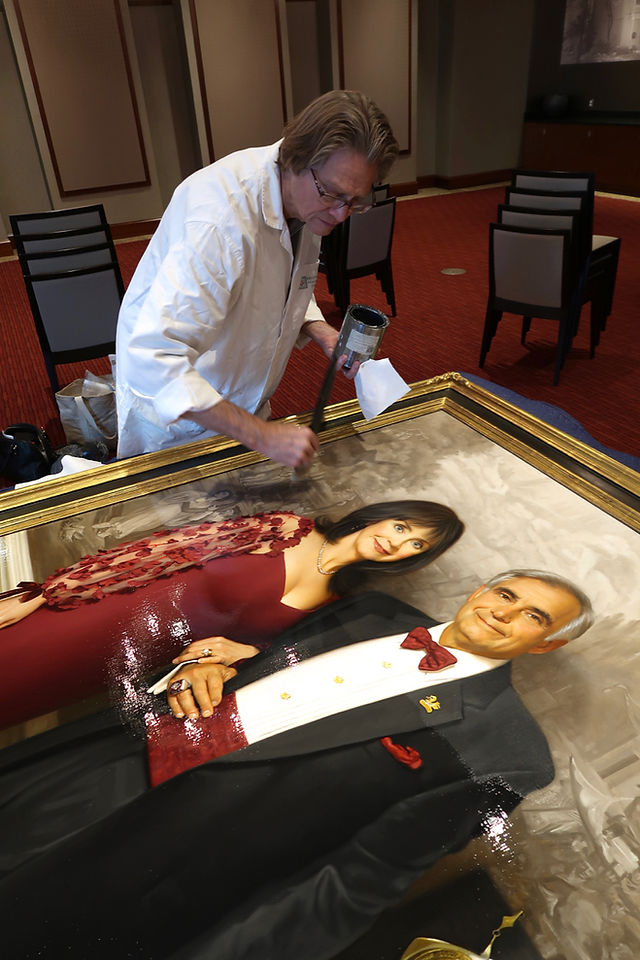
Step 5: Apply The Varnish
Dip your brush into the varnish. Start at the top of the painting. Brush in even, straight strokes. Work your way down. Don’t go over the same spot too many times.
Step 6: Let It Dry
Let the varnish dry completely. This can take several hours. Keep the painting in a dust-free area while it dries.
Step 7: Apply A Second Coat (optional)
For extra protection, you can apply a second coat. Wait until the first coat is fully dry. Then repeat the varnishing process.
Tips for Maintaining Your Varnished Painting
Once your painting is varnished, you still need to take care of it. Here are some tips:
- Avoid Direct Sunlight: Sunlight can fade colors.
- Keep Away from Moisture: Moisture can cause damage.
- Dust Regularly: Use a soft cloth to gently dust the painting.
- Handle with Care: Always hold the painting by the frame.
Common Mistakes to Avoid
Here are some common mistakes and how to avoid them:
- Not Waiting for Paint to Dry: Make sure the paint is fully dry before varnishing.
- Using the Wrong Varnish: Use varnish made for oil paintings.
- Applying Too Much Varnish: Use thin, even coats to avoid drips and bubbles.
- Varnishing in a Dusty Area: Dust can get trapped in the varnish. Work in a clean space.
Frequently Asked Questions
What Is Varnishing An Oil Painting?
Varnishing protects the painting’s surface from dust, dirt, and UV rays, enhancing its durability and appearance.
When To Varnish An Oil Painting?
Wait at least six months for the oil paint to cure fully before applying varnish.
Which Varnish Is Best For Oil Paintings?
Consider using Damar, Gamvar, or synthetic varnishes for their protective qualities and ease of application.
How To Apply Varnish Evenly?
Use a wide, flat brush, applying varnish in thin, even layers. Avoid over-brushing.
Conclusion
Varnishing your oil paintings is important. It protects and enhances your artwork. Follow these steps to varnish your paintings. They will look beautiful and last a long time.
Remember to take your time. Be careful and patient. Your paintings deserve the best care. Happy varnishing!


