
Painting a hummingbird wall art can bring color and life to any room. Many people love hummingbirds because they are symbols of joy, energy, and beauty. Creating your own wall art lets you add a personal touch to your space, and it’s easier than you might think—even if you’re new to painting.
With the right guidance, materials, and a bit of patience, you can make a stunning hummingbird artwork that catches everyone’s eye.
This guide will walk you through every step, from preparing your wall to adding the final details. You’ll learn what materials to use, how to sketch your design, and techniques for painting feathers and backgrounds. Along the way, you’ll pick up practical tips and answers to common problems beginners face.
Let’s dive into the creative process and make your walls come alive with a beautiful hummingbird.
Choosing The Right Spot For Your Hummingbird Wall Art
The first step is to decide where your hummingbird wall art will go. The right location makes a big difference in how your artwork looks and feels.
- Lighting: Choose a wall that gets plenty of natural or soft artificial light. This helps your colors stand out and makes the artwork more vibrant.
- Visibility: Pick a spot where people can easily see your painting, like above a sofa, in a hallway, or in a bedroom.
- Size of Wall: Check the wall size. Small spaces suit single hummingbirds, while larger walls can handle a whole scene with flowers or multiple birds.
- Wall Texture: Smooth walls are best for painting. If your wall is rough, sand it lightly or use a primer to even it out.
A non-obvious tip: Stand back and look at the wall from different angles before you start. Imagine how a hummingbird would look in that space. This helps you plan the size and composition.
Gathering Materials And Tools
Having the right materials is key for a good result. Here’s what you’ll need:
- Acrylic paints (basic colors: White, black, blue, green, red, yellow, brown, and purple)
- Paintbrushes (a set with fine, medium, and large brushes)
- Pencil (for sketching)
- Eraser
- Palette (for mixing paint)
- Painter’s tape (to mark your area)
- Drop cloth (to protect the floor)
- Ruler or measuring tape
- Cup of water (for cleaning brushes)
- Paper towels or rags
- Primer (optional, for rough or colored walls)
- Reference image (a printed photo or digital picture of a hummingbird)
If you want your art to last longer, use acrylic sealer once finished. This step is often forgotten but protects your work from dust and fading.
Preparing The Wall
Preparation is important for a smooth painting process. Here’s what to do:
- Clean the wall with a damp cloth to remove dust and dirt.
- Fill holes or cracks with spackle and let dry. Sand smooth if needed.
- Apply primer if your wall is dark or stained. This helps colors appear brighter.
- Mark your painting area with painter’s tape, making a rectangle or shape for your artwork.
A practical insight: Use a light pencil grid on the wall for larger or complex designs. This keeps your sketch in proportion.
Designing Your Hummingbird
Before painting, plan your design. You can use your own drawing, trace a photo, or print a coloring page to use as a guide.
- Reference images are useful for getting the right shape and colors.
- Decide if you want just a hummingbird or if you’ll add flowers, leaves, or a background.
- Think about the bird’s position: Facing left or right, flying, or hovering over a flower.
For beginners, tracing can save time. Tape your reference image to the wall, place carbon paper underneath, and trace the outline with a pencil.
Sketching The Outline
Start your painting with a light pencil outline. This is your roadmap and helps you avoid mistakes later.
- Begin with the main shapes: Body, head, wings, and tail.
- Add details like the beak, eye, and feather lines.
- Keep your lines light so they don’t show under the paint.
Don’t worry if your first sketch isn’t perfect. Erase and adjust as needed. This stage is about getting the proportions right, not perfection.
Choosing And Mixing Colors
Hummingbirds are known for their bright, iridescent colors. But painting them doesn’t mean using every color at once. Instead, focus on a few key shades and blend them for a natural look.
- Typical hummingbird colors: Shades of green, blue, red, yellow, purple, and white.
- Mix colors on your palette until you find the shades you like.
- Test colors on a scrap paper or a small wall area.
Here’s a helpful table with common hummingbird colors and how to mix them:
| Color | Mixing Tips | Where to Use |
|---|---|---|
| Emerald Green | Blue + Yellow | Body, wings |
| Ruby Red | Red + touch of white | Throat, head |
| Sky Blue | Blue + white | Tail, background |
| Golden Yellow | Yellow + tiny bit of brown | Underbelly, accents |
| Purple | Red + blue | Neck feathers |
An expert tip: Add a touch of white to your colors for highlights, or a bit of black for shadows. This gives your hummingbird a more three-dimensional look.
Painting The Background
Before working on the bird, paint your background. This avoids messing up your detailed work later.
- Simple backgrounds: A soft blue sky, gentle greens, or a blurred flower field.
- Use a large brush and light, sweeping strokes.
- Blend colors while still wet for a smooth effect.
Let the background dry fully before starting on your hummingbird. If you want a more graphic style, you can leave the wall color as your background.
Painting The Hummingbird: Step-by-step
This part is where the magic happens. Follow these steps for best results:
1. Block In The Main Colors
- Use a medium brush to fill in the body, head, wings, and tail with your base colors.
- Don’t worry about details yet; just cover the area with the main color.
2. Add Shadows And Highlights
- While the base color is still a bit wet, add a darker shade to the underside of the body and wings.
- Use a lighter shade or white to highlight the top of the head, back, and tips of wings.
3. Paint The Details
Switch to a fine brush for this stage.
- Outline the beak and add the eye with black or dark brown.
- Paint feather lines with quick, short strokes using a slightly different color than the base.
- Add tiny white dots to the eye for a lively look.
4. Layering For Realism
Hummingbird feathers shine because of many thin layers. Wait for each layer to dry before adding the next.
- Use thin, transparent layers of color to build up depth.
- Add touches of metallic or pearlescent paint for an extra shimmer (optional but adds realism).
Here’s a simple comparison of brush types and their uses:
| Brush Type | Best For | Example Use |
|---|---|---|
| Flat Brush | Background, large areas | Sky, base body color |
| Round Brush | Details, feather lines | Wing edges, eye, beak |
| Liner Brush | Fine lines, highlights | Feather tips, outlines |
Painting Flowers And Extra Details
Many hummingbird wall arts include flowers, as these birds are often seen feeding on nectar.
- Choose simple flowers like trumpet vines, hibiscus, or fuchsias for a classic look.
- Sketch the flowers lightly before painting.
- Use bright reds, pinks, yellows, and greens for petals and leaves.
Painting flowers can balance your composition and add more color. Just remember not to overcrowd your wall—sometimes less is more.
Fixing Mistakes And Cleaning Up Edges
Everyone makes mistakes, especially with wall art. Here’s how to fix common issues:
- Wobbly lines: Let the paint dry, then use the background color to cover mistakes and redraw the line.
- Wrong color: Paint over with white or light color, let dry, then repaint.
- Smudges: Gently wipe with a damp cloth if still wet.
For clean edges, use painter’s tape or a small flat brush. Take your time with this step for a professional finish.
Sealing And Protecting Your Artwork
After your wall art is dry, seal it with a clear acrylic sealer. This keeps your colors bright and protects from dust and moisture. Spray or brush-on sealers are both good—just follow the instructions on the product.
Let the sealer dry completely before touching or hanging anything near your art.
Common Beginner Mistakes And How To Avoid Them
Many first-time painters make the same errors. Here’s how to avoid them:
- Rushing the process: Take your time, especially when layering colors.
- Skipping wall prep: A dirty or uneven wall makes painting difficult and affects the result.
- Using too much paint: Thin layers are better for details and blending.
- Ignoring light and shadow: Adding highlights and shadows makes your hummingbird look real, not flat.
- Choosing the wrong spot: Plan your space before you start—moving art is hard after it’s painted!
A smart tip: Step back often to view your art from a distance. This helps you spot issues you might miss up close.

Credit: artbyjenduran.com
How To Make Your Hummingbird Wall Art Unique
Want your art to stand out? Here are creative ideas:
- Add a second hummingbird or a butterfly for movement.
- Use metallic or glitter paint for the throat and wings.
- Personalize with your initials or a small date in the corner.
- Paint a sunrise or sunset background for extra drama.
Another advanced idea: Paint your hummingbird in a style you like—realistic, cartoon, or abstract. It’s your wall, so have fun with it!
Caring For Your Wall Art
To keep your hummingbird looking fresh:
- Dust gently with a soft, dry cloth.
- Avoid harsh cleaners or scrubbing.
- If the wall gets dirty, gently dab with a slightly damp cloth.
If you ever repaint your room, mask off your art or paint around it carefully.

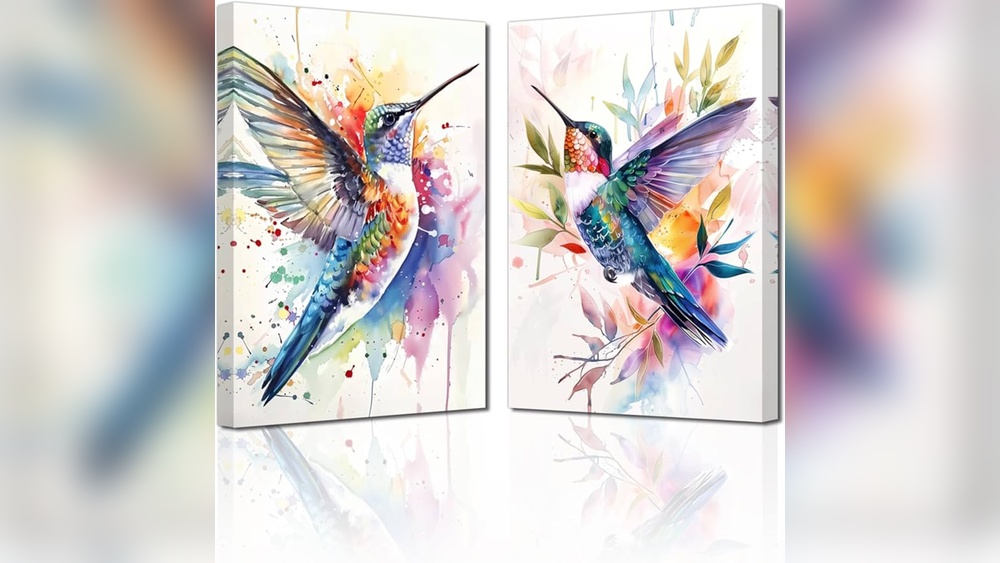
Credit: www.amazon.com
Example Timeline For Painting A Hummingbird Wall Art
Here’s how long each step may take for a beginner:
| Step | Estimated Time |
|---|---|
| Wall preparation | 1-2 hours |
| Sketching design | 30-60 minutes |
| Painting background | 1 hour |
| Painting hummingbird | 2-3 hours |
| Painting flowers/details | 1-2 hours |
| Sealing artwork | 30 minutes + drying time |
Painting can often be done over a weekend, but don’t rush. Enjoy the process!
Final Thoughts
Creating your own hummingbird wall art is a rewarding experience. It’s not just about decoration—it’s about bringing your personality and creativity into your home. The steps above guide you from blank wall to finished masterpiece, even if you’re a beginner. Remember to plan, use the right materials, and enjoy the journey. Every brushstroke adds life to your space, and you’ll be proud every time you see your beautiful hummingbird.
If you want more inspiration, check out the amazing bird paintings at Wikipedia for real-life color ideas.

Credit: meadowsweetstudio.com
Frequently Asked Questions
What Paints Are Best For Hummingbird Wall Art?
Acrylic paints are best because they dry quickly, are easy to clean with water, and work well on most walls. They also let you layer colors for depth and detail.
How Do I Make My Hummingbird Look Shiny Or Iridescent?
Use thin layers of paint and add touches of metallic or pearlescent colors. Highlights with white or light colors in small areas can also make feathers appear shiny.
Can I Paint Over My Wall Art If I Make A Mistake?
Yes, simply let the paint dry, cover the area with white or primer, and repaint. For small mistakes, use the background color to touch up edges.
How Big Should My Hummingbird Be?
The size depends on your wall space. For most rooms, a hummingbird 12-24 inches long looks good. For smaller walls, make it smaller to keep it in proportion.
Do I Need To Seal My Wall Painting?
Sealing isn’t required, but using a clear acrylic sealer will protect your art from dust, fading, and moisture, making it last longer.
With these tips and answers, you’re ready to create a hummingbird wall art that will wow your friends and brighten your home. Enjoy painting!


