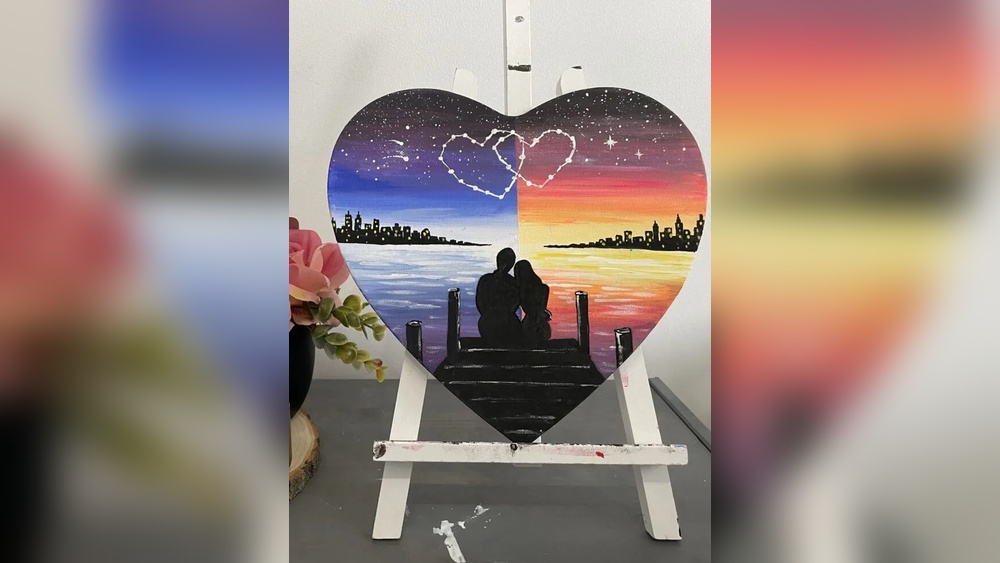
A silhouette painting has no faces, no fabric folds, and no skin tones, yet it can carry more emotion than a detailed portrait. Two dark figures leaning toward each other against a glowing sky tell a story instantly. That simplicity is why couple silhouettes are such a popular anniversary, wedding, and bedroom piece, and why they are achievable even if you have never painted a person before.
This guide covers how to paint a couple silhouette wall art canvas, from choosing a pose and transferring an outline to blending a sunset sky and keeping edges crisp. You can also adapt the method to paint a silhouette from your own photo.
Quick answer: To paint a couple silhouette, first blend a background such as a sunset gradient from yellow near the horizon to orange, pink, and purple above, and let it dry. Transfer the outline of two figures from a photo or drawing, then fill the shapes with solid black or a very dark navy using a small round brush for edges and a flat brush for interiors. Add a dark ground line or landscape so the figures stand on something, and keep the silhouette edges sharp.
Why Silhouettes Are Beginner Friendly
A silhouette reduces a figure to one flat shape. You do not need to model light and shadow on the people, mix flesh tones, or paint facial features. All of the expression comes from the outline: the tilt of a head, the gap between two faces, joined hands, or a dress caught in the wind.
The challenge shifts to two areas. First, the shape itself must be readable, so poses with clear gaps and recognizable gestures work best. Second, the background must have enough color and contrast to make the dark figures pop.
Choosing a Pose That Reads Clearly
Not every photo becomes a good silhouette. When the figures overlap too much, they merge into one unreadable blob. Look for poses where you can see light between the two people in at least one or two places.
| Pose | Why It Works | Watch Out For |
|---|---|---|
| Profile kiss or near kiss | Two facial profiles create a recognizable outline | Leave a tiny gap at noses or foreheads so the profiles stay distinct |
| Holding hands, walking | Clear arms and legs, strong sense of motion | Keep legs slightly apart so they do not merge |
| Forehead touch | Intimate, simple shape | Make sure shoulders and arms are visible |
| Dip or twirl | Dynamic, romantic | Complex limbs; simplify hands |
| Sitting side by side on a bench or hill | Calm, storytelling | Include the bench or hill for context |
Full-body side profiles nearly always read better than front views, because human profiles are more distinctive than frontal outlines.
Materials
- Canvas: 16 x 20 or 18 x 24 inches, primed.
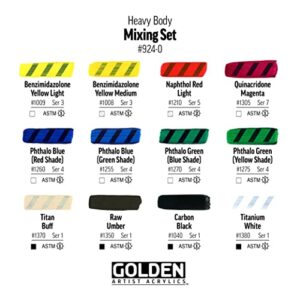
- Acrylic paints: Titanium white, cadmium yellow (or hue), cadmium orange, cadmium red or a warm red, magenta, dioxazine purple or ultramarine blue, and mars black. A dark navy can replace black for a softer look.
- Brushes: 1.5 or 2-inch flat for the sky, size 6 flat for silhouette interiors, size 2 round and size 0 liner for edges and hair.
- Transfer tools: Graphite or transfer paper, a printed outline, a ballpoint pen or stylus, or a projector.
- Extras: Spray bottle, palette, water, paper towels, painter’s tape, and varnish.
The sunset background relies on smooth blending, and the silhouette relies on a deep, opaque black that covers in one or two coats. Paint quality affects both. For recommendations on acrylics that blend smoothly and cover well, check our guide to the best paints for wall art and canvas decor.
Planning Scale and Placement
Before any paint goes down, decide how large the couple should be relative to the canvas. Small figures in a huge sky feel quiet and cinematic, while figures that fill most of the height feel intimate and personal. As a rough guide, figures that stand about one-third to one-half of the canvas height leave room for a dramatic sky without losing the details of the pose.
Place the couple off center. Positioning them on the left or right third, facing slightly toward the open side of the canvas, gives the composition direction. If the sun is included, set it behind the space between the two figures or just beside them; a glow framed by their faces draws the eye exactly where you want it.
Make a quick thumbnail sketch, about 2 x 3 inches, on scrap paper. Shade the figures and ground solid dark and leave the sky blank. If the thumbnail reads clearly at that tiny size, the full canvas will too. If the shapes look confusing, adjust the pose or separate the figures more before you commit.
How to Paint a Couple Silhouette Wall Art: Step by Step
- Plan the horizon. Decide where the ground meets the sky. Placing it about a quarter to a third of the way up from the bottom leaves room for a big sky. Mark it lightly with pencil.
- Paint the sky gradient. Lay out yellow, orange, pink or red, and purple. Starting just above the horizon, paint a band of yellow mixed with a little white. Above it, paint orange, then pink or magenta, then purple at the top. Each band should be about equal height or narrowing as it rises.
- Blend the bands. While the paint is wet, use a clean, slightly damp flat brush to stroke horizontally across each boundary, wiping the brush between passes. Mist with water if the paint starts to drag. Work quickly; acrylic sets fast.
- Add a sun (optional). Paint a pale yellow or white circle on the horizon, partly hidden by it, and soften its edge into the surrounding yellow. Place it so it will glow behind or beside the couple.
- Let the sky dry fully. Give it at least 30 to 60 minutes. Painting the silhouette on damp sky can smear colors.
- Transfer the couple outline. Print your reference outline at the size you need. Slide graphite paper underneath, position it on the canvas so the figures stand on the horizon, and trace the outline with a pen. Alternatively, draw freehand with light pencil.
- Paint the ground. Fill the area below the horizon with black or a dark color. You can make it a flat ground line, a gentle hill, a beach, or a field.
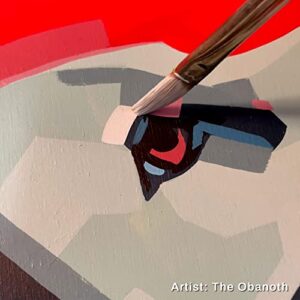
- Outline the figures. Using the size 2 round with fluid black paint, carefully paint along the outline of the couple. Steady your hand by resting your wrist on a clean paper towel on the canvas.
- Fill the figures. Switch to the size 6 flat and fill the interior of each figure. Two coats may be needed for full opacity.
- Add fine details. Use the liner brush for strands of hair, fingers, the edge of a veil, or a flowing scarf. Small extending details give life to a silhouette.
- Add environment. Paint grass blades along the ground, a tree, birds in the sky (simple V or M shapes), or a distant shoreline. Keep all of these in the same dark color as the figures.
- Clean up and varnish. Touch up any edges where sky color was disturbed. Let the painting cure at least 24 hours and apply varnish.
How to Turn Your Own Photo Into a Silhouette
Painting a silhouette of you and your partner makes the piece personal. Here is a straightforward approach.
- Take or choose a photo where the couple is in clear side profile with light behind them or a plain background.
- Increase the contrast in any photo editor until the figures turn dark and the background turns light. Many phone apps have a high-contrast or threshold filter.
- Print the high-contrast image at the size you want on the canvas. Office printers can tile large images across multiple pages.
- Cut out the silhouette and trace around it, or use transfer paper to trace it onto the canvas.
- Simplify fussy areas such as stray hair or folded clothing. The silhouette should read clearly from across the room.
Always paint from photos you took or have permission to use.
Background Ideas Beyond Sunsets
| Background | Colors | Mood |
|---|---|---|
| Night sky with moon | Navy to black, pale yellow moon, white stars | Romantic, quiet |
| Galaxy | Purple, blue, magenta, white splatters | Dreamy, playful |
| Ocean sunset | Sky gradient above, reflected colors on water below | Beach wedding, honeymoon |
| Single-color minimal | Solid blush, gold, or sage with black figures | Modern, clean |
| Abstract color blocks | Overlapping shapes in warm tones | Contemporary |
For a night sky, paint stars by loading an old toothbrush with thinned white paint and flicking the bristles with your thumb. Cover the silhouette areas with paper first if you add stars afterward.
Keeping Silhouette Edges Crisp
- Use fluid paint for outlines. Add a few drops of water so the paint flows off the brush tip.
- Turn the canvas. Rotate it so you can always pull strokes toward yourself, which is easier to control.
- Paint edges first, interiors second. This keeps outlines precise and makes filling easier.
- Fix mistakes with background color. Keep a small amount of each sky color mixed so you can repaint over stray black marks.
- Use tape for straight lines. For benches, piers, or building edges, tape off the lines before painting.
Common Mistakes
Figures merge into one shape. Reposition the pose or create small gaps of sky between faces, arms, and legs.
Gradient bands look stripey. Blending was attempted after paint dried. Repaint the band transitions wet and blend quickly, or use a slow-drying medium.
Silhouette looks gray or streaky. Black was too thin. Apply a second coat or use a heavier-body, more opaque black.
Figures look like they float. Add a ground line, shadow, or reflection so they are anchored.
Too much detail inside the silhouette. Adding facial features or clothing lines breaks the effect. Keep the shape solid.
Sun placed behind a solid figure. If the brightest part of the sky disappears behind a body, the glow is wasted. Shift the sun so it peeks between the figures or sits beside them.
Gift and Display Ideas
Couple silhouettes make thoughtful anniversary and wedding gifts. Add a small handwritten date, place name, or short phrase in a corner with a liner brush or paint pen. For a set, paint the same couple in three seasons on matching canvases. Simple coastal pieces such as the seahorse wall art guide can complement a beach-sunset silhouette in a themed room.
FAQs
What color should a silhouette be painted?
Black is the classic choice. Very dark navy, deep purple, or dark brown work well too and can look softer against warm sunsets. The key is that the figures should be much darker than the background.
How do I paint a smooth sunset background with acrylics?
Work wet into wet, apply colors in horizontal bands, and blend boundaries immediately with a clean damp brush. Misting the canvas and using a slow-drying medium extend working time.
Do I need drawing skills to paint a couple silhouette?
No. Tracing a printed outline with transfer paper is a common and practical approach. Your skill shows in the clean edges and background blending rather than in freehand drawing.
What size canvas is best for a couple silhouette?
16 x 20 or 18 x 24 inches gives enough room for detail and impact. Larger canvases look striking above a bed, while smaller ones work as gifts or shelf art.
How do I paint a silhouette from a photo?
Increase the photo’s contrast until the figures become a dark shape, print it to size, and transfer the outline onto your dried background. Simplify any messy areas before painting.
Can kids paint couple silhouette art?
Older kids can manage it with a pre-traced outline and help with the gradient. Using a stencil or cut-out template makes the silhouette easier to fill.
Final Thoughts
A couple silhouette succeeds when the pose reads at a glance and the background glows behind it. Spend time choosing a pose with clear gaps, blend the sky while it is wet, and keep the figures solid and sharp. The result is a personal piece with real emotional pull and very little technical risk.
Smooth gradients and opaque blacks depend on your paint. To pick a set that blends easily and covers in fewer coats, see our comparison of top acrylic paints for DIY wall art.