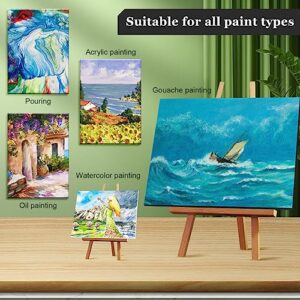
Acrylic pour painting offers endless creative possibilities. Experiment with colors, techniques, and mediums to create stunning abstract art.
Acrylic pour painting, also known as fluid art, involves pouring acrylic paint onto a canvas to create vibrant, abstract designs. This art form has gained popularity due to its mesmerizing results and relatively easy techniques. Artists of all levels can enjoy experimenting with different color combinations, pouring methods, and additives like silicone to produce unique effects.
Common techniques include the dirty pour, flip cup, and swipe method. You only need a few basic supplies, such as acrylic paint, pouring medium, and a canvas, to get started. With practice and creativity, you can produce beautiful, one-of-a-kind artwork that reflects your personal style.

Credit: www.pinterest.com
The Allure Of Acrylic Pour Painting
Acrylic pour painting captivates many art enthusiasts. This technique creates stunning, fluid artworks. It is both accessible and mesmerizing.
Artists love the unpredictability of each pour. No two pieces are ever the same. The colors blend and swirl in unique ways. This makes each creation a one-of-a-kind masterpiece.
The Basics Of Acrylic Pouring
Understanding the basics of acrylic pouring is essential. Here are the steps to get started:
- Prepare your workspace: Cover surfaces with plastic or newspaper.
- Gather your materials: You will need acrylic paints, pouring medium, and a canvas.
- Mix the paint: Combine acrylic paint with the pouring medium. The ratio is usually 1:1.
- Choose your colors: Select a few colors that complement each other.
- Pour the paint: Pour each color onto the canvas. Tilt the canvas to spread the paint.
- Let it dry: Allow the painting to dry for at least 24 hours.
Why Choose Acrylic Pouring?
Acrylic pouring offers several benefits:
- Easy to learn: Beginners can create beautiful art without prior experience.
- Relaxing: The process is calming and therapeutic.
- Creative freedom: Experiment with different colors and techniques.
- Affordable: Materials are inexpensive and readily available.
- Unique results: Each artwork is unique and unpredictable.
These advantages make acrylic pouring a popular choice among artists. It is a fun and rewarding hobby.
Gathering Your Materials
Starting your acrylic pour painting journey begins with gathering the right materials. Having the correct supplies ensures a smooth creative process. This section will guide you through the essential items you’ll need.
Essential Supplies List
To create stunning acrylic pour paintings, you’ll need several key supplies. Here’s a detailed list to get you started:
| Item | Description |
|---|---|
| Acrylic Paint | Choose high-quality acrylic paints in various colors. |
| Pouring Medium | Helps your paint flow and blend smoothly. |
| Canvas | Use a pre-stretched, primed canvas for best results. |
| Cups and Stirrers | Plastic cups and stirrers for mixing paints. |
| Gloves | Protect your hands while working with paint. |
| Drop Cloth | Keep your workspace clean with a protective cloth. |
Selecting Your Colors
Choosing the right colors is crucial for your artwork. Consider these tips:
- Complementary Colors: Pick colors that work well together.
- Experiment: Try different combinations to see what you like.
- Theme: Decide on a color theme for your painting.
- Inspiration: Look at nature or other art for color ideas.
Remember, bold colors can make your painting stand out. Soft pastels can create a calming effect. Try to balance both for a unique look.
Prepping Your Workspace
Creating a masterpiece with acrylic pour painting starts with a well-prepared workspace. Ensuring your area is organized and protected will make the process smoother and more enjoyable.
Setting Up A Pour-friendly Area
Choose a spot with good ventilation. This helps with the paint fumes. A well-lit area allows you to see the colors better. Make sure there’s enough room for your canvas and supplies.
Organize your paints, cups, and tools within easy reach. This helps you stay focused and efficient. Consider using a table or a sturdy surface. A level surface is crucial for even paint flow.
Place a drop cloth or plastic sheet under your work area. This catches any spills and makes cleanup easier. Prepare a drying area for your finished pieces. Ensure it’s dust-free and out of the way.
Protecting Surfaces From Spills
Acrylic pouring can get messy. Protect your surfaces to avoid permanent stains. Use painter’s tape to cover table edges and nearby walls. This shields them from accidental splashes.
Wear old clothes or an apron to protect yourself. Acrylic paint can be hard to remove from fabric. Have paper towels or rags handy for quick cleanups.
Consider using disposable gloves. This keeps your hands clean and paint-free. Keep a trash bin nearby for easy disposal of used materials.
| Item | Purpose |
|---|---|
| Drop Cloth | Protects floor from spills |
| Painter’s Tape | Shields surfaces |
| Disposable Gloves | Keeps hands clean |
| Trash Bin | Easy disposal of waste |
Following these steps ensures a clean and organized workspace. This enhances your creative process and keeps your area neat.

Credit: www.pinterest.com
Techniques To Get You Started
Acrylic pour painting is a fun and exciting way to create art. It uses liquid paint and various techniques to achieve different effects. This section will help you learn two popular techniques: The Dirty Pour Technique and The Flip Cup Method.
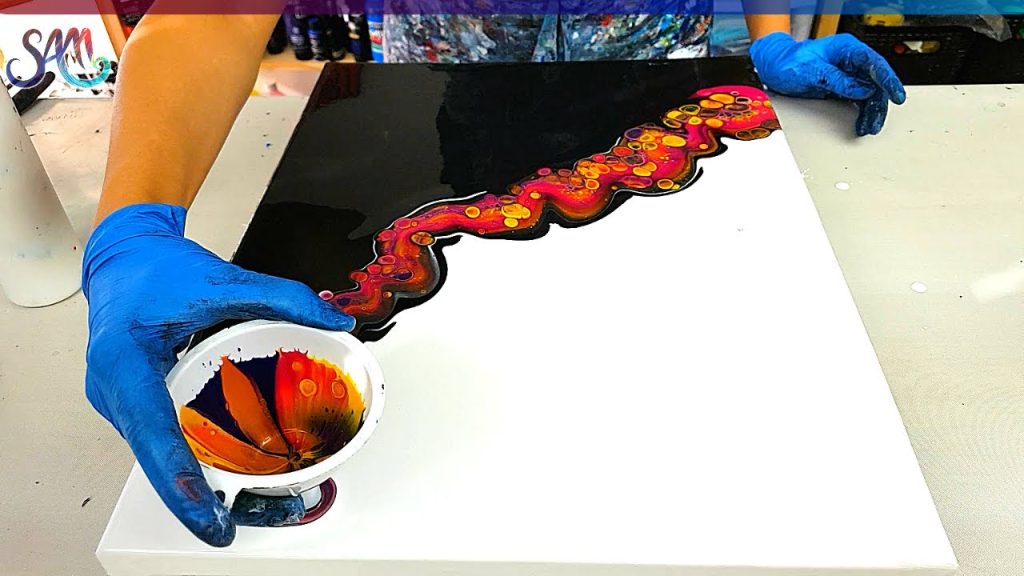
The Dirty Pour Technique
The Dirty Pour Technique is beginner-friendly and very popular. It involves mixing different colors in one cup before pouring. Follow these steps to get started:
- Gather all your materials: acrylic paints, pouring medium, canvas, and a cup.
- Mix each color with the pouring medium in separate cups. The ratio is usually 1:1.
- Layer the colors in one cup without mixing them.
- Pour the contents of the cup onto the canvas in a circular motion.
- Tilt the canvas to spread the paint and create unique patterns.
Here are some tips for a successful Dirty Pour:
- Use contrasting colors for a vibrant effect.
- Experiment with different pouring techniques, such as rings or zigzags.
- Let the painting dry for at least 24 hours before moving it.
The Flip Cup Method
The Flip Cup Method creates amazing cells and patterns. It involves flipping a cup of layered paint onto the canvas. Here’s how to do it:
- Prepare your materials: acrylic paints, pouring medium, canvas, and a cup.
- Mix each color with the pouring medium in separate cups. A 1:1 ratio works well.
- Layer the colors in one cup without stirring them.
- Place the canvas upside down over the cup.
- Quickly flip the cup and canvas together.
- Lift the cup slowly to allow the paint to spread.
- Tilt the canvas to achieve the desired effect.
Here are some tips for a successful Flip Cup:
- Use a silicone oil additive to create more cells.
- Choose colors that blend well together.
- Allow the painting to dry completely before sealing it.
Acrylic pour painting is easy and enjoyable. These techniques are a great way to start your creative journey.
Advanced Pouring Methods
Acrylic pour painting is a captivating art form. For those wanting to elevate their skills, advanced techniques offer exciting possibilities. These methods help create stunning and unique effects on your canvas.
Swirl And Ribbon Techniques
The Swirl Technique involves creating circular patterns. This is achieved by pouring paint in a spiral motion. Use different colors to form beautiful swirls.
Here’s a simple step-by-step guide:
- Prepare your canvas and paints.
- Layer your colors in a cup.
- Pour the paint in a spiral motion.
- Tilt the canvas to spread the paint.
The Ribbon Technique creates flowing ribbon-like patterns. Pour the paint in long, continuous lines across the canvas. Alternate colors for a vibrant effect.
- Use a squeeze bottle for better control.
- Experiment with different pouring speeds.
Creating Cells With Silicone
Creating cells adds texture and depth to your artwork. Using silicone is a popular method to achieve this effect. Silicone helps paint separate into cell-like structures.
Follow these steps to create cells:
- Mix silicone oil into your acrylic paints.
- Pour the paint onto the canvas.
- Use a torch to heat the paint gently.
- Watch as cells start to form.
Here’s a quick reference table for mixing ratios:
| Paint | Silicone Oil |
|---|---|
| 100 ml | 2-3 drops |
Experiment with different amounts of silicone. Achieve various cell sizes and patterns.
Color Theory In Pour Painting
Acrylic pour painting is all about colors flowing together. Understanding color theory is key to creating stunning artworks. Let’s dive into some exciting color ideas for your next pour painting project.
Understanding Color Combinations
Choosing the right color combinations is essential. Using a color wheel can help. Here are some basic combinations:
- Complementary Colors: Colors opposite each other on the wheel. Examples: Red and Green, Blue and Orange.
- Analogous Colors: Colors next to each other on the wheel. Examples: Blue, Blue-Green, and Green.
- Triadic Colors: Three colors evenly spaced on the wheel. Examples: Red, Yellow, and Blue.
Experiment with these combinations to see what you like. Remember, the goal is to create balance and harmony.
Incorporating Metallics And Neons
Metallics and neons add a unique touch to your artwork. They can make your pour painting stand out.
Metallics like gold, silver, and bronze add a shiny effect. They can give your painting a luxurious feel. Use them sparingly for the best effect.
Neons are bright and eye-catching. Colors like neon pink, green, and yellow can add excitement. They work well with darker colors for contrast.
| Type | Examples | Effect |
|---|---|---|
| Metallics | Gold, Silver, Bronze | Shiny, Luxurious |
| Neons | Pink, Green, Yellow | Bright, Exciting |
Mixing metallics and neons can create stunning pieces. Just remember to keep it balanced. Too much of either can overwhelm the viewer.
Finishing Touches
Once you’ve poured your acrylic masterpiece, the finishing touches are crucial. They ensure your artwork stands out and lasts a long time. Let’s dive into the final steps that perfect your acrylic pour painting.
Sealing Your Artwork
Sealing your artwork protects it from dust, dirt, and UV rays. Acrylic paintings are sensitive to their environment. A good sealant keeps them safe.
Here are steps to seal your acrylic pour painting:
- Let your painting dry completely.
- Choose a sealant: glossy, matte, or satin.
- Apply the sealant in a well-ventilated area.
- Use a soft brush or spray for even coverage.
- Let the sealant dry for 24 hours.
Sealing brings out the colors and enhances the shine of your painting.
Troubleshooting Common Issues
Sometimes, issues arise even after careful work. Here are some common problems and their solutions:
| Issue | Cause | Solution |
|---|---|---|
| Bubbles | Air trapped in paint | Use a torch to pop bubbles. |
| Cracks | Paint too thick | Thin layers reduce cracking. |
| Uneven Finish | Improper sealing | Apply sealant evenly. |
| Dust Particles | Dust in the environment | Seal in a clean space. |
Addressing these issues can save your artwork and improve its quality.

Credit: www.youtube.com
Inspiration And Ideas
Acrylic pour painting is a fun and creative art form. It offers endless possibilities for artists of all levels. This section will explore some inspiring ideas to ignite your creativity.
Seasonal Themes And Variations
Seasonal themes can provide great inspiration for your acrylic pour paintings. Each season offers unique colors and elements.
- Spring: Use pastel colors and floral patterns.
- Summer: Bright colors and beachy elements like waves.
- Autumn: Warm tones and leaf patterns.
- Winter: Cool blues, whites, and snowflake designs.
You can also experiment with seasonal variations. For example, a winter-themed pour could include glitter to mimic snow.
Mixing Media And Finding Your Style
Combining different media can take your pour paintings to the next level. You can mix acrylics with other materials like:
- Glitter
- Metallic paint
- Ink
- Resin
Experimenting with these materials can help you find your unique style. Try different techniques and see what works best for you.
A helpful tip is to keep a journal. Note down the combinations you like and the effects you achieve.
| Material | Effect |
|---|---|
| Glitter | Sparkling, eye-catching |
| Metallic Paint | Shiny, reflective |
| Ink | Deep, vibrant colors |
| Resin | Glossy, durable finish |
Frequently Asked Questions
What Do You Mix With Acrylic Paint For Pour Painting?
Mix acrylic paint with a pouring medium for pour painting. Common mediums include Floetrol, Liquitex Pouring Medium, and water.
Do Acrylic Pour Paintings Sell?
Yes, acrylic pour paintings do sell. They are popular for their unique designs and vibrant colors. Many art enthusiasts and collectors seek them out. Selling online through platforms like Etsy or at local art fairs can be effective.
What Colors Are Good For Acrylic Pouring?
Bright colors like turquoise, magenta, and gold work well for acrylic pouring. Earth tones like burnt sienna and ochre also create stunning effects. Experiment with contrasting colors for dynamic results.
How Do You Make Acrylic Pour Paintings Glossy?
Apply a high-gloss varnish or resin to the dried acrylic pour painting. Ensure an even coat for best results.
What Is Acrylic Pour Painting?
Acrylic pour painting involves pouring fluid acrylic paint on a surface.
How To Start Acrylic Pour Painting?
Begin by mixing acrylic paint with a pouring medium.
What Supplies Are Needed For Acrylic Pouring?
You’ll need acrylic paint, pouring medium, canvas, and cups.
Can Beginners Try Acrylic Pour Painting?
Yes, it’s beginner-friendly and easy to learn.
Conclusion
Exploring acrylic pour painting ideas can spark creativity and relaxation. Try different techniques and color palettes. Experiment with new tools and surfaces. Each pour is a unique masterpiece. Dive into the world of acrylic pour painting and let your artistic journey begin.
Enjoy the endless possibilities this art form offers.