PaintingProGuide is reader-supported. When you buy through links on this page we may earn an affiliate commission at no extra cost to you.
The best paint for tile floors is a floor-rated coating system rather than a single can of paint: a bonding primer made for glossy ceramic or porcelain, a durable floor paint or two-part epoxy as the color coat, and a clear floor-grade topcoat for wear resistance. Ordinary wall paint and craft acrylic will scuff and peel within weeks under foot traffic. Even with the right products, a painted tile floor is a cosmetic refresh, not a permanent surface, and it lasts longest in low-traffic rooms that stay dry.
This guide explains what makes a coating suitable for tile floors, how the main paint types compare, the preparation that decides success, and how to create a stenciled tile design. It also links a handful of floor-rated coating kits on Amazon, chosen from their listing details, for readers who prefer a matched system.
Quick answer: Use a bonding primer rated for glossy tile, then a floor-rated paint or two-part epoxy, and finish with a clear floor-grade topcoat. Avoid wall paint and craft acrylic on floors. Expect the best results in low-traffic, dry rooms such as a laundry room or half bath, and leave grout lines and showers to specialist refinishing products or professionals. For a ready-made system, the Rust-Oleum Home Interior Floor Coating Kit is a two-part base and topcoat that lists ceramic and porcelain tile among its surfaces.
How We Approached This Guide
We have not painted tile floors with specific products for this page; the kits we link were chosen from Amazon listing details such as the surfaces they name and their stated dry times. The guidance is based on how floor coatings are generally formulated and on widely published preparation practices. Always follow the instructions on the products you choose, since cure times, temperature ranges and recoat windows vary.
Can You Really Paint Tile Floors?
Yes, with realistic expectations. Glazed ceramic and porcelain tiles are designed to resist stains and moisture, which also means they resist paint. A properly prepared and sealed painted tile floor can look good for a year or more in light-use rooms. In kitchens, entryways and showers, constant foot traffic, grit and water wear through the coating much faster.
Painting makes the most sense when you want a budget refresh before a planned renovation, are working in a rental-style or utility space, or want a decorative stenciled pattern in a small room. If the floor has cracked tiles, loose grout or moisture problems, fix those first, because paint will not hide them for long.
Questions to Ask Before You Start
- How much traffic does the room get? Light-use rooms are good candidates; busy kitchens and entryways are not.
- Does the floor get wet? Occasional splashes are manageable; standing water and showers are not.
- Is the tile sound? Cracked, hollow-sounding or loose tiles need repair first.
- Can the room be closed off? Coatings need uninterrupted curing time, often several days.
- Is ventilation possible? Some primers and epoxies require open windows and fans.
- How long will you keep it? Paint is ideal as a bridge to a future renovation.
Types of Paint and Coatings for Tile Floors
Two-part epoxy
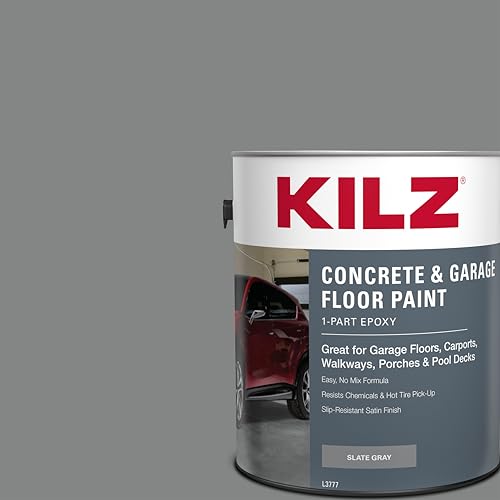
A resin and a hardener mixed just before use. Epoxy cures into a very hard, chemical-resistant film and is one of the most durable options for floors. It has a limited working time once mixed, can have a strong odor, and is less forgiving for beginners.
Floor and porch paint
Single-component paints formulated for foot traffic, often acrylic or urethane-modified. Easier to apply than epoxy, available in many colors, and suitable for stenciled designs. They usually need a bonding primer on glossy tile and benefit from a clear topcoat.
Floor coating kits
Bundled systems that include a base coat, color coat and topcoat, sometimes with tools. They simplify product matching, which matters because coatings from different systems do not always bond well together.
Tub and tile refinishing kits
Designed mainly for bathtubs, sinks and wall tile in wet areas. Some list floor use, but check the label carefully; floors take very different wear from tub walls.
What to avoid
- Wall paint: too soft for foot traffic.
- Craft acrylic: perfect for decorative tiles on a wall or as coasters, not for floors.
- Chalk-style paint without a floor topcoat: porous and easily marked.
- Mixing systems: a primer, paint and topcoat from unrelated product lines may not bond.
Recommended Tile Floor Coating Kits on Amazon
If you would rather buy a matched system than assemble primer, paint and topcoat separately, these floor-rated kits are a practical starting point. They were chosen from Amazon listing details checked in October 2026, mainly for whether the listing names ceramic or porcelain tile floors, the finish and the stated dry times. We have not applied these products ourselves.
| Product | Best For | Key Spec | Price Tier |
|---|---|---|---|
| Rust-Oleum Home Interior Floor Coating Kit, Matte Ultra White | A bright, low-sheen floor | Base + topcoat, up to 100 sq ft | $$$ |
| Rust-Oleum Home Interior Floor Coating Kit, Semi-Gloss Ultra White | Easier wipe-clean floors | Semi-gloss base + topcoat kit | $$$ |
| Rust-Oleum Home Interior Floor Coating Kit, Matte Greige | Hiding everyday dirt | Matte warm neutral, base + topcoat | $$$ |
| Rust-Oleum Home Interior Floor Coating Kit, Matte Black | Bold floors and stencil backgrounds | Matte black, base + topcoat | $$$ |
| DWIL Tub and Tile Refinishing Kit, Semi-Gloss White | Small tiled areas and touch-ups | 16.5 oz, 25 to 30 sq ft per coat | $$ |
Price tiers: $ under $15, $$ $15 to $40, $$$ over $40, based on listing prices checked in October 2026. Prices change often, so confirm on Amazon.
1. Rust-Oleum Home Interior Floor Coating Kit, Matte Ultra White — Best for a bright, low-sheen floor

This is the floor coating kit type described in the section above: a two-part base coat and topcoat system sold together so the layers are designed to bond. The listing says it works on ceramic and porcelain tile as well as concrete, wood, laminate and vinyl, and that it adheres without stripping, sanding or priming.
Each kit is listed to cover up to 100 square feet. The topcoat goes on after 6 hours, and the floor is dry enough for light foot traffic after 24 hours.
Best suited for: Laundry rooms, half baths and other low-traffic rooms where you want a clean, light floor without a shiny finish.
Key features:
- Water-based, low-odor base and topcoat system
- Lists ceramic and porcelain tile among compatible floors
- Up to 100 sq ft per kit; light traffic after 24 hours
Pros:
- Matched system avoids mixing incompatible products
- No separate primer needed per the listing
- Matte finish hides minor surface flaws
Limitations:
- White floors show dirt quickly
- Light traffic only at 24 hours; full cure takes longer
- Cosmetic finish, not a permanent surface
Buying consideration: The listing says no priming is needed, which differs from the general primer advice on this page; follow the kit’s own instructions when you use a matched system, and still clean and degloss the tile thoroughly.
2. Rust-Oleum Home Interior Floor Coating Kit, Semi-Gloss Ultra White — Best for easier wipe-clean floors

The same two-part system in a semi-gloss finish. A little more sheen generally makes a floor easier to wipe down, which helps in kitchens and bathrooms, though it also shows scratches and uneven tile more readily than matte.
The listing gives the same coverage of up to 100 square feet and the same 6-hour topcoat window and 24-hour light-traffic time.
Best suited for: Bathrooms and kitchen corners where easy cleaning matters more than hiding imperfections.
Key features:
- Semi-gloss finish
- Base coat plus topcoat in one kit
- Lists ceramic, porcelain, concrete, wood, laminate, vinyl and linoleum
Pros:
- Sheen makes cleaning easier
- Bright white suits small rooms
- Low odor, water-based
Limitations:
- Shows scuffs and surface flaws more than matte
- Can feel more slippery when wet
- Same cure limits as other kits
Buying consideration: If slip resistance is a concern, read the slip resistance section above before choosing a higher sheen.
3. Rust-Oleum Home Interior Floor Coating Kit, Matte Greige — Best for hiding everyday dirt

A warm gray-beige is one of the most forgiving colors for a floor, because it hides dust, pet hair and grout shadows better than white or black. This kit uses the same base and topcoat system as the whites above.
The listing notes the colors can be mixed or stenciled for a custom look, which ties in with the stenciled tile designs covered later in this guide.
Best suited for: Entryways, laundry rooms and family bathrooms where a neutral floor needs to look clean between washes.
Key features:
- Matte greige finish
- Can be mixed or stenciled (per listing)
- Up to 100 sq ft per kit
Pros:
- Forgiving everyday color
- Works as a base for a stenciled pattern
- Matte finish hides small flaws
Limitations:
- Neutral tone may look flat without a pattern
- Color on screen may differ from the floor
- Needs careful prep like any kit
Buying consideration: Paint a sample tile or board first and view it in your room’s light before committing to a whole floor.
4. Rust-Oleum Home Interior Floor Coating Kit, Matte Black — Best for bold floors and stencil backgrounds

Black is a strong design choice and a classic background for a stenciled pattern in a lighter color. This kit is the same two-part system, listed for ceramic and porcelain tile with a 6-hour topcoat window.
Dark floors show dust and light scratches, so this suits rooms where the floor is a feature rather than a workhorse.
Best suited for: Powder rooms and accent spaces, or as the base color for a two-tone stenciled design.
Key features:
- Matte black finish
- Water-based, low odor
- Light foot traffic after 24 hours
Pros:
- High-contrast stencil base
- Matte finish reduces glare
- Dramatic look in small rooms
Limitations:
- Shows dust and pale scratches
- Can make small rooms feel darker
- Not for heavy traffic
Buying consideration: For a stencil design, buy a second kit in a lighter color from the same line so the layers are compatible.
5. DWIL Tub and Tile Refinishing Kit, Semi-Gloss White — Best for small tiled areas and touch-ups

As the types section above explains, tub and tile kits are mainly made for wet-area walls and tubs. This DWIL kit is one that lists floors among its suitable surfaces, alongside tubs, sinks, countertops and backsplashes, so it can work for a very small tiled floor or a hearth.
The listing gives coverage of 25 to 30 square feet per coat from a 16.5 oz bottle, with two or more coats recommended for dark tiles and a full cure in 7 days.
Best suited for: Small tiled areas such as a hearth, a tiny bathroom floor or a tiled step, rather than whole rooms.
Key features:
- Water-based acrylic, low odor
- Lists floors among suitable surfaces
- Fully cured in 7 days (per listing)
Pros:
- Includes tools in the kit
- Easy water cleanup
- Covers several surfaces in one project
Limitations:
- Small coverage per bottle
- Designed mainly for tubs and walls
- Long cure before heavy use
Buying consideration: Check the coverage against your floor area; a typical small bathroom floor will need more than one kit for two coats.
The four Rust-Oleum Home kits share the same system and differ only in color and finish, so choose by the room: semi-gloss for easy wiping, matte for hiding flaws, greige for everyday dirt and black for a bold or stenciled floor.
Buying Guide: How to Choose Paint for Tile Floors
Check the label says “floor”
Look for products rated for floors and foot traffic, not just “tile” or “multi-surface.”
Match primer to tile type
Glazed ceramic and porcelain need a bonding primer formulated for glossy, non-porous surfaces. Unglazed terracotta or quarry tile is more porous and may need a different primer.
Decide between epoxy and floor paint
Epoxy for maximum durability if you can manage the mixing and working time; floor paint for easier application and stencil work.
Plan the topcoat
A clear floor-grade topcoat adds abrasion resistance and protects stenciled designs. Choose matte, satin or gloss based on slip resistance and look; glossy floors can be slippery when wet.
Consider slip resistance
Some coatings offer anti-slip additives. In bathrooms and laundry rooms, slip resistance matters.
Check temperature and humidity ranges
Coatings cure poorly in cold or humid conditions. Choose a time when the room can be kept within the label range.
Account for cure time
Many floor coatings are walkable within a day but need several days before full traffic and longer before heavy furniture or washing.
How to Prepare and Paint a Tile Floor
- Deep clean: scrub tiles and grout with a degreasing cleaner to remove soap scum, wax and grease. Rinse well.
- Repair: replace cracked tiles, re-grout loose joints and let repairs cure.
- Scuff the glaze: sand the tile surface lightly with fine sandpaper or a sanding pad so primer can grip.
- Remove dust: vacuum thoroughly, then wipe with a damp cloth and let it dry completely.
- Tape edges: protect baseboards, cabinets and thresholds.
- Prime: apply a bonding primer in a thin, even coat with a brush for grout lines and a roller for tile faces.
- Paint: apply the floor paint or epoxy in thin coats, following recoat times.
- Stencil if desired: once the base color is dry, add patterns (see below).
- Topcoat: apply two or more thin coats of a clear floor-grade topcoat.
- Cure: keep traffic off as long as the label recommends, then add furniture pads before moving furniture back.
Stenciled Tile Floors: The Decorative Option
Stenciling turns plain tiles into a patterned floor that looks like encaustic cement tile, and it is where decorative painting skills come in. The process uses the same floor-rated paint as the base, applied through a stencil.
Choosing a stencil
Pick a stencil sized to your tile, such as 12 x 12 inches, with registration marks so each repeat lines up. Simple geometric and Moroccan-style patterns are forgiving; very fine detail is harder to keep crisp on a floor.
Applying the pattern
Use a dense foam roller or stencil brush with very little paint. Offload most of it on a paper towel, then roll or dab straight down. Two light passes give a cleaner edge than one heavy one. Lift the stencil carefully, wipe the back if paint has crept, and move to the next tile. Many people stencil every other tile first, let them dry, then return to the rest to avoid smudging.
Touch-ups
Keep a small artist’s brush and the base color on hand to fix bleed or smudges once the pattern is dry. This is where fine brush control pays off; our guide to painting pottery at home covers similar techniques on glazed surfaces.
Protecting the design
A stenciled floor needs a clear floor topcoat more than a solid-color floor does, because the thin stencil layer wears first. Apply several thin coats and refresh the topcoat when the sheen starts to wear in walkways.
Choosing Colors and Patterns
A painted floor is a large area, so color choice affects the whole room. Mid-tone grays, greiges and soft blues hide dust and scuffs better than pure white or very dark colors, both of which show every footprint. For stenciled floors, a two-color scheme of a light base and a darker pattern is the most forgiving: small touch-ups disappear into the pattern.
Pattern scale matters too. In a small powder room, a bold, large-scale pattern can make the space feel intentional and graphic, while a fine, busy pattern may look cluttered. Diagonal and borderless all-over patterns hide uneven tile lines better than designs that emphasize the grid. Before committing, paint the base and stencil one design on a spare tile or a scrap board and live with it for a day or two.
If your tiles have strong texture or deep grout lines, simpler patterns work better, because stencils do not sit flat over raised areas and fine details blur.
Tools You Will Need
- Degreasing cleaner, a stiff scrub brush and a grout brush.
- Fine sandpaper or sanding pads, plus a vacuum and tack cloth.
- Painter’s tape and drop cloths.
- A short-nap or foam roller for tile faces and an angled brush for grout lines and edges.
- A paint tray and liners for each product in the system.
- For stencils: the stencil, a dense foam roller or stencil brushes, paper towels and a small artist’s brush for touch-ups.
- Knee pads, gloves, and a respirator if the coating label calls for one.
Painting vs. Other Tile Floor Updates
Painting is the lowest-cost way to change a tile floor’s look, but it is not the only one. Peel-and-stick vinyl tiles can go over some existing floors and are removable, though they need a flat surface. Professional refinishing services apply industrial coatings with longer lifespans. Grout recoloring alone can transform dated tile if the tiles themselves are in good shape. Replacement is the most expensive but permanent fix. Consider how long you plan to keep the floor and how much traffic it gets before choosing paint.
Where Painted Tile Floors Work Best
- Laundry rooms and mudrooms: moderate traffic, easy to keep off while curing.
- Half baths and powder rooms: low traffic and little standing water.
- Closets and storage rooms: almost no wear.
- Covered porches with tile: with an exterior-rated floor coating.
- Less suitable: kitchens, main entryways, showers and areas with standing water.
Smaller Tile Projects for Artists and Crafters
If the goal is creative rather than a whole-floor makeover, painting individual tiles is far more forgiving. Decorative tiles for a wall display, backsplash accents, trivets or coasters can be painted with acrylics or porcelain paints and sealed, and they let you experiment with patterns before committing to a floor. Glazed tiles also make good practice surfaces for stencil techniques. For more decorative ideas, the layered method in our scratch art painting guide can be adapted to painted tiles for display.
How Long Does a Painted Tile Floor Last?
Lifespan depends far more on preparation, product choice and traffic than on any single brand. In a well-prepared, low-traffic room with a floor-rated coating and topcoat, many homeowners report results lasting a year or more, with occasional touch-ups. High-traffic areas and wet zones wear faster, especially where chairs slide or grit is tracked in. Felt pads under furniture, doormats at entrances and gentle pH-neutral cleaners extend the life of the finish considerably.
Maintaining a Painted Tile Floor
Care in the first few weeks makes the biggest difference. Many coatings continue to harden for days or weeks after they feel dry, so avoid dragging furniture, placing rugs with rubber backing, or mopping with heavy water until the label’s full cure time has passed.
After that, sweep or vacuum regularly, because grit acts like sandpaper underfoot. Mop with a damp, not soaking, microfiber mop and a pH-neutral cleaner; strong degreasers, bleach and abrasive powders can dull or soften topcoats. Put felt pads on chair and table legs and use doormats at any entry.
When walkways start to look dull, clean the floor thoroughly, lightly scuff the worn areas and apply a fresh coat of the same clear topcoat. Refreshing the topcoat before the color layer wears through is much easier than repainting the floor.
Fixing chips and scratches
Small chips can be touched up with the base color and a fine brush, feathered at the edges, then sealed with a dab of topcoat. On stenciled floors, keep a little of each color in a sealed jar, labeled, so touch-ups match. Larger peeling areas usually point to a preparation problem, such as residue or moisture, and may need sanding back to sound coating before repainting.
Common Mistakes to Avoid
- Skipping degreasing: soap residue and wax prevent bonding.
- Not scuffing glossy tile: primer cannot grip a slick glaze.
- Using wall or craft paint: it cannot handle foot traffic.
- Thick coats: they cure slowly and can peel.
- Walking on it too soon: early traffic damages uncured coatings.
- Painting shower floors: constant water exposure breaks down most DIY coatings.
- Ignoring ventilation: epoxies and solvent-based coatings need fresh air and appropriate respirators.
FAQs
What is the best paint for tile floors?
A floor-rated system: bonding primer for glossy tile, floor paint or two-part epoxy as the color coat, and a clear floor-grade topcoat. Avoid wall paint and craft acrylic.
Can I paint ceramic tile floors without sanding?
Some bonding primers claim to grip without sanding, but lightly scuffing the glaze almost always improves adhesion and durability.
Should I paint the grout too?
In most painted-floor projects, grout is painted along with the tiles for a uniform look. Some people re-mark grout lines with a contrasting color afterward.
How long does painted tile flooring last?
With good preparation and a topcoat, painted floors in low-traffic rooms often last a year or more. High-traffic and wet areas wear faster.
Can I paint porcelain floor tiles?
Yes, with a bonding primer made for very smooth, non-porous surfaces. Porcelain is especially slick, so preparation matters even more.
Can I use acrylic craft paint on floor tiles?
Not for a walking surface. Craft acrylic is too soft for foot traffic and will scuff quickly, even under a topcoat. It is excellent for decorative tiles on walls, trivets and coasters, where wear is light.
How long before I can walk on a painted tile floor?
Many floor coatings allow light foot traffic within about a day, but full cure can take several days or longer. Follow the specific product label, and wait the full cure time before moving heavy furniture back or mopping with water.
Is painted tile slippery?
Glossy finishes can be slippery when wet. Choose a satin or matte topcoat, or one with anti-slip additives, for bathrooms and entryways.
Final Recommendation
Painting a tile floor works when you treat it as a system: deep clean, repair, scuff, prime with a bonding primer for glossy tile, apply a floor-rated paint or two-part epoxy, and protect it with several coats of clear floor-grade topcoat. Choose epoxy for maximum durability, or floor paint if you want easier application and stenciled designs.
Keep expectations realistic: painted tile is a cosmetic refresh best suited to low-traffic, dry rooms. For creative tile projects, start small with decorative tiles, then bring those stencil and brush skills to a floor once you are confident.