Crackle effects make a fresh painting look weathered, like old enamel or sunbaked earth. The trick is controlling where the cracks form and how big they get. Here is how to use crackle medium with acrylic paint, covering both main product types, the exact layering order, what changes crack size, and how to fix the most common failures.
Quick answer: For a two-color crackle, paint a base coat of acrylic and let it dry, brush on an even layer of crackle medium and let it become tacky or dry (follow the label), then apply a contrasting acrylic top coat in one pass without overbrushing. Cracks open in the top coat as it dries and reveal the base color. Thicker top coats give larger cracks, thinner coats give fine ones. Crackle paste, by contrast, is applied thickly on its own and cracks as it dries.
Two Types of Crackle Product
Manufacturers use the word crackle for two different products, and mixing them up is the number one reason the effect fails.
| Type | How it works | Look | Best support |
|---|---|---|---|
| Crackle medium (two-step or layered) | A clear layer sandwiched between a base coat and top coat; makes the top coat shrink and split | Cracked paint revealing a second color underneath | Canvas, panel, wood, MDF |
| Crackle paste | A thick, opaque paste that cracks on its own as it dries | Dry riverbed, cracked earth, plaster texture | Rigid panels or board |
| Crackle glaze or varnish | Clear coat that crazes on its own or over another varnish | Fine antique craquelure over a finished image | Finished, dry paintings |
Read your label to see which one you have. The steps below cover all three. Crackle is a texture effect; if you also want silky transitions elsewhere in the same piece, our guide to acrylic mediums that make blending easier covers the smoothing side of your kit.
Materials
- Acrylic paints in two contrasting colors (heavy body or craft acrylic both work)
- Crackle medium, crackle paste or crackle glaze
- A soft flat brush for the medium and a separate flat brush or foam brush for the top coat
- A palette knife for crackle paste
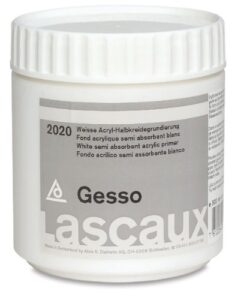
- Primed canvas, gessoed panel or sealed wood
- A hair dryer on a low setting (optional)
- A clear acrylic varnish for sealing
How to Use Crackle Medium With Acrylic Paint: Two-Color Method
- Prepare the surface. Use a primed, clean surface. Bare wood should be sealed with gesso or a primer so it does not soak up the medium unevenly.
- Apply the base coat. Paint the color you want to show through the cracks. Dark bases under light top coats give the strongest contrast. Let it dry completely, usually 30 to 60 minutes for a thin acrylic layer.
- Brush on the crackle medium. Load the brush generously and apply an even layer in one direction. Thin medium gives fine cracks; thick medium gives larger ones. Avoid puddles, which create random craters.
- Wait for the right stage. Most crackle mediums want the top coat applied when the medium is tacky but not wet, often 20 minutes to an hour. Some brands want it fully dry. The label is the authority here because chemistry varies.
- Apply the top coat once. Load the brush fully and lay the top color on in smooth, single strokes, slightly overlapping. Do not go back over it. Rebrushing drags the softened medium and ruins the cracks.
- Let it dry undisturbed. Cracks often start appearing within minutes and continue to develop as the layer dries. Leave the piece flat to avoid drips.
- Seal it. After a full day of drying, apply a clear acrylic varnish to lock in the cracked layer and protect the edges of the flakes.
How to Control Crack Size and Direction
The cracks follow simple physics: the top coat shrinks as it dries, and the crackle medium stops it from gripping the layer underneath. You can steer the results:
- Top coat thickness: Thick paint shrinks more, opening wide cracks. Thin paint forms a fine web.
- Medium thickness: A heavier medium layer increases separation and crack width.
- Brush direction: Long parallel strokes produce cracks aligned with the stroke, useful for wood grain or aged doors. Patting with a sponge gives random, cobweb cracks.
- Temperature and airflow: Gentle warm air from a hair dryer speeds drying and often widens cracks. Too much heat can bubble paint.
- Paint type: Fluid and craft acrylics often crack more readily than very thick heavy body paint, which can resist splitting.
| Goal | Medium layer | Top coat | Application |
|---|---|---|---|
| Fine antique crazing | Thin | Thin | Smooth brush, one direction |
| Bold weathered paint | Heavy | Thick | Loaded brush, single pass |
| Random spiderweb cracks | Medium | Medium | Sponge dab |
| Directional peeling look | Medium | Medium to thick | Long straight strokes |
Using Crackle Paste for Cracked Earth Texture
- Work on a rigid support. Crackle paste can flake if canvas flexes.
- Spread the paste with a palette knife. Thicker applications, roughly 3 to 6 mm, produce larger cracks; thin spreads may barely crack.
- Let it air dry fully, often overnight or longer for thick layers. Do not force-dry thick paste with heat, which can cause it to detach.
- Once dry, paint over it with thinned acrylic or glazes. Color sinks into the cracks, adding depth.
- Seal the surface, ideally with a brush-on medium first, so the absorbent paste stays stable.
Some painters tint crackle paste with a small amount of acrylic before applying. Keep the added color modest so it does not change how the paste dries.
Crackle Glaze Over a Finished Painting
Clear crackle glazes give a crazed, old-master look over a finished image. The painting must be fully dry. Brush on the base glaze, let it dry as directed, then apply the crackle layer. Once cracks form, many artists rub a little burnt umber paint into them and wipe the surface, leaving dark lines that read as aged varnish. Seal afterward. Test on a scrap first, because this cannot be undone easily.
Troubleshooting: Why Didn’t My Crackle Medium Work?
No cracks at all
The top coat may have been too thin, the medium too thin, or the wait time wrong for your brand. Heavy body paint may also resist cracking. Try a thicker top coat of a more fluid paint.
Cracks only in some areas
The crackle medium was uneven. Where it was thin or missing, the top coat simply bonded to the base. Apply the medium more generously and evenly next time.
Top coat smeared or lifted
You brushed back over the top coat, or the medium was still wet. Apply the top coat in one pass and wait for tackiness.
Flakes falling off
Cracks are too wide or the support flexed. Seal the piece promptly and use rigid supports for heavy crackle.
Cracks look too uniform
Vary your stroke direction or switch to sponge application for a natural, irregular look.
Where Crackle Works Best in a Painting
Crackle reads as age, heat or wear, so it is most convincing when the subject justifies it. Using it everywhere turns a painting into a texture sample.
- Old doors, shutters and fences: Two-color crackle in long vertical strokes mimics paint peeling along the grain.
- Desert floors and dry lakebeds: Crackle paste gives the polygon pattern of mud cracks, especially when glazed with warm earth colors.
- Frames and borders: A crackled edge can make a contemporary piece feel vintage without touching the main image.
- Mixed media and abstract work: Crackle contrasts nicely with smooth poured areas and glossy gels.
- Still life props: Cracked ceramic jugs, old enamel pots and weathered signs gain instant character.
Plan crackle areas before you start. Because the effect needs specific layering, it is much harder to add over a finished section than to build in from the beginning.
Crackle Timing Cheat Sheet
Timing is where most crackle projects go wrong, so it helps to see the whole sequence in one place. These are typical ranges for thin to medium layers at normal room temperature; humidity and thickness can stretch them considerably.
| Stage | Typical wait | How to tell it is ready |
|---|---|---|
| Base coat | 30 to 60 minutes | Dry to the touch, no cool or damp feel |
| Crackle medium (tacky method) | 20 to 60 minutes | Slightly sticky when touched with a knuckle, no transfer |
| Crackle medium (dry method) | 1 to 4 hours | Clear and not tacky |
| Top coat cracking | Minutes to an hour | Cracks visible and no longer widening |
| Before varnishing | 24 hours or more | Completely dry through the thickest areas |
| Crackle paste, thick | Overnight to several days | Uniform color, firm, no soft center |
Write down the waits that work with your products and climate. A simple note on the bottle saves guessing next time.
Safety and Durability Notes
Most acrylic crackle products are water-based and low-odor, but read the label for ventilation guidance, especially for glaze systems with a solvent-based step. Wear a dust mask if you sand dried crackle paste, as the dust is fine and easy to inhale.
For durability, remember that crackle is a fractured film by design. Avoid using heavy crackle on items that will be handled often, flexed or washed. On canvas, keep the layers moderate and seal well. On wood pieces, a few coats of brush-on varnish give more protection than a single spray.
Finally, store crackle mediums tightly closed. They thicken as they lose water, and a thickened medium cracks differently from fresh product, which can make results inconsistent from one project to the next.
Acrylic Paint Tips and Tricks for Crackle Projects
- Make a test board. Paint a few strips with different medium and top coat thicknesses. It costs ten minutes and saves a ruined canvas.
- Choose strong value contrast. A crackle effect disappears if base and top coat have similar value.
- Mask boundaries. Use low-tack tape to keep the effect in a defined area, such as a door or frame within a scene.
- Add color to cracks later. Wash a thin glaze over the finished crackle and wipe it back so it settles in the gaps.
- Keep brushes separate. Crackle medium residue can make later paint layers behave oddly. Wash brushes promptly.
Other Acrylic Mediums Worth Understanding
How to use glazing medium with acrylic paint
Glazing medium thins paint while keeping its binder strong, so you can build transparent layers. Mix a small amount of paint into a larger amount of medium, often 1 part paint to 5 to 10 parts medium, and apply thin layers over dry paint.
How to use floating medium for acrylic paint
Floating medium is used for side loading a flat or angle brush to create soft shading. It keeps paint moving smoothly across a surface without hard lines. It is common in decorative painting.
Acrylic paint vs regular paint for crackle
Artist and craft acrylics are the usual choice. Latex house paint can crackle too, but it is formulated for walls, not artwork, and behaves differently on canvas.
If you are building a broader medium kit, our roundup of the best acrylic mediums for smooth blending covers glazing, retarding and blending mediums that pair well with textural work.
FAQs
Do you need a top coat with crackle medium?
Yes, for two-step crackle medium. The cracks form in the top coat. Crackle paste is different and cracks without a top coat.
How long should crackle medium dry before painting over it?
It varies by product. Many recommend applying the top coat when the medium is tacky, roughly 20 to 60 minutes. Always check the label.
Can you use crackle medium on canvas?
Yes, on primed canvas. For thick crackle paste, a rigid panel is safer because canvas flexing can cause flakes to detach.
Can I make crackle effect with glue?
Many crafters use white school glue as a substitute crackle medium. Results vary and long-term durability is unclear, so use dedicated medium for artwork you want to last.
Should you seal a crackle finish?
Yes. A clear acrylic varnish protects the edges of the cracks and keeps flakes from lifting over time.
Why are my cracks too small?
The top coat or medium was too thin. Apply both more heavily, or use gentle warm air to speed drying.
Final Thoughts
Crackle is a controlled failure: you are deliberately making paint split. Once you know which product you have and how thickness and timing affect the result, it becomes repeatable. Keep a test board, record what you did, and seal everything. When you are ready to pair texture with smooth gradients elsewhere in the painting, browse our guide to the top acrylic paint mediums for blending to round out your kit.