A finished painting can look like it appeared in one inspired burst, but nearly every good piece follows a sequence: an idea, a plan, a foundation, and then layers that move from big shapes to small details. So how do you craft a painting that you actually want to hang? Knowing that sequence is the answer. This guide walks through it from blank surface to final varnish, with the materials, timings and fixes that matter at each stage.
Quick answer: To craft a painting, choose a subject and reference, make a small thumbnail sketch to plan the composition, prepare and prime your surface, then lightly draw the main shapes. Block in large areas of color from dark to light (or background to foreground), build up middle layers, add details and highlights last, and seal the dry painting with varnish. Acrylic craft paint on a canvas board is the simplest place to start.
The process is the same whether you’re painting a landscape on canvas or decorating a wooden sign. If you still need materials, our guide to the best craft paint sets for DIY projects explains what to look for before you buy.
Craft Supplies for Painting: What You Actually Need
You can make a solid first painting with a short list. Extra gear helps later, but these items cover nearly every beginner project.
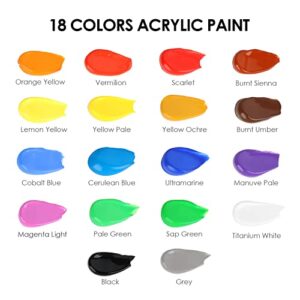
- Paint: a set of acrylic craft paints, or a smaller set of student acrylics in primary colors plus white and black.
- Surface: canvas boards, stretched canvas, wood panels or heavy mixed-media paper.
- Brushes: a 1 inch flat, a medium flat (#8 to #10), a medium round (#6), a small round (#2) and a liner.
- Palette: a plastic palette, a paper plate or a sheet of wax paper taped to the table.
- Water: two containers, one for rinsing and one for clean water.
- Paper towels or a rag for blotting brushes.
- Pencil and eraser for sketching, or a white charcoal pencil for dark backgrounds.
- Optional: gesso, a spray bottle, painter’s tape, a palette knife and a clear varnish.
Acrylic Paint for Crafts vs Artist Acrylics
Craft acrylics come in small bottles, usually in ready-mixed colors, and tend to have a fluid consistency. Artist acrylics come in tubes with more pigment and a thicker body. Both work for paintings, but they behave differently.
| Feature | Craft acrylic | Student/artist acrylic |
|---|---|---|
| Consistency | Thin, pourable | Creamy to heavy body |
| Pigment load | Lower; may need 2 to 3 coats | Higher; better coverage and mixing |
| Color range | Huge range of premixed colors | Fewer, pure pigments for mixing |
| Finish | Usually matte or satin | Varies; often satin |
| Best for | Wood, rocks, signs, decor, kids’ projects | Canvas paintings, blending, layering |
For a first canvas, craft paint is perfectly fine. You’ll simply build color in more thin layers, which is good practice anyway.
Paint Brushes for Crafts and Paintings
Synthetic brushes are the standard choice for acrylic because they hold their shape and tolerate water well. Each shape has a job:
- Flat: broad strokes, backgrounds, sharp edges.
- Round: versatile; thin to thick lines depending on pressure.
- Filbert: rounded flat brush, great for soft edges, petals and blending.
- Liner or rigger: long, thin hairs for branches, grass and signatures.
- Fan: foliage texture and soft blending.
A round paint brush for crafts in a medium size is the single most useful brush if you can only buy one.
Step 1: Choose a Subject and a Reference
Pick something you genuinely want to look at for a couple of hours. Simple subjects teach more at first: a single piece of fruit, a sunset over water, a potted plant or a mug on a table. Work from a photo you took, a real object in front of you or a royalty-free image.
Check your reference for strong lights and darks. Photos with flat, gray lighting make dull paintings. A subject lit from one side gives clear shadows that are easier to paint and look more three-dimensional.
Step 2: Plan with a Thumbnail Sketch
A thumbnail is a tiny sketch, about 2 by 3 inches, that you make in a few minutes to test the composition. Draw a rectangle in the same proportions as your canvas, then rough in the main shapes and shade only three values: light, middle and dark.
Make two or three thumbnails with different arrangements. Ask yourself:
- Where is the focal point? It usually works best off-center, near one of the intersections of a rule-of-thirds grid.
- Does the horizon split the picture exactly in half? Moving it up or down usually looks better.
- Are the darkest dark and lightest light next to each other at the focal point? That’s where the eye will go.
This step takes ten minutes and saves hours of repainting.
Step 3: Prepare Your Surface
Most store-bought canvases and canvas boards come pre-primed with acrylic gesso, so you can paint right away. Bare wood, MDF and paper benefit from one or two coats of gesso, sanded lightly between coats for a smooth finish.
Many painters also tone the surface by brushing on a thin wash of color, such as burnt sienna, yellow ochre or a mid gray. Painting on a stark white surface makes it harder to judge values, because every color looks darker against white. A toned ground gives you a middle value to work from.
Crafts Using Canvas Boards
Canvas boards are thin, rigid panels with canvas glued to cardboard or hardboard. They’re cheaper than stretched canvas, easy to store and ideal for practice paintings, color studies and small gifts. They also fit into frames from craft stores without special hardware. Use them for plein air sketches, coasters (when sealed), mini-series of seasonal paintings or quick daily studies.
Step 4: Draw the Main Shapes
Use a light pencil, a thinned paint line or a chalk pencil to place the big shapes from your thumbnail. Don’t draw details like windows, leaves or facial features yet; they’ll be covered by the first layers of paint anyway. Focus on placement and proportion.
If you struggle with drawing, a grid can help. Draw a light grid over your reference photo and a matching grid on your canvas, then copy one square at a time.
Step 5: Block In the Big Areas
Blocking in means covering the surface with flat areas of color that roughly match the values in your thumbnail. Use your largest brush. Work from the back of the scene forward: sky, then distant land, then midground, then foreground objects.
Speed matters more than precision here. The goal is to kill the white of the canvas and establish the overall color relationships. Keep paint thin in this stage so later layers stick well and texture doesn’t build up too early.
Step 6: Build Middle Layers and Form
Once the block-in is dry to the touch (often 10 to 20 minutes for thin acrylic), start refining. Mix a slightly darker version of each color for shadows and a lighter version for lit areas. Blend where forms turn gradually, like the curve of an apple, and keep edges sharp where one object overlaps another.
Useful mixing habits at this stage:
- Darken colors with their complement or a dark blue or brown rather than black. For example, darken orange with a touch of blue.
- Lighten with white, but add a hint of yellow to warm colors so they don’t turn chalky and pastel.
- Mix enough of each color to finish an area. Re-mixing an exact match in acrylic is difficult once it dries.
Glazing Medium for Crafts and Paintings
A glazing medium thins acrylic paint into a transparent layer without breaking down its binder the way too much water can. Brush a glaze of transparent color over a dry area to deepen shadows, shift a color’s temperature or unify a section. A blue glaze over distant hills, for instance, pushes them back in space. Glazing medium is also useful on crafts like faux-aged wood signs, where a brown glaze settles into crevices.
Step 7: Add Details and Highlights
Details come last for a reason: they sit on top of everything else. Switch to smaller brushes and add the textures and specifics that make the subject recognizable: bark lines, reflections, petals, window frames. Use a liner for anything long and thin.
Highlights are the final touch. Place your brightest light where the light source hits most directly. A single crisp highlight on a glass, an eye or a wet surface makes it look shiny and real. Resist adding detail everywhere; leaving some areas loose makes the focal point stand out.
Step 8: Step Back and Evaluate
Walk away for at least 15 minutes, then look at the painting from across the room. Viewing it from a distance, in a mirror or as a phone photo in black and white reveals problems you can’t see up close. Check:
- Is the focal point the area with the most contrast and detail?
- Do the values match your thumbnail?
- Are there distracting spots, like a bright patch at the edge pulling the eye out?
Make adjustments, sign the painting and let it dry fully.
Step 9: Varnish to Protect the Finished Painting
Varnish protects acrylic paintings from dust, UV light and scuffs, and it evens out patchy sheen. Wait until the paint is completely dry; manufacturers commonly suggest at least 24 to 72 hours for thin layers and longer for thick paint. Brush on a thin coat of acrylic varnish in matte, satin or gloss, working in one direction. A second coat can go on after the first dries.
For crafts that will be handled, such as coasters, ornaments or boxes, a durable clear sealer is especially important.
How Long Does It Take to Craft a Painting?
| Stage | Small canvas (8×10) | Medium canvas (16×20) |
|---|---|---|
| Thumbnails and sketch | 15 to 20 min | 30 to 45 min |
| Surface prep and toning | 10 min plus drying | 20 min plus drying |
| Block-in | 20 to 30 min | 45 to 60 min |
| Middle layers | 30 to 60 min | 1.5 to 3 hrs |
| Details and highlights | 20 to 40 min | 1 to 2 hrs |
| Varnish | 10 min after full drying | 15 min after full drying |
These are rough ranges for acrylic. Oil paintings take longer between layers because oil dries by oxidation over days rather than evaporation over minutes.
Turning Painting Skills into Crafts
The same layer-by-layer method works on functional and decorative projects. Some ideas that use these skills:
- Painted birdhouses: a great way to practice painting on wood and sealing for outdoor use. Our painted birdhouse DIY guide walks through it.
- Ceramic and terra-cotta pieces: unglazed ceramics accept acrylic well; glazed pieces need special paints or primer for adhesion.
- Alcohol ink crafts: a fluid, unpredictable medium for tiles, ornaments and coasters that teaches color layering.
- Metallic accents: metallic craft paint adds a finishing touch to frames, lettering and holiday decor.
- Brush holders: a painted jar or wood block with drilled holes keeps your tools organized and doubles as a practice piece.
Common Beginner Mistakes
- Starting with details. They get lost or look disconnected. Build large shapes first.
- Using paint too thick, too early. Heavy texture in the first layers makes it hard to refine later.
- Overmixing on the canvas. Blending too long creates mud. Mix on the palette, then place strokes and leave them.
- Not cleaning brushes. Acrylic that dries in the ferrule ruins a brush. Rinse often, and never leave brushes standing bristles-down in water.
- Skipping the value plan. Most paintings that “feel wrong” have values that are too similar.
FAQs
What is the first step in making a painting?
Choose your subject and plan it with a quick thumbnail sketch that maps out the composition and the light, middle and dark values. Planning first makes every later step easier.
Is acrylic paint for crafts good enough for canvas paintings?
Yes, for practice and casual work. Craft acrylics have less pigment than artist paints, so you may need extra coats, but they blend, layer and dry the same basic way.
What craft supplies for painting should a beginner buy first?
A basic acrylic set, a few canvas boards, four or five synthetic brushes (flat, round and liner), a palette and two water cups. Gesso and varnish can come later.
Which paint brushes for crafts are most versatile?
A medium synthetic round and a 1/2 inch flat handle the majority of tasks. Add a liner for fine lines and a larger flat for backgrounds.
Do I need to prime a canvas board before painting?
Most canvas boards are pre-primed. Extra gesso is optional but can give a smoother or more absorbent surface. Bare wood and paper should be primed.
How do I fix a mistake in an acrylic painting?
Let it dry, then paint over it. Acrylic is opaque enough, especially with a coat of white or gesso first, to cover almost any error.
Next Step
Crafting a painting comes down to a repeatable sequence: plan, prepare, block in, build, detail and protect. Practice it on small canvas boards and simple subjects, and each painting will teach you something new. When you’re ready to upgrade your colors, our guide to the top-rated craft paint sets for home projects compares options for canvas, wood and mixed-media crafts.