The key to a professional finish is preparation, technique, and using the right tools.
When it comes to transforming your living space with paint, achieving a professional finish might seem challenging. However, with a few strategic professional painting hacks, you can achieve stunning results without hiring a professional. From mastering the right brush technique to choosing quality materials, this guide covers all you need to transform any room in your home into a masterpiece. Dive deeper into these painting hacks to elevate your painting skills and give your home that polished look.
Essential Preparation Steps
Preparation is crucial for a professional finish. Skipping this step can result in uneven applications and subpar results. Follow these steps for optimal preparation:
- Clean the Surface: Ensure all surfaces are dust-free and clean. Use a mild detergent solution to remove any grime or grease.
- Repair and Sand: Fill holes or cracks with a suitable filler, and sand the surfaces smooth. This creates a uniform base for your paint.
- Use Painter’s Tape: Protect trim and edges with painter’s tape for clean, sharp lines.
A well-prepared wall not only makes application easier but also enhances the longevity of your paint job.

Selecting the Right Tools and Materials
Investing in Quality Equipment
Equipping yourself with the right tools can make all the difference. Consider the following:
- Quality Brushes and Rollers: Invest in high-quality brushes and rollers for a smooth and even finish. Cheap tools can shed, leaving bristles or lint on the wall.
- Choose the Right Paint: The type of paint matters. Use water-based paint for easy application and cleanup, or oil-based paint for a durable finish.
- Primers Matter: Depending on your surface type, a primer can help the paint adhere better and enhance the color payoff.
Choosing the right materials ensures a smoother application process and a professional finish.
Mastering Painting Techniques
Expert Tips for a Professional Finish
Technique is just as important as preparation and tools. Here are some expert tips:
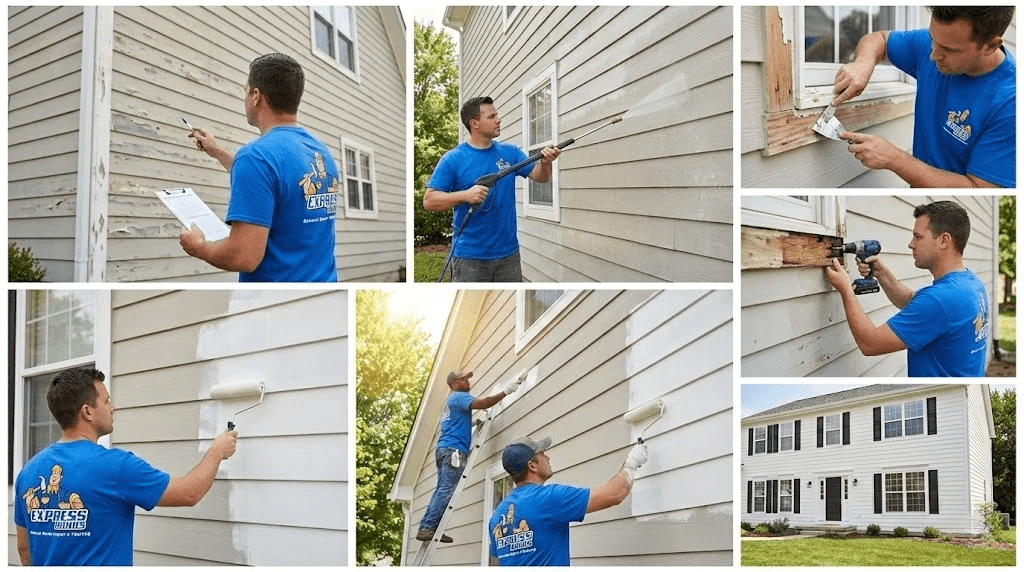
- Cutting-In First: Before rolling, use a brush to paint around the edges and corners. This is known as cutting-in and creates a seamless boundary for rolling.
- Use the “W” Technique: When using a roller, apply paint in a “W” pattern. This ensures even coverage and eliminates lines.
- Don't Oversaturate: Avoid overloading your brush or roller with paint. This prevents drips and uneven application.
Improving your technique can dramatically improve your results, making your work look professional.

The Preparation Habits That Separate Amateur and Professional Results
Box your paint
If a room needs more than one can, pour all the cans into a single larger bucket and stir them together before you start. Batch numbers differ slightly, and the join where one can ended and the next began shows up in daylight as a faint stripe down the wall. Boxing removes that problem completely and takes five minutes.
Seal stains before you paint them
Water marks, smoke damage, knots in timber and marker pen will bleed through ordinary emulsion no matter how many coats you apply. A shellac based or specialist stain blocking primer locks them down. One coat of the right primer saves four coats of the wrong topcoat.
Caulk after priming, not before
Fill nail holes and gaps with decorators caulk once the primer is on. Primer shows up every defect you missed, and caulk sticks better to a sealed surface than to bare plaster or timber. Smooth the bead with a wet fingertip and wipe the excess immediately, because dried caulk on the wall face will telegraph through the paint.
Sand between coats
A light pass with 220 grit paper or a fine sanding sponge between coats knocks down dust nibs and raised grain. On trim and doors this is the single biggest difference between a decorated finish and a sprayed looking one. Wipe with a slightly damp cloth afterwards and let it dry before recoating.
Technique Tricks Decorators Rely On
Keep a wet edge
Almost every roller mark and lap line comes from rolling into paint that has already started to set. Work in sections roughly a metre wide, always rolling back into the wet edge of the previous section, and finish each wall before you stop for tea. In a warm room or in direct sun, make the sections smaller.
Load the brush properly
Dip only the bottom third of the bristles and tap the brush against the inside of the pot rather than dragging it over the rim. A brush loaded to the ferrule pushes paint into the heel, dries hard and never cuts a clean line again.
Choose roller nap by surface, not by habit
A short nap of around 5mm suits smooth plaster and gives the flattest finish. Medium nap around 10mm covers light texture and most emulsion walls. Long nap of 15mm or more is for brick, render and heavily textured ceilings, and it will leave an orange peel finish on smooth plaster if you use it there by mistake.
Use an extender in warm weather
A paint conditioner or extender slows drying slightly, which lets brush marks level out and gives you longer to keep that wet edge. It is the closest thing to a genuine secret in decorating, and it costs very little.
Wrap the brush instead of washing it
For a break of a few hours, or overnight, wrap the loaded brush or roller sleeve tightly in cling film or a freezer bag and press the air out. It will be ready to use again with no washing, no drying time and no waste.