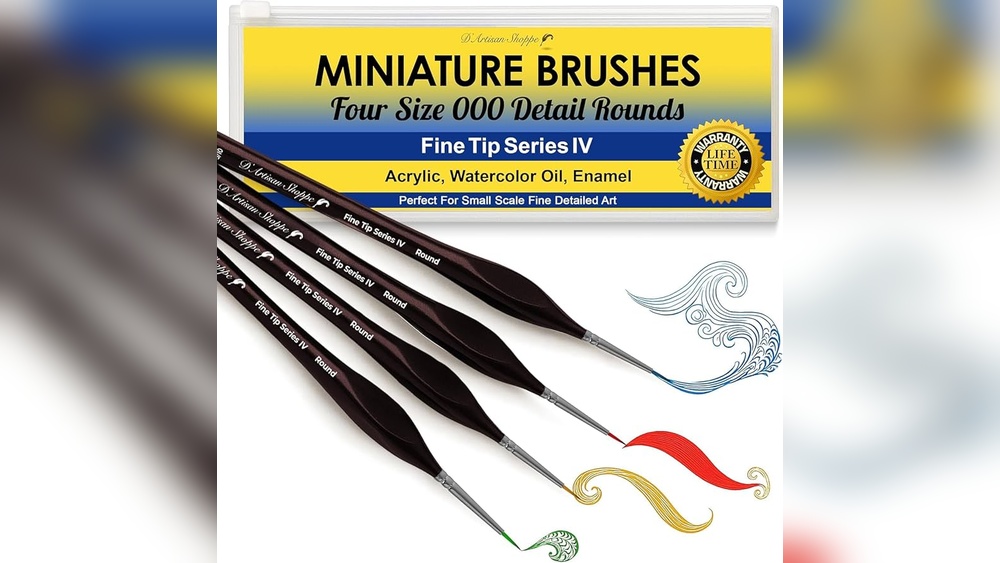
Quick answer: To paint fine details with a small brush, use a round or liner that comes to a sharp point (often a size 0 to 2 works better than the tiniest 20/0), thin the paint to a fluid, ink-like flow, and load only the tip. Anchor your hand on the surface or a mahlstick, paint with the tip using light pressure, and pull strokes toward you. Rinse often so paint never dries at the tip, and work under good light, with magnification if needed.
Fine detail is where many painters get stuck. Eyelashes come out as smudges, lettering wobbles, highlights land as blobs. The usual reaction is to buy an even tinier brush, but brush size is rarely the real problem. Detail depends on four things working together: a brush with a reliable point, paint that flows, a steady hand, and the right technique for the mark.
This guide explains how to choose small detail paint brushes, prepare paint for fine work, steady your hand, and paint specific details like lines, dots, hair and highlights.
Why the Smallest Brush Is Not Always Best
A 20/0 or 10/0 brush has very few hairs. That sounds ideal for precision, but it creates problems:
- It holds very little paint, so it runs dry after a stroke or two.
- Paint dries on it quickly, especially acrylic, ruining the tip.
- Its short hairs give little control over line thickness.
A quality size 0, 1 or 2 round with a sharp point can paint lines just as fine as a 10/0, because the tip does the work, while the belly behind it holds a reservoir of paint. Many miniature and detail painters rely on a size 1 or 2 for most of their fine work, reaching for tiny brushes only for the very smallest marks. The quality of the point matters more than the number on the handle, which is why our guide to the best paint brushes for fine detail and everyday use focuses on point retention.
Types of Fine Detail Paint Brushes
| Brush type | Shape | Best for |
|---|---|---|
| Detail round | Standard round with a sharp point | General detail, small shapes, dots, highlights |
| Spotter | Very short hairs, fine point | Tiny dots, precise spots, retouching |
| Liner | Long, thin hairs | Long fine lines, outlines, lettering |
| Rigger | Extra-long hairs | Ship rigging, branches, grass, long continuous lines |
| Script | Long hairs, slightly fuller than a liner | Lettering, flowing curves, signatures |
| Small angled flat | Slanted edge | Crisp edges, small corners, cutting in |
Paint Brushes for Fine Detail: What to Look For
- A sharp, consistent point that reforms when the brush is rinsed and flicked.
- Snap: the hairs should spring back straight after you press and release.
- A full belly to hold paint behind the tip.
- A short handle for close work, which many detail painters prefer.
- Hair suited to the medium: soft synthetic for acrylic, sable or soft synthetic for watercolor, firmer synthetic for oil detail.
Best Watercolor Brushes for Fine Detail vs Acrylic Detail Brushes
Watercolor detail relies on the brush holding enough water to keep a line flowing. Natural sable rounds have long been favored because they hold a lot of fluid and keep a fine point. Quality soft synthetics have become a common alternative.
Acrylic is harsher. It dries fast and can build up in natural hair, so most painters choose synthetic detail brushes for acrylic. Synthetic filaments clean easily and tolerate frequent rinsing. The best acrylic paint brushes for fine detail tend to be firm enough to push slightly thicker paint but soft enough to keep a delicate tip.
For oil, firmer synthetic rounds and small sable brushes both work. Oil stays wet longer, which makes detail easier to adjust.
Prepare the Paint for Detail Work
Paint consistency is often the true cause of shaky detail.
- Acrylic: Thin to the consistency of ink or milk for lines, slightly thicker (like cream) for dots and highlights. A flow improver keeps color strong while increasing flow. A retarder slows drying, which helps the brush tip stay clean.
- Watercolor: Use a richer, more concentrated mix than for washes, so a fine line still shows clear color.
- Gouache: Thin to light cream. Too thick and it drags; too thin and it loses opacity.
- Oil: Add a little medium so the paint flows off the tip. Very stiff oil paint will not form fine lines.
Mix enough paint for the whole detail pass. Running out and remixing makes color shifts visible in small areas.
Use a Wet Palette for Acrylic
A wet palette, which is a shallow tray with a damp sponge or paper towel under a sheet of baking parchment, keeps acrylic workable for hours. It is especially useful for detail and miniature painting, where you use small amounts over long periods.
Steady Your Hand
- Anchor your hand. Rest the side of your palm or little finger on the surface (protected with a sheet of paper if the paint is wet).
- Use a mahlstick or bridge. A stick resting across the canvas edge, or a ruler propped on blocks, gives your painting hand a stable support over wet paint.
- Brace your elbows. For miniatures, rest both elbows on the table and bring your hands together; the model hand steadies the brush hand.
- Breathe out as you paint the stroke. Many painters find holding their breath makes their hand tense.
- Rotate the work. Turn the canvas or object so you are always pulling the brush toward you or in your most comfortable direction.
- Take breaks. Fatigue and caffeine both increase tremor.
How to Paint Fine Details With a Small Brush: Step by Step
- Finish the underlying layers first. Detail goes on last, over dry paint. Painting detail into wet layers makes lines bleed.
- Set up light and position. Use bright, even light from the side opposite your painting hand to avoid shadows. A magnifier or magnifying visor helps for very small work.
- Thin and test the paint. Make a test line on scrap. It should flow without the brush pressing hard.
- Load only the tip. Dip the front third of the hairs, roll on the palette to form a point, and remove excess.
- Position the brush. Hold it a little closer to the ferrule than normal for control, at roughly 45 degrees for lines or vertical for dots.
- Touch lightly and move. Let the tip glide. Pressure widens the line; lift to narrow it.
- Pull, don’t push. Pulling toward you gives smoother lines than pushing the tip into the surface.
- Rinse often. With acrylic, rinse every minute or two and reshape the point. Dried paint at the tip is the main cause of ragged detail.
- Build gradually. Several light passes look better than one heavy one.
Small Detail Brush Painting Techniques
Fine Lines
Use a liner or a round with a sharp point and fluid paint. Start the stroke with the brush already moving, slightly above the surface, then touch down; this avoids a blob at the start. Lift gradually at the end to taper the line.
Dots and Highlights
Use a spotter or the tip of a small round with slightly thicker paint. Touch straight down and lift straight up. A tiny white highlight in an eye, for example, is often a single touch of the tip.
Hair and Fur
Use a liner or rigger with fluid paint and flick strokes in the direction of growth, lifting at the end to taper. Vary the pressure and length. Layer a darker value first, then lighter strands on top.
Edges and Outlines
For crisp edges, a small angled flat can be easier than a round. Rest the edge where the line should be and pull along it.
Lettering
Script and liner brushes are designed for this. Lightly sketch letters first, then paint each stroke in one movement. Rotate the work so each stroke moves in your strongest direction.
Small Detail Paint Brushes for Miniatures
Miniature painters often paint eyes, edge highlights and tiny insignia. Thin paint more than seems necessary, build up color with several layers, and keep the brush tip immaculate. Many hobbyists keep a separate “best” detail brush used only for final details, and a cheaper brush for general base coats.
Lighting and Magnification for Detail Work
Many detail problems are really seeing problems. If you cannot see the tip of the brush clearly, you cannot place it accurately.
- Use a bright, neutral light. A daylight-balanced lamp shows colors more accurately than warm household bulbs, which matters when matching small touches of color.
- Light from the opposite side. Right-handed painters usually place the lamp to the left, so the hand does not cast a shadow over the area being painted.
- Add magnification for tiny work. A desk magnifier, a head-mounted visor or reading glasses with extra strength can make miniature detail far easier. Start with low magnification; very strong lenses reduce working distance and depth perception.
- Reduce glare. Wet paint reflects light. Adjust the lamp angle until reflections do not hide the surface.
Correcting Detail Mistakes
Small mistakes are easy to fix if you know how each medium behaves.
- Acrylic: Let the mistake dry, then paint over it with the background color and redo the detail. Trying to wipe wet acrylic often spreads it.
- Watercolor: Lift a fresh mistake with a clean, damp brush and a tissue. Dry mistakes can sometimes be lifted by gently scrubbing with a damp synthetic brush, depending on the pigment and paper.
- Oil: Wipe away the wet detail with a cotton swab or the corner of a rag dipped lightly in medium, then repaint.
- Gouache: Rewets easily, so mistakes can often be lifted with a damp brush even after drying, or covered with an opaque layer.
Troubleshooting Fine Detail Problems
| Problem | Likely cause | Fix |
|---|---|---|
| Lines are shaky | Unsupported hand, tension, or pushing the brush | Anchor hand, pull strokes, breathe out |
| Lines break up | Paint too thick or brush too dry | Thin paint; load more into the belly |
| Blobs at start of strokes | Overloaded tip, or touching down stationary | Remove excess; start moving before contact |
| Brush will not point | Dried paint or worn tip | Rinse and reshape; replace worn brush |
| Detail bleeds or feathers | Underlayer wet, or paint too thin | Wait until dry; thicken slightly |
| Hairs splay out | Too much pressure or paint at ferrule | Lighter touch; load only the tip |
Common Mistakes
- Reaching for the smallest brush instead of the one with the best point
- Using paint straight from the tube for lines
- Painting details too early, before the base is resolved
- Letting acrylic dry at the tip
- Using a detail brush for scrubbing or base coats, which ruins the point
- Painting in poor light, which causes eye strain and misplaced strokes
Caring for Detail Brushes
A fine point is fragile. Protect it:
- Rinse frequently during painting and clean thoroughly afterward with mild soap.
- Reshape the point and dry flat or hairs-down.
- Never let the brush rest on its tip in water.
- Keep detail brushes separate from general-purpose brushes so they are not used for rough work.
- For extra protection, set the point with a little brush soap when storing, and rinse before use.
Tips by Skill Level
Beginners
Practice lines and dots on scrap paper before painting detail on a finished piece. Start with a size 1 or 2 round rather than the smallest brush available.
Intermediate Painters
Add a liner and a spotter to your kit and learn which marks each does best. Experiment with flow improver and retarder in acrylic.
Advanced Painters
Refine with glazes over detail to soften and integrate it, so details sit in the painting rather than on top of it. Selective detail, sharp in focal areas and suggested elsewhere, usually reads as more skillful than detail everywhere.
FAQs
What is the best paint brush for small details?
A quality round in size 0 to 2 with a sharp, springy point handles most small details. Add a liner for long fine lines and a spotter for tiny dots.
How do you paint fine lines with a small brush?
Thin the paint to an ink-like flow, load the tip, anchor your hand and pull the brush toward you with light pressure, lifting at the end to taper.
Why can’t I paint fine details?
The usual causes are paint that is too thick, a brush that has lost its point, an unsupported hand or poor lighting. Fix those before buying smaller brushes.
Are synthetic brushes good for fine detail?
Yes. Quality synthetic rounds hold a sharp point and suit acrylic well. Sable is still favored by many watercolorists for its paint-holding capacity.
What size brush is used for fine detail?
Sizes 0, 1 and 2 cover most fine detail. Sizes 10/0 to 5/0 are for the very smallest marks, such as eye highlights on miniatures.
How do I keep my hand steady when painting details?
Rest your hand on the surface or a mahlstick, brace your elbows, rotate the work to paint in your strongest direction and take regular breaks.
Final Thoughts
Fine detail is less about tiny brushes and more about a reliable point, fluid paint, a supported hand and patient layering. Once those are in place, a size 1 round can do remarkable work. If your detail brushes no longer hold a point, compare options in our guide to detail-ready artist brushes for acrylic, oil and watercolor, and see our Princeton synthetic brush review for a look at one synthetic line many acrylic painters use.