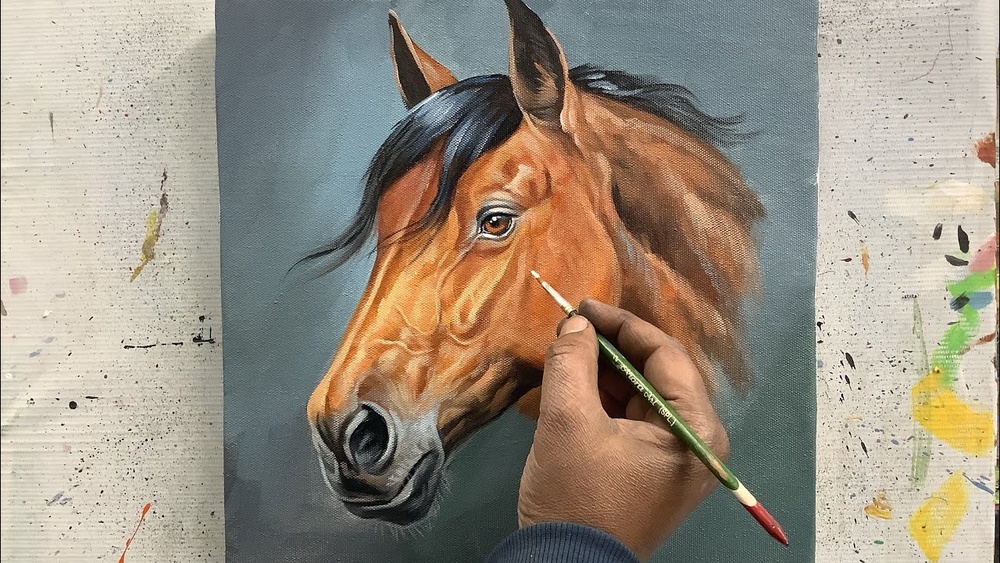
Quick answer: To paint a horse with acrylic paint, measure proportions using the length of the head as a unit, sketch the body as connected circles for chest and hindquarters, and paint the background first. Block in the coat color, model the muscles with darker and lighter planes, and keep the coat smooth by blending rather than adding fur strokes. Paint the mane and tail with flowing strokes, add a dark eye with a soft highlight, and finish with highlights on the muscles and a cast shadow on the ground.
Horses have intimidated artists for centuries. They have long legs with complicated joints, visible muscles under a short, glossy coat, and proportions that look wrong at the slightest error. People who know horses notice immediately when a painted horse has a neck too short or a leg bending the wrong way.
The good news is that horses follow consistent proportional rules, and once you learn a few of them, painting a believable horse becomes a matter of patience rather than talent. This guide explains how to paint a horse with acrylic paint, using a measurement system, coat color recipes and a stage-by-stage approach.
One practical note before you start: horse coats are mixed almost entirely from earth pigments, and those vary between brands in warmth and opacity. Our guide to the best acrylic paint for realistic animal painting covers which lines have reliable earth tones.
Horse Proportions: The Head as a Measuring Unit
Artists commonly use the length of the horse’s head, from poll (top of the head between the ears) to the end of the muzzle, as a unit to check other parts. These are approximate guides, and breeds vary, but they catch the most common errors.
- Body length (point of shoulder to point of buttock) is roughly 2.5 head lengths.
- Height at the withers (top of the shoulder) is roughly the same as the body length, making the main body fit loosely into a square.
- Depth of the body (withers to bottom of the chest) is roughly one head length.
- Leg length (bottom of the chest to the ground) is also roughly one head length or a bit more.
- Neck length along the top line is roughly 1 to 1.5 head lengths.
The single most common error is legs that are too short. Beginners often make the body too deep and the legs stubby. Check: the gap between belly and ground should be about the same as the depth of the body.
Understanding Horse Anatomy for Painting
The Body Masses
Think of the horse as two large circles connected by a barrel. The front circle is the chest and shoulder. The rear circle is the hindquarters. The barrel between them is the ribcage and belly. The neck attaches as a thick, tapering wedge from the front circle.
The Legs
Front legs: The upper leg (forearm) is muscular, then comes the knee, which is a flat, bony joint. Below it, the cannon bone is thin and straight down to the fetlock (a rounded joint), then the pastern angles forward to the hoof.
Back legs: The thigh and gaskin are heavily muscled. The hock is a sharp, backward-pointing joint roughly level with the front knee. Below it, the leg mirrors the front: cannon, fetlock, pastern, hoof.
The Head
A horse head is a long wedge with a wide, flat forehead and large jaw at the back, narrowing to the muzzle. The eyes sit on the sides of the head, about one-third of the way down from the poll. The nostrils are large and expressive. Ears are relatively small and pointed, and they show mood.
Coat Colors and Mixing Recipes
| Coat | Description | Midtone | Shadow | Highlight |
|---|---|---|---|---|
| Bay | Reddish brown body, black mane, tail and lower legs | Burnt sienna + burnt umber | Burnt umber + ultramarine | Burnt sienna + yellow ochre + white |
| Chestnut | Red-gold body, mane same or lighter | Burnt sienna + cadmium orange | Burnt sienna + burnt umber | Cadmium orange + yellow ochre + white |
| Black | Black overall, may fade brown in sun | Ultramarine + burnt umber | Same, darker | Blue-gray (white + ultramarine + umber) |
| Gray | Light to dark gray, may be dappled | White + ultramarine + burnt umber | Darker gray with violet tint | Warm white |
| Palomino | Golden body, white or cream mane | Yellow ochre + raw sienna + white | Raw sienna + burnt umber | Yellow ochre + cadmium yellow + white |
| Buckskin | Tan-gold body, black points | Yellow ochre + raw umber + white | Raw umber + burnt umber | Yellow ochre + white |
Coat colors rely heavily on earth pigments, and those vary between paint brands in warmth and opacity. A red-leaning burnt sienna versus a brown-leaning one can change a bay into a chestnut. Test your burnt sienna on scrap before committing to a coat color.
Materials
- Surface: 16×20 or 12×16 inch canvas. Horizontal for a standing or running horse, vertical for a portrait.
- Paints: Titanium white, burnt sienna, burnt umber, raw umber, yellow ochre, raw sienna, ultramarine blue, cadmium orange, cadmium yellow and a black.
- Brushes: Large flat for background, #12 and #8 filberts for the body, #4 round for features, #0 liner for mane hairs and fine details, and a fan brush for grass.
- Extras: Slow-drying medium or retarder, stay-wet palette, reference photos.
How to Paint a Horse With Acrylic Paint: The Process
Stage 1: Construct the Drawing
Lightly draw a square for the main body. Inside, place the chest circle at the front and the hindquarter circle at the back. Connect them with the belly line. Add the neck as a wedge rising from the chest, and the head at its end. Measure with head lengths. Then draw the legs, marking the joints: knees and hocks roughly at the same height, fetlocks lower. Check your drawing against the reference several times before painting.
Stage 2: Background
Paint the setting: a pasture, a beach, a misty field or a simple gradient. Keep the horizon line below the horse’s back so the horse stands against the sky, which gives a strong silhouette. Paint slightly into the horse’s outline for soft edges later.
Stage 3: Block In
Fill the horse with the midtone coat color. Paint the mane, tail and lower legs in their own colors (black points on a bay, for example). Keep it flat.
Stage 4: Model the Muscles
Horses have visible muscle groups that catch light and cast shadow. This modeling is what makes a horse look powerful rather than like a cutout. With your shadow mix, paint the following areas on the side away from the light:
- Below the neck and along the jaw
- Behind the shoulder, where the shoulder blade meets the ribcage
- Under the belly
- Behind the stifle and along the back of the thigh
- Inside of the far legs
Then add lighter planes on the top of the neck, the shoulder, the top of the rump and the front of the thigh. Blend transitions softly. Horse coats are short and glossy, so smooth blending usually works better than visible fur strokes.
Stage 5: Head and Face
Paint the head structure: a slight hollow above the eye, the flat cheekbone, the large jaw, and the bony bridge of the nose. Paint the eye as a dark, rounded almond shape with a soft reflection of the sky on the upper part, often a curved light gray-blue band rather than a single dot. Add the eyelid and a few lashes. Paint the nostrils dark with a lighter rim, and add soft pink or gray around the muzzle on lighter horses.
Stage 6: Legs and Hooves
Refine each leg, keeping joints bony and the cannon bones thin. Add tendons as subtle lines down the back of the lower legs. Paint hooves dark (or striped on some horses) with a highlight along the front. Paint white markings, such as socks and stockings, with soft cool shadows on their shaded side.
Stage 7: Mane and Tail
Mane and tail hair is long and flowing. Paint it in clumps, not individual strands:
- Block in the overall mane shape with the dark color.
- Paint large flowing locks with a filbert, following the direction the hair falls or blows.
- Add midtone strands on top with a liner, using long, tapered strokes.
- Add a few highlight strands where light catches the top of each clump.
- Pull a few loose strands past the edge for movement.
Stage 8: Highlights and Ground
Add the brightest highlights on the most rounded muscles in direct light: top of the rump, shoulder point, top of the neck, and forehead. A glossy horse has sharp highlights along these curves. Finally, paint a cast shadow on the ground beneath the horse and add grass or sand around the hooves so they sit in the ground rather than on top of it.
Painting White Markings and Dapples
Facial markings like a star, stripe, blaze or snip help identify a particular horse, so paint them carefully from your reference. White markings are not pure white; they take on the light of the scene, with cool gray shadows on the shaded side and warm highlights where the sun hits. Edges of markings are usually slightly soft where white hair meets colored hair.
Dapple gray horses have rings of lighter gray around darker spots. Paint the darker gray base first, then add the lighter rings with a round brush, leaving the darker centers showing. Dapples should follow the form, appearing rounder on flat areas and more oval where the body curves away.
Painting Horses in Motion
Running horses are popular but tricky because the legs take positions that are hard to imagine. Historically, many paintings showed galloping horses with all four legs stretched out, a pose real horses do not make. Photo studies later showed that during a gallop, all four legs gather under the body at the moment of suspension. Always work from a photo for running poses. Add motion with:
- A flowing mane and tail streaming behind
- Kicked-up dust or water spray around the hooves
- Softer edges on the far legs and sharper edges on the head
- A diagonal composition that leads in the direction of travel
Common Horse Painting Mistakes
- Legs too short or too thick: Check that leg length roughly equals body depth, and keep the lower legs slim.
- Neck too thin or short: Horse necks are thick and muscular where they join the chest.
- Head too small: Use the head as a unit and check it against the body.
- Flat body: Model the muscles with light and shadow.
- Stringy mane: Group hair into clumps before adding strands.
- Floating horse: Add a cast shadow and let grass overlap the hooves.
Practice Ideas
- Paint just a horse head in profile, focusing on the bony structure and eye.
- Do a black-and-white value study of a standing horse to understand muscle shading.
- Paint a horse silhouette against a sunset to practice outline accuracy.
- Paint the same horse in two coat colors to see how lighting changes on light and dark coats.
For soft background washes in misty pasture scenes, fluid-bodied paint can glaze more evenly; our fluid acrylic review discusses how this paint type handles washes.
Related Reading
FAQs
How do you paint a horse for beginners?
Start with a side-view horse, use the head length as a unit to check proportions, block in the coat color, add basic shadows under the belly and neck, and keep details simple. A silhouette against a sunset is an even easier start.
What colors do you need to paint a brown horse?
Burnt sienna, burnt umber, yellow ochre, ultramarine blue and white cover most brown horses. Mix burnt umber and ultramarine for the black mane and tail of a bay.
How do you paint a horse’s mane in acrylic?
Block in the mane shape, paint flowing clumps with a filbert, then add midtone and highlight strands with a liner brush using long, tapered strokes.
Why do my horse legs look wrong?
They are usually too short, too thick, or the joints are misplaced. Use a reference photo, keep lower legs thin, and place the hind hock roughly level with the front knee.
How do you make a horse look shiny?
Blend the coat smoothly and add sharp, bright highlights on rounded muscles in direct light, such as the rump, shoulder and neck. Strong contrast between highlight and shadow suggests gloss.
How long does it take to paint a horse in acrylic?
A simple horse can be painted in two to three hours. A detailed, realistic horse on a 16×20 canvas might take eight to fifteen hours across several sessions.
Final Thoughts
Painting a convincing horse comes down to accurate proportions, muscle modeling and a mane painted in clumps. Use the head as your measuring stick, always work from good reference photos, and build the form before details. Coat colors depend on clean, reliable earth pigments, so if your browns look dull, our comparison of acrylic brands with dependable earth tones may help you find a better match for equine work.