Holding a paint brush may look easy, but doing it correctly can completely change your results. If you often end up with streaks, drips, or sore hands, you’re not alone. Many beginners and even some experienced painters struggle with this basic—but critical—skill.
The best way to hold a paint brush correctly is not just about comfort; it’s about control, smooth strokes, and getting the finish you want. This article will guide you through the full process, from grip to posture, and even small tips that make a big difference.
Whether you’re painting walls, trim, or artwork, these techniques will help you achieve a professional look with less effort.
Why Proper Brush Holding Matters
Painting is not just about moving color from a can to a surface. The way you hold your brush affects almost everything: accuracy, speed, and final appearance. When you grip a brush incorrectly, you may use more force than needed, tire your hand quickly, or lose control of the bristles. This leads to uneven lines, brush marks, or paint running where you don’t want it.
Professional painters have learned that a correct grip:
- Reduces muscle fatigue
- Allows for more precise edges
- Helps you paint longer with less strain
- Prevents accidental splatters
You may be surprised how much difference a small change in grip can make. If you’re painting for hours or working on detailed trim, the benefits become obvious.
Understanding Paint Brush Types
Before learning how to hold a brush, you need to know what kind of brush you have. Different brushes are designed for different tasks, and each may require a slightly different approach.
| Brush Type | Best For | Common Sizes | Handle Shape |
|---|---|---|---|
| Flat Brush | Large, flat areas (walls, doors) | 2″ – 4″ | Long, straight |
| Angled Brush | Cutting-in, corners, trim | 1″ – 2.5″ | Beveled |
| Round Brush | Detail work, art, small spots | 1/4″ – 1″ | Short, round |
Key insight: The brush size and shape will affect how you hold it. For example, a trim brush with a short handle is often held like a pencil, while a large wall brush is better held by the ferrule (the metal part) or back of the handle.

Credit: www.masterstrokebyresene.com
The Correct Hand Position
Let’s get to the core technique. How you hold your paint brush depends a bit on the task, but some universal principles apply.
1. Relax Your Grip
Avoid holding the brush too tightly. A relaxed grip gives you better control and prevents hand cramps. Imagine holding a pen or chopsticks—firm enough so it doesn’t drop, but not tense.
2. Position Your Fingers
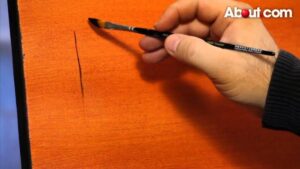
For detail or cutting-in: Hold the brush close to the bristles, with your thumb on one side and your index finger on the other, just above the ferrule. Your other fingers wrap naturally around the handle.
For broad strokes: Hold the brush further back on the handle. This gives you a wider range of motion and helps keep your wrist loose.
3. Adjust For Angle
If your brush is angled, align the angle with your wrist movement. This lets the bristles naturally follow the line you want to paint.
Beginner mistake: Many people grip the brush like a hammer. This makes it hard to control fine details and tires your hand quickly.
Step-by-step: How To Hold A Paint Brush For Different Tasks
Different jobs require slightly different holding methods. Here’s how to adjust for the task:
For Cutting-in (painting Edges)
- Use an angled sash brush (1–2.5 inches).
- Grip it close to the ferrule, as if holding a pencil.
- Rest your pinky finger against the wall for extra control.
- Keep your wrist straight and move your whole arm, not just your wrist.
For Painting Large Surfaces
- Use a flat brush (2–4 inches).
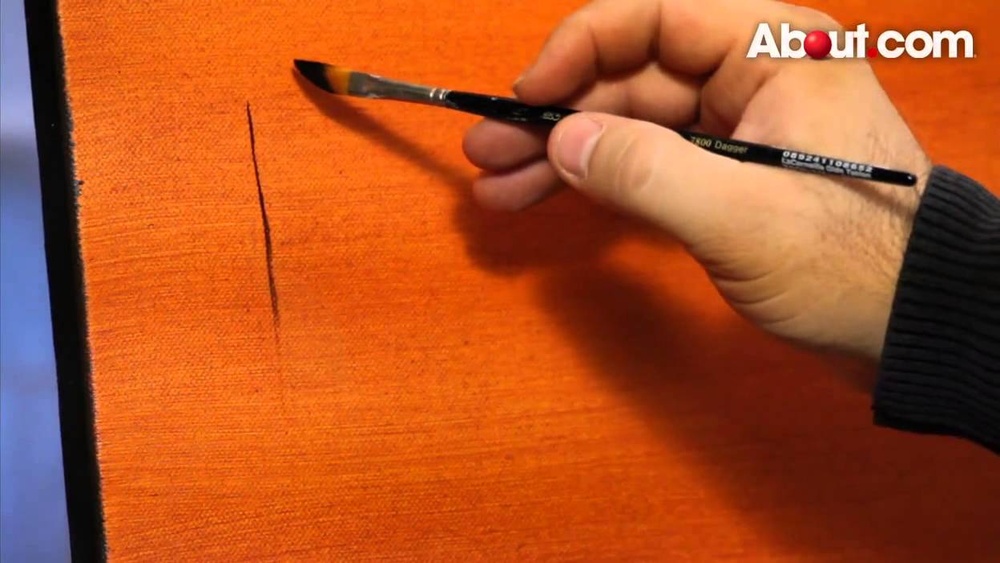
- Grip the handle further back—about halfway or more.
- Keep your hand relaxed and guide the brush in long, even strokes.
- Use your whole arm to move the brush, which reduces fatigue.
For Detail Work Or Art
- Use a round or small flat brush.
- Hold it like a pencil, close to the bristles.
- Support your hand by resting your wrist or pinky on the surface for stability.
These small adjustments help you paint more precisely and for a longer time without getting tired.
Posture And Body Position
Even if you hold the brush correctly, poor posture can cause mistakes. Good painters pay attention to their whole body, not just their hands.
- Stand or sit up straight: Avoid hunching over.
- Keep your painting arm close to your body: This gives you better control.
- Move your body, not just your wrist: For long lines or edges, shift your whole arm or step sideways rather than overextending your wrist.
If you’re painting for a long time, take breaks to stretch your fingers and shoulders.
Dipping And Loading The Brush
How you load your brush with paint affects the grip and the result.
- Dip only the bottom third of the bristles into the paint.
- Tap off excess paint on the side of the can—don’t wipe it off completely.
- Hold the brush at your chosen grip and angle before you touch the surface.
Overloading the brush leads to drips and loss of control. Underloading means you’ll have to go back and forth more often, which tires your hand.

Credit: www.youtube.com
Common Mistakes When Holding A Paint Brush
Even experienced DIYers make mistakes with brush holding. Here are some to watch out for:
- Gripping too tight: Causes hand cramps and shaky lines.
- Holding too far back for detail work: Reduces control.
- Painting only with the wrist: Makes strokes uneven.
- Not adjusting grip for different brushes: Every brush type works best with a different grip.
Awareness of these mistakes helps you correct them before they affect your work.
Comparison: Professional Vs. Amateur Brush Holding
How do the pros do it differently? Here’s a side-by-side look:
| Amateur Approach | Professional Approach |
|---|---|
| Grips handle tightly | Holds with relaxed fingers |
| Uses wrist for all movement | Moves whole arm for steady strokes |
| Doesn’t adjust for different brushes | Changes grip based on brush and task |
| Loads brush with too much paint | Dips only bottom third of bristles |
Non-obvious insight: Professionals often “roll” the brush slightly between fingers as they move, helping the paint flow evenly and the bristles stay sharp at the edge.
Tools That Help With Correct Brush Holding
Some tools and accessories can make holding a paint brush easier, especially for beginners or people with arthritis.
| Accessory | Benefit | When to Use |
|---|---|---|
| Brush Grips | Cushion handle, reduce hand strain | Long painting sessions |
| Extension Poles | Reach high places without ladder | Ceilings, tall walls |
| Ergonomic Handles | Shape fits natural grip | Fine control, less fatigue |
Practice Exercises For Better Brush Control
If you want to improve your painting skills, try these practice drills:
- Straight Line Drill: Paint long, straight lines on scrap wood or cardboard. Focus on keeping the width and edges even.
- Edge Practice: Paint along the edge of a piece of tape, trying not to let the paint bleed under.
- Wrist vs. Arm Movement: Paint lines using only your wrist, then using your whole arm. Notice the difference in smoothness and fatigue.
- Brush Rolling: Practice slowly rolling the brush between your fingers as you paint a line. This helps the bristles maintain a sharp edge.
These exercises build muscle memory and control, making real projects easier.
Cleaning And Maintaining Your Brush Grip
A clean brush is easier and more comfortable to hold. Dried paint on the handle or ferrule makes the brush slippery or sticky. Always:
- Wipe the handle after each use.
- Wash the brush thoroughly with soap and water (for water-based paints) or the correct solvent (for oil-based paints).
- Dry the brush handle and bristles before storing.
This keeps your grip comfortable and extends the life of your brush.
When To Use A Different Tool
Sometimes, a brush isn’t the best tool for the job. Rollers, pads, or sprayers might be better for large areas. But for detail, edges, and trim, a brush with the right grip gives the best result.
If you notice your hand getting tired or the finish isn’t smooth, it may be time to switch tools or adjust your holding style.
Advanced Tip: Two-handed Support
For extra control, especially on ladders or when painting fine details, use your non-dominant hand to steady your painting hand. Place your non-dominant hand under your wrist or forearm. This stabilizes the brush and reduces shaking. Artists use this trick often for precise work.
Real World Example: Cutting-in A Room
Imagine you’re painting the edge where the wall meets the ceiling. Using an angled sash brush, you grip the brush like a pencil, rest your pinky against the wall, and move your arm slowly along the edge. The brush glides smoothly, and you get a crisp, professional line.
If you had held the brush like a hammer or moved only your wrist, the line would be wobbly and uneven.
This method can save you hours of touch-up work and gives a finish you’ll be proud of.
Credit: thepalettemuse.com
Where To Learn More
If you want to dive deeper into paint brush techniques or see visual guides, check out this excellent resource on Wikipedia.
Frequently Asked Questions
How Tight Should I Grip A Paint Brush?
You should hold the brush firmly but gently—enough so it won’t slip, but not so tight your knuckles turn white. A relaxed grip gives you better control and less fatigue.
What’s The Best Way To Hold A Brush For Painting Edges?
Hold the brush close to the bristles, like a pencil, with your pinky resting against the surface for support. This method is best for clean, straight lines along edges or trim.
Can The Wrong Grip Damage My Brush?
Yes. Holding a brush too tightly or pressing too hard can bend the bristles and shorten the brush’s life. Always use gentle, controlled pressure.
Should I Use My Whole Arm Or Just My Wrist?
For long, smooth strokes, use your whole arm and shoulder. For small details, your wrist and fingers are fine. Mixing both gives you the most control and least fatigue.
What If My Hand Gets Tired Quickly?
Try loosening your grip and changing how you hold the brush. Take short breaks, stretch your fingers, and consider using brushes with ergonomic handles or added grips.
Holding a paint brush correctly might seem simple, but mastering it opens the door to better, easier painting. With these tips, you’ll enjoy smoother lines, less strain, and results you’ll want to show off. Don’t forget: practice makes perfect, and even small changes in technique lead to big improvements.