
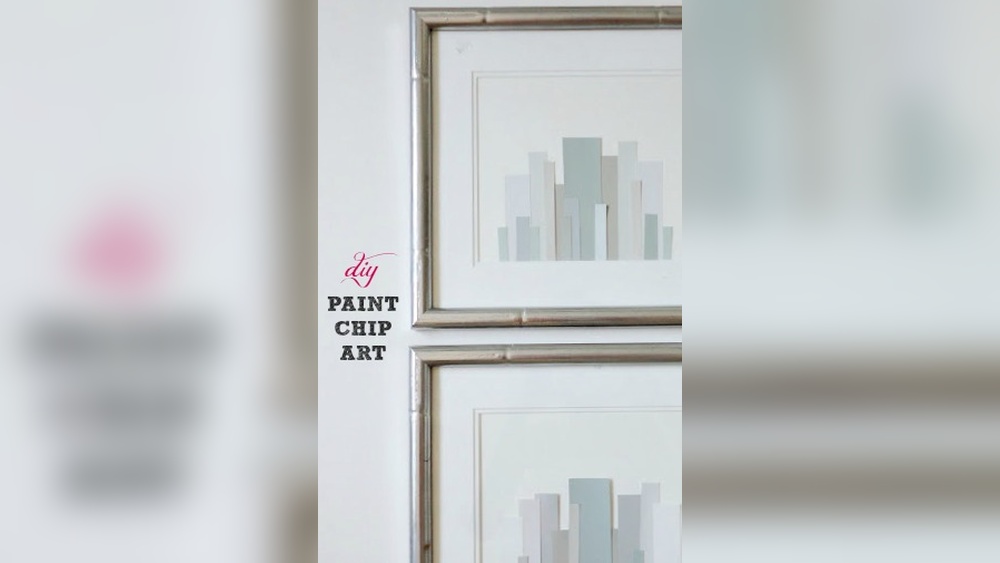
Paint chips, the little color sample cards found at hardware and paint stores, are designed to help you choose a wall color. But their perfectly printed gradients also make them a surprisingly good art material. Cut, punched and arranged, they can form ombre mosaics, geometric mountains, pixel hearts and even trees with color-changing leaves. Because the colors are already coordinated in families, it’s easy to build a design that looks deliberate. Here’s how to do DIY paint chip wall art, from gathering materials and planning layouts to gluing, sealing and framing your finished piece.
Quick answer: To make DIY paint chip wall art, collect paint chips in one or two color families, sketch a simple design on a canvas, foam board or mat board, and cut the chips into squares, strips, hexagons or punched shapes. Arrange them before gluing, attach them with a glue stick, double-sided tape or decoupage medium, then press flat and seal with a clear matte spray to reduce fading. Frame the piece or mount it on a painted canvas for a finished look.
Many of the best designs combine paint chips with a painted background, which adds depth and hides gaps. If you’d like to add painted elements, our guide to the best paints for wall art projects covers acrylic and craft options that work on canvas and board.
A Quick Note on Gathering Paint Chips
Paint chips are offered free so customers can choose colors, and stores stock them for that purpose. Take only what you need for a planned project, or ask staff if they have discontinued cards to spare. Some stores sell sample cards or larger color swatches, and online retailers offer printed color decks. Leftover chips from your own decorating projects are a great starting point too.
Art Supplies for DIY Paint Chip Projects
- Paint chips: single-color cards and multi-shade strips. Large swatches give more usable area.
- Backing: stretched canvas, canvas panels, foam board, mat board or heavy cardstock.
- Cutting tools: sharp scissors, a craft knife, a metal ruler and a self-healing cutting mat.
- Paper punches: circles, hearts, hexagons, squares or leaf shapes in 1 to 2 inch sizes save time and create clean, uniform pieces.
- Adhesive: glue stick, double-sided tape, spray adhesive or decoupage medium.
- Sealer: clear matte acrylic spray, ideally with UV protection.
- Acrylic paint: for backgrounds, borders or extra details.
- Pencil, eraser and a brayer for planning and pressing.
- Frame: a shadow box or standard frame, if you’re not using canvas.
Choosing the Right Adhesive
| Adhesive | Best for | Pros | Cons |
|---|---|---|---|
| Glue stick | Small pieces on cardstock or board | Clean, easy for kids, little warping | Edges may lift over time |
| Double-sided tape | Strips and larger pieces | No drying time, no warping | Fiddly with tiny pieces |
| Spray adhesive | Many pieces at once, large layouts | Even coverage, strong bond | Needs ventilation and overspray protection |
| Decoupage medium | Canvas projects and a sealed, unified finish | Glues and seals in one | Can cause paper curling or wrinkling if applied thickly |
How to Do DIY Paint Chip Wall Art: Step by Step
Step 1: Choose a Design and Palette
Simple, bold designs work best because paint chips are flat blocks of color. Decide whether you want a gradient (one color family from light to dark), a complementary scheme (two opposite families) or a rainbow. Sort your chips by hue and value on the table before cutting.
Step 2: Prepare the Backing
If you’re using canvas or board, paint the background first and let it dry. White makes colors pop, black creates a stained-glass effect between pieces, and a metallic or neutral can tie the piece to your room. Lightly sketch your design in pencil.
Step 3: Cut or Punch the Pieces
Cut chips into uniform shapes with a ruler and craft knife, or use a punch. Trim off printed color names and store logos unless you want them as part of the design. Keep pieces sorted in small cups or zip bags by color.
Step 4: Dry-Fit the Layout
Arrange every piece on the backing without glue. Adjust spacing, swap colors and step back to check balance. Take a phone photo once you’re happy so you can recreate the arrangement if pieces get bumped.
Step 5: Glue Section by Section
Starting from one corner or the center, lift a few pieces at a time, apply adhesive and press them back into place. Work in small sections so the layout doesn’t shift. Roll a brayer over each section or press with a clean cloth to remove air pockets.
Step 6: Press and Dry
If you used liquid glue or decoupage medium, place a sheet of wax paper over the piece and set a few heavy books on top for an hour or two to prevent curling.
Step 7: Seal
Paint chips are printed paper, and printed colors can fade in strong light over time. Spray two light coats of clear matte acrylic sealer, preferably one with UV protection, in a well-ventilated area. Matte keeps the color accurate and avoids glare.
Step 8: Frame or Hang
Frame paper-backed pieces behind glass, ideally UV-filtering glass for sunny rooms. Canvas pieces can hang unframed if the edges are painted. Hang the artwork out of direct sunlight to extend its life.
Paint Chip Wall Art Ideas
1. Ombre Square Mosaic
Cut 1 or 2 inch squares and arrange them in rows from lightest to darkest, diagonally across the board. Leave a narrow, consistent gap (about 1/8 inch) between squares for a tile effect. This looks best large and in one or two color families.
2. Geometric Mountain Range
Cut triangles in blues, grays and purples and layer them to form overlapping mountains, with the lightest triangles in the back to suggest distance. Add a painted circle sun or moon in metallic gold.
3. Paint Chip Tree
Paint a simple tree trunk and branches on a canvas, then punch leaf or circle shapes from chips in greens and golds for spring, or reds, oranges and yellows for fall. Glue them densely around the branches, letting a few “fall” toward the bottom.
4. Hexagon Honeycomb
Punch hexagons in warm yellows and oranges and fit them together like honeycomb. Leave a few gaps or extend a cluster off one edge for a modern, asymmetric design.
5. Pixel Heart or Monogram
Draw a grid on your backing and fill squares to form a heart, initials or a simple icon. Use shades of one color within the design to add dimension, such as light pinks on one side and deep reds on the other.
6. Color Wheel Circle
Cut wedge shapes and arrange them in a circle by hue, with lighter tints toward the center and darker shades on the outside. It’s decorative and a useful color reference for an art space.
7. Strip Gradient Stripes
Use full multi-shade paint strips side by side, alternating direction so light and dark ends form a wave pattern. This quick project is great for kids or a fast weekend upgrade.
8. 3D Paint Chip Flowers
Punch circles, fold each in half and glue several folded circles together around a center to form petals. Mount the flowers on a painted canvas or inside a shadow box for dimension.
9. Word or Quote Art
Cut letters from paint chips using templates or a die-cutting machine, then mount them on a contrasting painted background. Short words like “home,” “create” or a family name work well.
10. Mixed-Media Abstract
Paint a loose acrylic abstract background in your palette, then add paint chip shapes on top in a few areas. The contrast between flat printed color and painted texture looks intentional and modern.
DIY Large Canvas Art Ideas for Beginners Using Paint Chips
Scaling up paint chip art for a large wall needs some planning:
- Combine paint and chips. Fill most of a large canvas with paint, and use chips as accents or in a focal section. This saves time and chips.
- Use larger swatches. Big sample cards cover more area per piece.
- Build a modular set. Make three or four smaller boards that hang together, each with a section of the design.
- Use a grid. On large pieces, a light pencil grid keeps rows straight and spacing consistent.
- Repeat a motif. Repeated circles, hexagons or triangles cover large areas evenly and look cohesive.
For other big-canvas ideas that pair well with paint chip pieces, try a simple painted subject, such as our seahorse wall art guide for a coastal-themed room.
Paint Chip Wall Art with Kids
Paint chips are clean, free of wet paint and easy to handle, making them a favorite classroom and family activity.
- Pre-punch shapes for younger children and let them arrange and glue.
- Use glue sticks rather than liquid glue to reduce mess and warping.
- Try themes: rainbow fish, hot air balloons, a city skyline or a mosaic of their initials.
- Talk about color concepts like light and dark, warm and cool, and how gradients work.
Tips for a Professional Finish
- Cut precisely. Uneven pieces look sloppy in mosaic designs. A paper trimmer speeds up square cuts.
- Keep gaps consistent. Use a spacer, like a thin strip of cardstock, between pieces.
- Hide edges. Paint the canvas sides or frame paper pieces cleanly.
- Limit the palette. Two or three color families look more refined than every color available.
- Seal everything. Sealing protects against fading, dust and humidity.
- Remove text. Trim printed names and logos unless they’re part of the concept.
Common Mistakes and Fixes
| Problem | Cause | Fix |
|---|---|---|
| Curling pieces | Too much wet glue | Use thinner glue layers and press under weight while drying |
| Uneven rows | No guide lines | Draw a light pencil grid before gluing |
| Faded colors over time | Sunlight exposure | Seal with UV-protective spray, use UV glass, hang away from direct sun |
| Design looks busy | Too many color families | Limit to one to three families; add neutral space |
| Visible glue residue | Excess adhesive | Apply glue sparingly; wipe immediately with a damp cloth |
Planning a Design That Works
A few minutes of planning prevents most layout problems.
- Measure the backing. Divide the width and height by your piece size plus the gap to find out how many pieces fit in each row. For example, a 12 inch board with 1 inch squares and 1/8 inch gaps fits about 10 squares per row with a margin.
- Count your chips. Estimate how many pieces of each color you need before cutting, so you don’t run short of a key shade halfway through.
- Sketch in color. Use colored pencils on graph paper to map the design. Each square on the paper equals one piece.
- Decide on a focal point. Place the darkest or brightest colors where you want the eye to land.
- Leave margins. A border of 1 to 2 inches of painted background makes the design look framed and intentional.
Graph-paper planning is especially useful for pixel designs, monograms and gradients, where one misplaced shade stands out.
FAQs
What can I make with paint chips?
Mosaics, ombre wall art, geometric mountains, trees with paper leaves, honeycomb patterns, pixel hearts, color wheels, 3D flowers, bookmarks and greeting cards are all popular paint chip projects.
What glue is best for paint chip art?
Glue sticks and double-sided tape work well for small projects with minimal warping. Spray adhesive is efficient for many pieces, and decoupage medium glues and seals in one step on canvas.
Do paint chips fade?
They can fade over time in direct sunlight because they’re printed paper. Sealing with a UV-protective spray and framing behind UV-filtering glass helps preserve the colors.
How do I make paint chip art look less crafty?
Use a limited palette, precise cuts, consistent spacing and a painted or framed finish. Combining chips with a painted background also gives the piece a more polished, gallery-style look.
Is paint chip art a good project for kids?
Yes. It’s low-mess, inexpensive and teaches color relationships. Pre-cut shapes and glue sticks make it easy for young children.
Can I combine paint chips with acrylic paint?
Yes. Painting a background first and adding paint chips as accents is one of the best ways to create larger, more finished-looking pieces.
Final Thoughts
DIY paint chip wall art turns ready-made color gradients into mosaics, landscapes and graphic designs for very little cost. Plan a simple layout, cut precisely, keep the palette tight and seal the finished piece to slow fading. To add painted backgrounds and details that bring your designs together, see our recommendations for the top acrylic and craft paints for DIY wall decor.




