Quick answer: To paint DIY flower pots at home, scrub and fully dry the pot, seal the inside and rim of terra-cotta so moisture cannot push the paint off, prime the outside, then apply two or three thin coats of outdoor-rated acrylic, letting each coat dry for about an hour. Add your design, wait at least 24 hours, and finish with two coats of clear exterior sealer before planting.
Painted pots fail for one main reason: water. Terra-cotta is porous, so soil moisture travels through the clay wall and lifts paint from behind, which is why so many bright, cheerful pots look chalky and peeling by midsummer. If you learn how to paint flower pots with that in mind, the rest is simple and very forgiving.
This guide covers the full process for painting DIY flower pots at home: picking the right pot, sealing it, choosing paint, design methods that work for adults and kids, drying times, and fixes for the problems that show up later. If you are planning this as a family project, a good starter set makes it easier, and our roundup of paint kits that work well for kids’ craft projects covers sets with enough colors and brushes for a table full of pots.
What You Need to Paint DIY Flower Pots
You do not need specialist gear. Most of this list is already in a typical craft drawer.
- Pots: unglazed terra-cotta is the easiest to paint. Glazed ceramic and plastic need extra prep (covered below).
- Stiff brush or sponge for scrubbing off dust and mineral crust.
- Sealer for the interior: a clear waterproof sealer, a brush-on concrete or masonry sealer, or a thinned coat of exterior acrylic sealer.
- Primer: white acrylic gesso or an exterior primer. White makes colors look brighter.
- Paint: outdoor or multi-surface acrylic craft paint is the most common choice. Standard acrylic works if you seal it well.
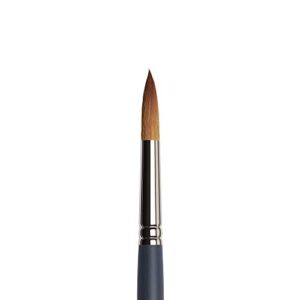
- Brushes: a 1-inch flat for base coats, a small round for details, and a liner for thin lines.
- Extras: painter’s tape, sponges, cotton swabs for dots, paint pens, stencils.
- Clear topcoat: exterior-grade spray or brush-on sealer, in matte, satin or gloss.
- Drop cloth, paper towels and a cup of water.
Choosing the Right Pot
The pot material decides how much prep you need. Here is a quick comparison.
| Pot type | Paint grip | Prep needed | Best use |
|---|---|---|---|
| Unglazed terra-cotta | Excellent | Clean, dry, seal inside, prime | Most projects, indoor or outdoor |
| Glazed ceramic | Poor without prep | Scuff with fine sandpaper, bonding primer | Indoor decor pots |
| Plastic | Fair | Light sanding, plastic-bonding primer | Lightweight hanging planters |
| Concrete or cement | Good | Clean, let cure fully if new, masonry primer | Large outdoor planters |
| Metal (tin, galvanized) | Fair | Degrease, metal primer | Herb tins, rustic displays |
Brand-new terra-cotta often has a light dust coating from the kiln and storage. Older pots may carry a white mineral bloom from fertilizer salts. Both block adhesion, so scrubbing is not optional.
How to Paint Flower Pots: Step-by-Step
Step 1: Clean and dry the pot completely
Scrub the pot inside and out with warm water and a stiff brush. For salt crust on used pots, soak them in a mix of one part white vinegar to three parts water for 20 to 30 minutes, then scrub and rinse.
Now the important part: let terra-cotta dry for at least 24 hours, longer in humid weather. Clay soaks up water like a sponge, and painting over a damp pot traps moisture under the paint. A pot that feels dry on the surface can still be wet inside. If it feels cool to the touch or looks darker in spots, wait.
Step 2: Seal the inside and the rim
Brush sealer over the entire inner wall, the inside base, and the top rim. Many people skip this, then wonder why the paint bubbles. Sealing the inside slows moisture from moving through the wall to the painted surface. Leave the drainage hole open. Let the sealer dry according to its label, usually one to two hours, and apply a second coat for outdoor pots.
If you plan to use the pot only as a cover pot (a plastic nursery pot sits inside it), sealing is still worth doing, but it matters less because the soil never touches the clay.
Step 3: Prime the outside
One coat of white gesso or exterior primer gives paint something consistent to bite into and stops the orange clay from dulling your colors. Apply it thinly with a flat brush in vertical strokes. Dry time is typically 30 to 60 minutes.
Glazed pots need a light scuff with 220-grit sandpaper first, then a bonding primer. Without that step, paint can scratch off with a fingernail even weeks later.
Step 4: Apply the base color
Brush on thin coats. Thick coats look faster but stay soft longer, crack as they dry, and show brush ridges. Two to three thin coats, about an hour apart, give a smooth, even color. Turning the pot upside down on a jar or can lets you paint the whole outside without touching it.
Step 5: Add your design
Wait until the base coat is dry to the touch, usually an hour. For taped designs, give it several hours so the tape does not pull up the base. Design ideas and methods are covered in the next section.
Step 6: Let it cure
Acrylic feels dry within an hour but stays soft underneath for longer. Give the finished design at least 24 hours before sealing. In cool or humid rooms, 48 hours is safer.
Step 7: Seal the outside
Apply two light coats of clear exterior sealer, letting the first dry before adding the second. Spray sealers give the smoothest finish but should be used outdoors or in a well-ventilated space. Brush-on sealers work fine; use a soft brush and avoid overworking, which can smear paint pens or reactivate soft layers.
Wait the full cure time on the sealer label before planting, often 24 to 72 hours.
Easy Flower Pot Painting Ideas
Here are design methods that work well on curved surfaces, sorted roughly from easiest to most involved.
Color-dipped rim
Paint the rim and the top inch or two in a contrasting color. Use painter’s tape as a guide for a crisp line, or freehand for a loose, painted look. It is one of the quickest ways to make a plain pot look finished.
Painted stripes and color blocks
Wrap tape around the pot horizontally for bands, or diagonally for a geometric look. Press the tape edges firmly, paint, and pull the tape while the last coat is still slightly tacky for the cleanest edge. On tapered pots, horizontal tape will not lie flat in a straight line all the way around, so use thinner tape or accept a small curve.
Dot patterns
Use the back of a brush, a pencil eraser, or cotton swabs to stamp dots. Dots hide small mistakes well, which makes them good for kids. For mandala-style dot work, our guide on how to do dot painting at home covers spacing and tool sizes in detail.
Ombre fade
Pick two colors and mix three or four in-between shades on your palette. Paint the darkest band at the bottom and work upward, blending each band into the next while wet. A slightly damp sponge helps soften the transitions.
Sponge texture
Dab a natural sea sponge or crumpled paper towel into paint, blot most of it off, and press it onto the base coat. Layering two or three related colors creates a stone-like or speckled finish that hides fingerprints and chips.
Simple faces and characters
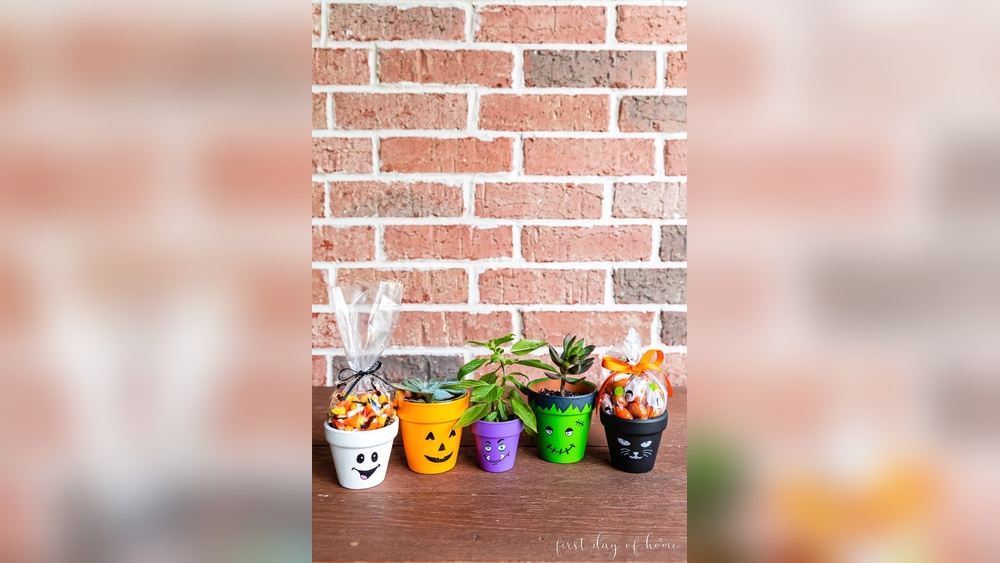
Kids love turning pots into faces where the plant becomes the “hair.” Paint the base, then add eyes, cheeks and a mouth with paint pens or a small round brush. Succulents and grasses make great hair.
Botanical motifs
Leaves, lemons, daisies and vines suit plant pots naturally. Sketch lightly with a pencil first, block in shapes with a flat color, then add one shade darker for depth and a thin highlight on one side.
Painting Flower Pots With Kids
Flower pots are one of the best first painting projects for children: the surface is sturdy, the result is useful, and a small pot is finished in one sitting. A few adjustments make it smoother.
- Do the prep yourself. Cleaning, sealing and priming involve waiting and, with some sealers, fumes. Have primed pots ready before kids sit down.
- Use small pots. 3- to 4-inch pots are easier for small hands to hold and fill with design quickly.
- Choose washable or non-toxic craft paint labeled for children, and keep spray sealers for adults only, outdoors.
- Give each child a paper plate palette with four or five colors. Too many colors usually ends in brown.
- Use paint pens for details. They give kids control that small brushes do not.
- Plan for drying. Set up a drying station on a tray so pots are not moved while wet.
For other table-friendly projects in the same spirit, painted candles are a nice follow-up; see our tips on painting DIY candles at home.
Drying and Curing Times at a Glance
| Stage | Typical time | Notes |
|---|---|---|
| Pot drying after washing | 24 hours minimum | Longer in humid weather |
| Interior sealer | 1 to 2 hours per coat | Check label |
| Primer | 30 to 60 minutes | Thin coats dry faster |
| Each acrylic coat | About 1 hour | Touch-dry, not cured |
| Before sealing design | 24 to 48 hours | Lets paint harden |
| Before planting | 24 to 72 hours after sealing | Follow sealer instructions |
Temperature matters. Most acrylic and sealer products recommend application between roughly 50 and 85 degrees Fahrenheit. Painting in a cold garage slows drying and can leave a cloudy finish.
Common Mistakes When Painting Terra-Cotta Pots
- Painting a damp pot. The most common cause of bubbling and peeling. Dry for a full day.
- Skipping the inside seal. Moisture from soil travels through the clay and pushes paint off the outside.
- Using thick coats. They crack and stay tacky. Thin layers always look better.
- Sealing too soon. Sealer applied over soft paint can wrinkle or turn cloudy.
- Painting the drainage hole shut. Keep it clear so roots do not sit in water.
- Using indoor-only sealer outside. Some clear coats yellow or turn white with sun and rain exposure.
- Forgetting the base. The bottom sits in a saucer of water. Seal it or the paint near the base will fail first.
Troubleshooting Painted Pots
Paint is peeling or flaking
This almost always comes from moisture behind the paint or a dusty surface. Scrape off loose paint, let the pot dry fully indoors for several days, seal the inside, and repaint the damaged area.
White haze appears on the paint
Mineral salts from water and fertilizer can migrate through unsealed clay and leave a white film. Sealing the inside reduces it. Wipe the haze with a damp cloth and a little vinegar, dry, and add a fresh topcoat.
Sealer turned cloudy
Cloudiness often comes from humidity during application or from sealing over paint that was not dry. Let it sit in a warm, dry room for a day; sometimes it clears. If not, lightly sand and recoat in better conditions.
Paint pen lines smeared
Some paint pen inks reactivate under brush-on sealer. Use a light mist of spray sealer first to lock the lines, then brush on additional coats if you want.
Indoor vs Outdoor Painted Pots
Indoor pots face far less stress: no UV, no rain, no freeze-thaw. Regular acrylic craft paint with a decent clear coat will hold up for years on a windowsill. Outdoor pots need more care. Use outdoor-rated paint, seal every surface, and pick a UV-resistant topcoat. In regions with hard winters, bring terra-cotta inside before frost, because water in the clay expands as it freezes and can crack both the paint and the pot.
Expect to touch up outdoor pots every season or two. A fresh topcoat each spring extends the life of the design considerably.
Tips by Skill Level
Beginners: stick to color-blocked rims, dots and sponge textures. These look good even with uneven brushwork.
Intermediate: try ombre blending, taped geometric patterns and simple botanical shapes with one shadow tone.
Advanced: paint wraparound scenes, fine linework with a liner brush, or faux finishes like weathered verdigris (layers of teal, green and white dry-brushed over bronze).
FAQs
What kind of paint is best for flower pots?
Outdoor or multi-surface acrylic craft paint is the most popular choice because it bonds well to primed terra-cotta and cleans up with water. Regular acrylic also works if you seal the pot inside and out. Avoid washable kids’ tempera for pots that will be watered, since it can rewet and run.
Do I need to seal terra-cotta pots before painting?
Sealing the inside and rim is strongly recommended. It slows moisture moving through the clay, which is the main reason paint peels from the outside of terra-cotta pots.
Can I paint plastic flower pots?
Yes. Lightly sand the surface to remove the sheen, wipe off the dust, and apply a primer made for plastic. Without the primer, acrylic tends to scratch off easily.
How long should painted pots dry before planting?
Let the design dry for 24 to 48 hours, seal it, and then wait the full cure time listed on the sealer, which is often one to three days. Planting too early can soften the finish.
Is painted terra-cotta safe for herbs and vegetables?
Many gardeners paint and seal only the outside of pots used for edibles and leave the inside unsealed or use a sealer labeled safe for that use. If in doubt, use a plastic liner pot inside the painted pot so soil never touches painted or sealed surfaces.
Why is the paint on my pot bubbling?
Bubbles usually mean moisture is trapped under the paint, either because the pot was not fully dry or because water from the soil is moving through unsealed clay. Let the pot dry thoroughly, seal the interior, and repaint.
Next Step
Painting DIY flower pots at home comes down to three habits: a fully dry pot, a sealed interior, and thin coats with a proper exterior topcoat. Get those right and almost any design will last through a season or more.
If you are setting up a pot-painting afternoon with children, having the right supplies on hand removes most of the frustration. Take a look at our guide to the best DIY paint kits for kids to find a set with bright colors, decent coverage and brushes sized for small hands.