
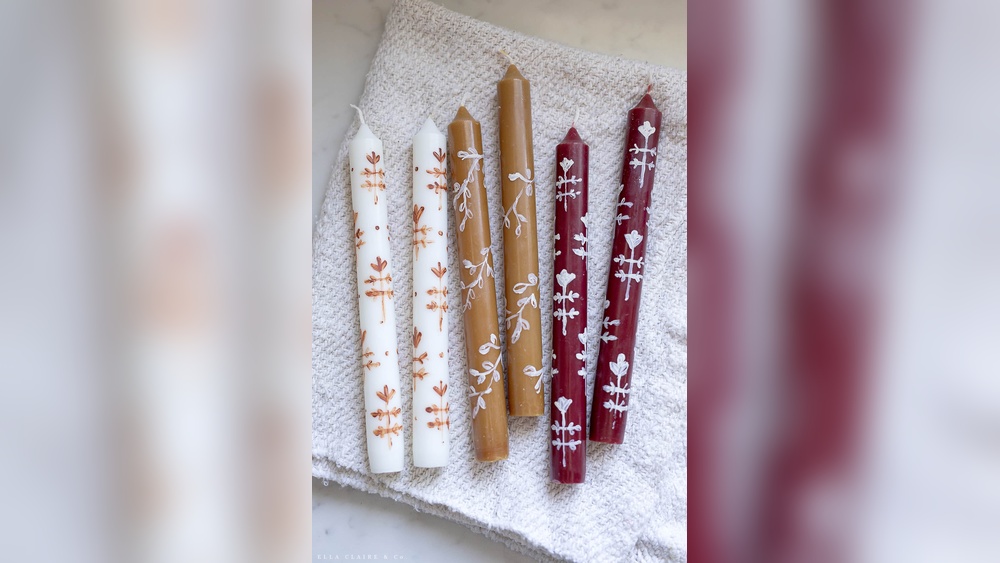
Plain white pillar candles are inexpensive, widely available, and practically a blank canvas. With a few bottles of acrylic paint and the right prep, you can turn them into seasonal decor, wedding favors, personalized gifts, or a rainy-afternoon craft project with kids. The catch is that wax is slick and slightly oily, so paint applied straight onto a candle tends to bead up, crack, or peel.
This guide covers how to paint DIY candles at home so the design actually sticks, including surface prep, which paints and mediums work on wax, design ideas for every skill level, and important safety tips for burning painted candles.
Quick answer: To paint candles at home, wipe the candle with rubbing alcohol to remove oils, then mix acrylic paint with a candle painting medium (or brush on a thin primer layer of the medium first) so the paint grips the wax. Paint your design in thin layers with soft brushes, let each layer dry, and seal with a thin coat of the medium or a decoupage sealer. Keep designs on the lower and middle part of the candle, away from the wick, and never leave a burning painted candle unattended.
Why Paint Will Not Stick to Wax Without Prep
Candle wax repels water-based paint. Most candles are made of paraffin, soy, or beeswax, all of which have smooth, low-energy surfaces that paint struggles to grip. Many candles also have a slight oily film from fragrance oils or handling. When acrylic paint dries on an unprepared candle, it can bead into droplets, crack as the wax flexes with temperature, or flake off with a fingernail.
Two steps solve most of this: cleaning the surface with rubbing alcohol, and using a candle painting medium that helps acrylic adhere to wax and stay slightly flexible.
Supplies for Painting Candles
- Candles: Pillar candles work best because of their wide, flat surface. Unscented, light-colored candles show colors more accurately. Taper and jar candles work too, with some adjustments.
- Acrylic craft paint: Bright, opaque colors cover best. Metallic acrylics add shine.
- Candle painting medium: Sold at craft stores, it is mixed with acrylic paint or brushed on first to help adhesion.
- Rubbing alcohol and lint-free cloths or cotton pads.
- Brushes: Soft synthetic brushes in several sizes: a small flat, a round, and a fine liner for details.
- Extras: Paper plates or a palette, water cup, paper towels, painter’s tape or rubber bands for stripes, dotting tools, cotton swabs, a pencil or toothpick for sketching, and stencils if desired.
- Sealer (optional): A thin coat of candle medium or a decoupage sealer to protect the design.
If you are planning to craft with kids, a pre-assembled kit with non-toxic paints and brushes can save time. For age-appropriate options, see our guide to the best DIY paint kits for kids.
Choosing the Right Candle
| Candle Type | Paint Adhesion | Best Use | Notes |
|---|---|---|---|
| Paraffin pillar | Good with prep and medium | Most designs | Widely available and inexpensive |
| Soy pillar | Fair; softer surface | Simple designs | Can be oily; clean thoroughly and handle gently |
| Beeswax | Fair | Rustic designs | Natural texture and warm color affect paint look |
| Taper | Good | Stripes, dots, metallic accents | Thin surface; keep designs below the top third |
| Jar or glass candle | Paint the glass instead | Exterior jar decoration | Use glass or multi-surface paint on the outside of the jar |
Glass jar candles are often easier, because you paint the jar rather than the wax. Choose paint labeled for glass, and keep the design on the outside only.
How to Paint DIY Candles at Home: Step by Step
- Set up your workspace. Cover the table with paper or a craft mat. Work in a room at normal temperature; very warm wax is softer and easier to dent.
- Clean the candle. Dampen a lint-free cloth with rubbing alcohol and wipe the entire surface you plan to paint. Let it evaporate for a few minutes. Avoid touching the cleaned area with your fingers afterward, since skin oils reduce adhesion.
- Sketch the design. Lightly mark your design with a toothpick, pencil tip, or by scratching very gently into the wax. Simple guidelines help keep patterns even.
- Prepare paint. Mix acrylic paint with candle medium according to the medium’s instructions, often around equal parts. Alternatively, brush a thin coat of medium over the design area first and let it dry before painting.
- Paint the base colors. Apply thin layers with a soft brush. Thick paint is more likely to crack. If the paint beads, the surface needs more cleaning or more medium.
- Let each layer dry. Allow 15 to 30 minutes between layers, depending on thickness and humidity. Rotate the candle carefully, holding it by the unpainted top or bottom.
- Add details. Use a liner brush or dotting tool for fine details, outlines, and highlights after base colors are dry.
- Seal the design. Brush a thin coat of candle medium or a suitable sealer over the painted area to protect it from scratches and handling.
- Cure before use. Let the finished candle dry for at least 24 hours before handling heavily, displaying, or burning.
Design Ideas by Skill Level
Beginner Designs
- Color dipped look: Paint the bottom third of a pillar candle in a solid color with a clean edge using painter’s tape.
- Polka dots: Dip the end of a pencil eraser or a dotting tool in paint and stamp dots in rows or scattered patterns.
- Stripes: Wrap rubber bands or painter’s tape around the candle and paint between them. Remove once the paint is touch dry.
- Metallic band: Paint a single gold or silver band around the middle for an elegant, simple look.
Dot techniques adapt beautifully to candles. Our DIY dot painting guide covers dot sizing, spacing, and mandala patterns you can wrap around a pillar.
Intermediate Designs
- Botanical sprigs: Paint simple leaves and stems wrapping around the candle using a round brush and green tones.
- Seasonal motifs: Pumpkins for fall, snowflakes or holly for winter, Easter eggs for spring, or stars for the Fourth of July.
- Abstract brush strokes: Loose terracotta, blush, and sage strokes for a modern, boho look.
- Stencil patterns: Wrap a flexible stencil around the candle and dab paint with a sponge.
Advanced Designs
- Floral bouquet: Layered roses, peonies, and greenery with shading and highlights.
- Hand-lettered names or dates: For weddings, anniversaries, or memorials, using a liner brush or a paint pen suited to wax.
- Landscape scene: A simple mountain silhouette or sunset band wrapping around the candle.
Painting Candles With Kids
Candle painting can be a fun family activity, but it needs adult supervision. Let kids paint unlit candles only, and have an adult handle cleaning with rubbing alcohol. Use washable, non-toxic acrylics and a candle medium labeled appropriate for the task. Give younger children chunky brushes, sponges, or stamping tools, since fine detail brushes can be frustrating.
For safety, consider using LED pillar candles for children’s projects. They have a wax exterior, take paint the same way, and can be displayed and “lit” without a flame. Kids who enjoy small, decorative paint projects might also like making painted bookmarks, which use similar brush skills on paper.
Safety Tips for Burning Painted Candles
Painted candles can be burned, but paint and sealers are not designed to be fuel. Follow these precautions:
- Keep paint away from the wick and top. Leave at least the top inch or two of a pillar candle unpainted. Paint near the flame can smoke or burn.
- Use wide pillars. Wide pillars usually burn down the center, leaving a wax wall with your design intact for longer.
- Never leave a burning candle unattended, and keep it away from children, pets, curtains, and flammable materials.
- Burn on a heat-resistant holder or plate.
- Extinguish if the flame reaches the painted area. Once the wax tunnels down to the design, stop burning the candle, or switch to using it as decor.
- Consider decor-only candles. Many people keep heavily painted candles as display pieces and burn plain candles instead, or place a small LED tea light inside a hollowed pillar.
Common Problems and How to Fix Them
| Problem | Cause | Fix |
|---|---|---|
| Paint beads up | Oily or uncleaned surface, no medium | Wipe with rubbing alcohol and mix paint with candle medium |
| Paint cracks | Layers too thick, candle flexing | Apply thin layers and use medium for flexibility |
| Paint peels off | Poor adhesion | Remove, clean surface again, prime with medium, repaint |
| Streaky coverage | Thin, low-pigment paint | Use more opaque paint and build up two or three thin layers |
| Fingerprints and dents | Handling warm wax | Work in a cool room and hold the candle by unpainted areas |
To remove a mistake, gently scrape wet or freshly dried paint with a plastic scraper or wipe it with a damp cloth, then clean the area with rubbing alcohol before repainting. Lightly buffing the area with a soft cloth can smooth any marks left in the wax.
Alternative Ways to Decorate Candles
Paint is not the only option. If you want different textures or a quicker project, several related techniques combine well with painted details:
- Tissue paper or napkin transfer: Print or cut a design on thin tissue, place it on the candle, cover with wax paper, and gently warm it with a hair dryer or heat gun until the image melts into the surface. Painted accents can be added afterward.
- Pressed flowers: Attach dried, flat flowers with a thin layer of candle medium or melted wax, then seal. Keep them low on the candle and away from the flame.
- Paint pens: Multi-surface paint markers give fine control for lettering and outlines. Test on the bottom of the candle first, since some inks do not dry well on wax.
- Metallic leaf: Apply gold or copper leaf with adhesive size for a luxe look, combined with simple painted bands.
Mixing a painted base with one of these accents often gives a more finished, store-bought look than paint alone.
Gift and Event Ideas
- Wedding favors: Small pillars painted with the couple’s initials and wedding date.
- Holiday centerpieces: A trio of pillars in seasonal colors on a tray with greenery.
- Teacher gifts: Candles painted with apples, pencils, or a short thank-you message.
- Memorial candles: A name and dates in simple lettering with a small floral accent.
- Birthday party craft: Each guest paints an LED candle to take home.
FAQs
What kind of paint do you use on candles?
Acrylic craft paint mixed with a candle painting medium is the most common choice. The medium helps the paint adhere to wax and stay flexible. Paint markers made for multiple surfaces can also work for details.
Do you need candle medium to paint candles?
It is strongly recommended. Without medium, acrylic paint often beads up, cracks, or peels off wax. If you do not have medium, cleaning the candle with rubbing alcohol improves adhesion somewhat, but results are less reliable.
Is it safe to burn a painted candle?
It can be, with precautions. Keep paint away from the top of the candle and the wick, use wide pillars, burn on a heat-resistant surface, never leave it unattended, and extinguish it if the flame approaches the painted area.
How long does paint take to dry on candles?
Thin layers are usually touch dry in 15 to 30 minutes. Let the finished candle dry for at least 24 hours before handling heavily or burning.
Can kids paint candles?
Yes, with adult supervision. Use unlit candles or LED candles, non-toxic paints, and have an adult handle any rubbing alcohol. Simple designs like dots, stripes, and stamped shapes work best.
How do I seal painted candles?
Brush a thin layer of candle painting medium over the dry design, or use a decoupage sealer suitable for candles. Keep the sealer away from the wick area and let it dry completely.
Next Step
Painting candles comes down to a clean surface, a candle medium, thin layers, and sensible burning precautions. Start with stripes or dots, move on to botanicals and lettering, and you will have a custom candle for every season and occasion.
If you are turning this into a family craft day, a ready-made kit keeps everything in one place and suited to small hands. Browse our picks for kid-friendly DIY painting kits for creative projects to find one that fits your plans.





One Comment