
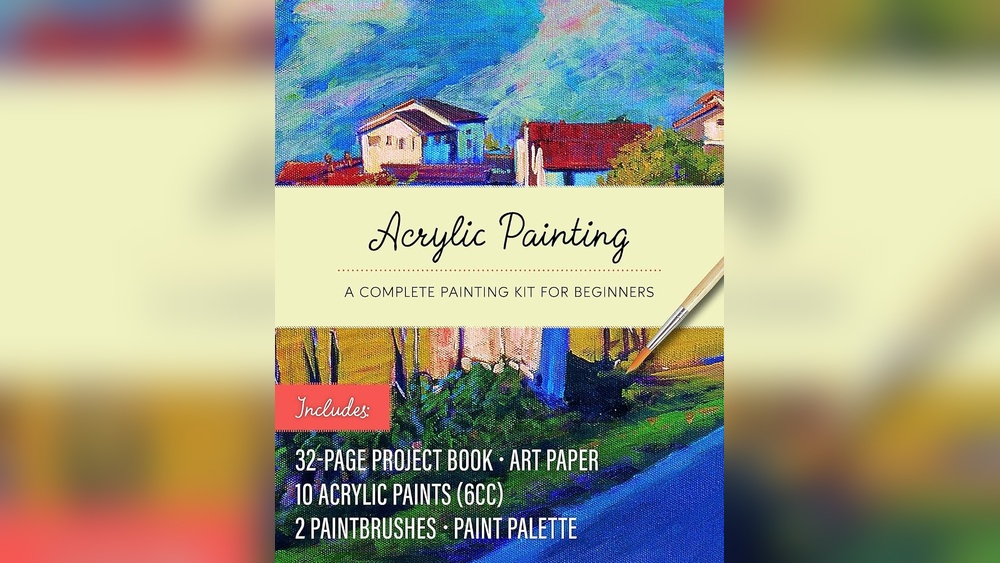
Quick answer: For acrylic painting for absolute beginners, start with five colors (a warm yellow, a red, a blue, white and burnt umber), three synthetic brushes and a few primed canvas panels. Keep your palette damp, paint thin layers from dark to light, wash brushes before paint dries in them, and finish small paintings in one sitting. Most early frustrations come from paint drying too fast and from overworking wet paint, and both are easy to fix once you know why they happen.
Acrylics are often recommended as the friendliest paint for a first-timer: water cleanup, no solvents, fast drying and almost any surface will do. All true. But the same fast drying that makes acrylic convenient also makes it confusing in the first week, when brushes stiffen, blends streak and colors dry darker than they looked on the palette.
These acrylic painting for absolute beginners tips are arranged in the order you will need them: what to buy, how to set up, how the paint behaves, how to make your first marks, and how to fix what goes wrong.
What Makes Acrylic Different (and Why It Matters)
Acrylic paint is pigment suspended in an acrylic polymer emulsion. While wet, the water in it keeps the polymer particles separate. As the water evaporates, the particles fuse into a flexible plastic film that locks the pigment in place. Once that happens, water will no longer dissolve it.
Three practical consequences follow:
- Short working time. A thin layer can set in 10 to 20 minutes, sometimes faster in dry or warm rooms.
- Permanent once dry. You can paint over any dried layer without disturbing it, which is great for layering and corrections.
- Color shift. The wet emulsion looks milky, so many colors dry slightly darker. Expect it and test swatches.
The Absolute Beginner Supply List
You do not need a 48-tube set. A small, well-chosen kit teaches more because you learn to mix.
Paint
- Titanium white (buy a larger tube; you will use the most of it)
- A warm yellow, such as cadmium yellow medium or a hue version
- A red, such as cadmium red medium, naphthol red or a hue version
- A blue, such as ultramarine blue (warm-leaning) or phthalo blue (very strong, cool-leaning)
- Burnt umber, for darkening and mixing natural browns and grays
Student-grade paint is fine to start, but the very cheapest craft paints often have low pigment content, which leads to streaky coverage and weak mixes. Our comparison of the best acrylic paints and starter kits for beginners explains what separates useful starter sets from frustrating ones.
Brushes
- A 3/4-inch or 1-inch flat for backgrounds and large areas
- A medium filbert (size 6–8) for general painting and soft edges
- A small round or liner (size 0–2) for details and thin lines
Choose synthetic bristles. Natural hair brushes can be damaged by the alkaline nature of acrylic and constant soaking.
Surfaces and Extras
- Primed canvas panels, 8×10 or 9×12 inches (cheap and easy to store)
- A palette: a plastic tray works, but a stay-wet palette is the single most helpful extra
- Two water containers, paper towels, a spray bottle and a palette knife for mixing
Setting Up Your Workspace
- Light: Paint near a window or under a daylight-balanced bulb (around 5000K). Warm household bulbs make it hard to judge color.
- Layout: If you are right-handed, put the palette and water on the right so you are not reaching across wet paint.
- Protection: Cover the table. Dried acrylic is hard to remove from fabric and wood.
- Palette order: Squeeze colors around the edge of the palette in the same order every time (white, yellow, red, blue, umber). Consistency builds muscle memory.
- Portion size: Squeeze out about a pea-sized amount of each color, more for white. You can add more; dried paint is wasted.
How to Use Acrylic Paints for Beginners: First Marks
Before attempting a picture, spend one session on a practice sheet. It feels slow, but it removes most of the guesswork later.
Exercise 1: Consistency Swatches
Paint the same color at three consistencies: straight from the tube, thinned with a little water (like cream), and heavily thinned (like ink). Notice how coverage and brush marks change. Thick paint holds texture; thin paint flows and becomes transparent.
Keep water additions moderate. A widely shared guideline is to avoid thinning beyond roughly 30 percent water for layers that need to be durable, since too much water can weaken the binder. For thinner effects, use a medium designed for it.
Exercise 2: A Value Scale
Paint five squares from pure white to the darkest mix you can make with blue and burnt umber, with three evenly stepped grays in between. This trains you to see light and dark, the skill that matters most for realistic results.
Exercise 3: A Color Wheel from Three Primaries
Mix orange (yellow plus a little red), green (yellow plus a little blue) and violet (red plus blue) and paint them between their parents. Add white to each to see tints. You will learn quickly that adding dark to light works in small amounts, while adding light to dark takes a lot of paint.
Acrylic Painting Tips for Beginners Blending
Blending is the skill beginners struggle with most in acrylic. Three methods help:
- Wet-into-wet: Lay two colors next to each other while wet, then stroke back and forth across the border with a clean, slightly damp brush. Work quickly and in small sections.
- Layered blending: Let the first layer dry, then apply thin, semi-transparent strokes of intermediate colors on top. This builds a smooth gradient over several passes.
- Retarder medium: Adding a retarder or slow-drying medium (usually a small amount, per the label) extends working time so wet blending becomes easier.
Misting the canvas with a fine spray of water before blending can also buy you a few minutes. Avoid soaking it; puddles cause blooms and lift the paint film.
How to Use Acrylic Mediums for Beginners
| Medium | What it does | When to try it |
|---|---|---|
| Retarder / slow-dry medium | Extends drying time | Blending skies, soft transitions |
| Glazing medium | Makes paint transparent without weakening it | Adding shadows, adjusting color over dried layers |
| Gloss or matte medium | Thins paint and changes finish | Controlling sheen, extending paint |
| Gel medium | Thickens paint and adds body | Texture, impasto, collage adhesive |
| Pouring medium | Makes paint flow evenly without cracking | Acrylic pour paintings |
| Modeling paste | Builds heavy texture | Raised surfaces, sculptural effects |
You do not need any of these on day one. Add one at a time once you notice a specific problem it solves.
A Simple First Painting, Step by Step
A sunset over water with a dark shoreline is a classic first painting because it teaches gradients, layering and silhouette shapes without demanding drawing skill.
- Tone and sketch: Draw a horizon line about one-third up from the bottom with a light pencil.
- Sky: With the large flat brush, paint yellow just above the horizon, orange above it, then a red-violet and finally a muted blue-violet at the top. Blend borders while wet.
- Water: Repeat the sky colors below the horizon in reverse, slightly darker. Use horizontal strokes only.
- Let it dry: Wait 15–20 minutes, or use a hair dryer on a cool or low setting held at a distance.
- Shoreline: Mix a near-black from blue and burnt umber. Paint a low, uneven landmass along part of the horizon and a few trees with the round brush.
- Reflections: Drag a few short horizontal strokes of pale yellow across the water beneath the brightest part of the sky.
- Sign it. Finishing is a skill too.
For more beginner-sized projects in this spirit, see our collection of simple acrylic painting ideas for beginners.
Glazing Tips for Beginners
Glazing is laying a thin, transparent color over a dried layer. It changes the hue and value underneath without hiding the texture or detail.
- Always glaze over fully dry paint, or you will lift the layer below.
- Mix paint with glazing medium rather than lots of water for durable, even glazes.
- Use transparent pigments where possible (phthalo blue, quinacridone colors, many organic reds); opaque pigments like titanium white and cadmiums look chalky as glazes.
- Build several thin glazes rather than one heavy one. Each layer deepens the color.
Acrylic Underpainting Tips
An underpainting is a quick, thin first layer that maps out light and dark. Try a thin wash of burnt umber or burnt sienna over the whole canvas, then wipe out the lightest areas with a paper towel before it dries. Paint the darks with a slightly thicker mix of the same color.
Because acrylic dries so quickly, you can start the color layers within minutes, and a warm underpainting peeking through gives your final painting a unified glow.
Acrylic Pouring Tips for Beginners
Pouring is a separate technique worth trying for fun. The essentials: mix each color with a pouring medium until it drips off a stick in a smooth ribbon, protect your table with plastic, elevate the canvas on cups so paint can run off the edges, and tilt slowly. Let pours dry flat in a dust-free spot for at least a day, often longer for thick layers.
Troubleshooting: Common Beginner Problems
| Problem | Likely cause | Fix |
|---|---|---|
| Streaky coverage | Paint too thin or low pigment | Use less water, apply two thin coats |
| Paint dries on palette | Dry air, open palette | Stay-wet palette, mist regularly |
| Muddy colors | Overmixing, too many colors in one mix | Mix no more than two or three colors at once; clean brush between colors |
| Brush strokes lift previous layer | Painting over tacky paint | Wait until fully dry |
| Colors look dull when dry | Matte drying, color shift | Test swatches; varnish to restore richness |
| Stiff, ruined brushes | Paint dried in bristles | Rinse often, wash with mild soap after each session |
Brush Care in Three Minutes
- During painting, rinse brushes in water when switching colors and never let paint dry at the ferrule (the metal part).
- After painting, wash with mild soap and lukewarm water, working lather into the bristles gently with your fingers.
- Rinse until water runs clear, reshape the tip, and dry brushes flat or bristles-down. Standing them upright wet lets water seep into the handle.
Habits That Speed Up Progress
- Paint small and often. Three 30-minute sessions a week beat one long session a month.
- Keep every painting, even bad ones, dated. Comparing them after two months shows real progress.
- Copy simple paintings or tutorials at first. Copying is how painters have learned for centuries.
- Change only one variable at a time when practicing, such as a new brush or a new medium.
FAQs
How do I paint with acrylics for beginners without making a mess?
Cover your table, keep paper towels and two water jars nearby, squeeze out small amounts of paint and wear old clothes. Acrylic cleans up with water while wet but is permanent once dry, so wipe spills immediately.
Is acrylic gouache good for beginners?
Acrylic gouache dries to a flat, matte, opaque finish and is water-resistant once dry, so you can layer it like acrylic. It is beginner-friendly for illustration and flat-color work, though it shows brush marks less and behaves differently from standard acrylic when blending.
Can I use water to thin acrylic paint?
Yes, in moderation. Small amounts of water improve flow. Very heavy dilution can weaken the paint film and cause poor adhesion, so use a medium when you need large amounts of thinning.
How long does acrylic paint take to dry?
Thin layers usually feel dry in 10 to 30 minutes. Thick layers can take hours, and full curing through the paint film can take days. Humidity, temperature and airflow all affect drying.
What size canvas should a beginner use?
Small panels between 8×10 and 11×14 inches are ideal. They are cheap, quick to cover and let you finish paintings in one session, which builds confidence and skill faster.
Do I need to varnish acrylic paintings?
It is not required, but varnish protects against dust and UV light and evens out the sheen. Wait until the painting has cured, commonly several days for thin layers, and follow the varnish manufacturer’s instructions.
Next Step
Do the three practice exercises, then paint the sunset project this week. You will learn more from those two sessions than from hours of watching tutorials.
When you are ready to choose paint that makes those exercises easier, our guide to beginner acrylic paint sets worth buying compares coverage, color range and value so your first kit supports you instead of fighting you.


One Comment