Acrylic paintings on canvas offer vibrant colors and versatility. They are popular among artists for their quick-drying properties.
Acrylic paint is a favorite among both novice and professional artists due to its ease of use and adaptability. It can be applied thickly for a textured effect or thinned with water for a watercolor-like finish. Artists appreciate its fast-drying nature, which allows for rapid layering without long wait times.
Acrylics adhere well to canvas, providing a durable and long-lasting medium. This type of paint is also water-resistant once dry, making it ideal for a variety of artistic styles and techniques. Acrylic paintings on canvas can range from abstract to realistic, providing endless creative possibilities.
The Allure Of Acrylics
Acrylic paint has captured the hearts of artists. It is loved for its vibrant colors and quick drying time. This medium offers endless possibilities. Let’s explore why acrylics are so captivating.
Versatility Of Acrylic Paint
Acrylic paint is incredibly versatile. It can mimic the look of watercolor, oil, or even gouache. Artists can apply it thickly for texture or thin it with water for a wash effect. Acrylics can be used on various surfaces, not just canvas. Wood, fabric, and paper are also great options.
- Quick drying time
- Easy to layer
- Water-resistant when dry
This paint is also very forgiving. Mistakes can be easily painted over. It is perfect for beginners and experts alike.
Comparing Acrylics With Other Mediums
| Feature | Acrylics | Oils | Watercolors |
|---|---|---|---|
| Drying Time | Fast | Very Slow | Fast |
| Blendability | Moderate | High | Low |
| Ease of Use | Easy | Moderate | Easy |
| Surface Variety | High | Moderate | Low |
Acrylics dry much faster than oils. This allows for quicker layering. Oil paints blend well but take days to dry. Watercolors dry fast but are harder to layer. Acrylic paint combines the best of both worlds.
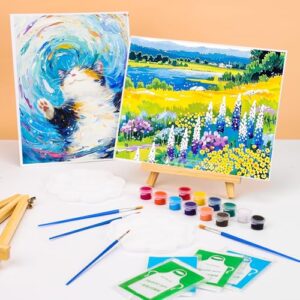
Gathering Your Supplies
Acrylic painting on canvas is a fun and creative activity. Before you start, gather all the necessary supplies. This guide will help you get everything you need. Let’s dive into the essential materials and how to choose the right canvas.
Essential Materials For Acrylic Painting
To create beautiful acrylic paintings, you need specific tools. Below is a list of essential materials:
- Acrylic Paints: Choose a variety of colors.
- Brushes: Get different sizes and shapes.
- Palette: Use it to mix your colors.
- Water Container: Keep your brushes clean.
- Canvas: The surface for your painting.
- Easel: Hold your canvas steady.
- Palette Knife: Useful for mixing and applying paint.
- Rags or Paper Towels: For cleaning and wiping.
Choosing The Right Canvas
Choosing the right canvas is crucial for your artwork. Here are some tips:
- Material: Canvases are usually made of cotton or linen. Cotton is cheaper and suitable for beginners. Linen is more durable and preferred by professionals.
- Pre-Stretched vs. Canvas Rolls: Pre-stretched canvases are ready to use. Canvas rolls need to be stretched onto a frame.
- Primed vs. Unprimed: Primed canvases have a coating that prevents paint from soaking in. Unprimed canvases need gesso before painting.
- Size: Choose a size that fits your project. Small canvases are good for practice, large ones for detailed work.
- Texture: Fine texture is smooth and good for detailed work. Rough texture adds a unique look to your painting.
With these tips and materials, you’re ready to start your acrylic painting journey. Happy painting!
Preparing Your Canvas
Before starting any acrylic painting on canvas, preparing your canvas is key. Proper preparation ensures that your artwork stands out. A well-prepared canvas provides a smooth surface and longevity for your art.
Priming The Surface
Priming your canvas is the first step. It helps the paint adhere better. Follow these steps:
- Choose a high-quality gesso. Gesso is a primer for canvases.
- Apply a thin layer with a wide brush.
- Let it dry completely. This usually takes a few hours.
- Sand the surface lightly with fine-grit sandpaper.
- Repeat steps 2-4 for a smoother finish.
Priming your canvas is crucial. It enhances the color vibrancy and durability of your painting.
Setting Up Your Workspace
A good workspace boosts creativity. Here are some tips to set up your workspace:
- Choose a well-lit area. Natural light is best.
- Keep your space clean and organized.
- Have all your materials within reach. This includes brushes, paints, and water.
- Use a sturdy easel or table. Stability is important.
- Cover your workspace with old newspapers or a drop cloth. This protects against spills.
An organized workspace helps you focus on your art. It also makes the painting process more enjoyable.
Materials Checklist
Before starting your painting, ensure you have these materials:
| Item | Purpose |
|---|---|
| Canvas | Surface for painting |
| Gesso | Primer for the canvas |
| Brushes | For applying paint |
| Paints | Acrylic colors for your artwork |
| Palette | For mixing colors |
| Water | For cleaning brushes |
| Rags or Paper Towels | For wiping brushes and spills |
| Easel | To hold the canvas |
| Drop Cloth | To protect the workspace |
Having everything ready helps you start painting smoothly. It saves time and keeps you organized.
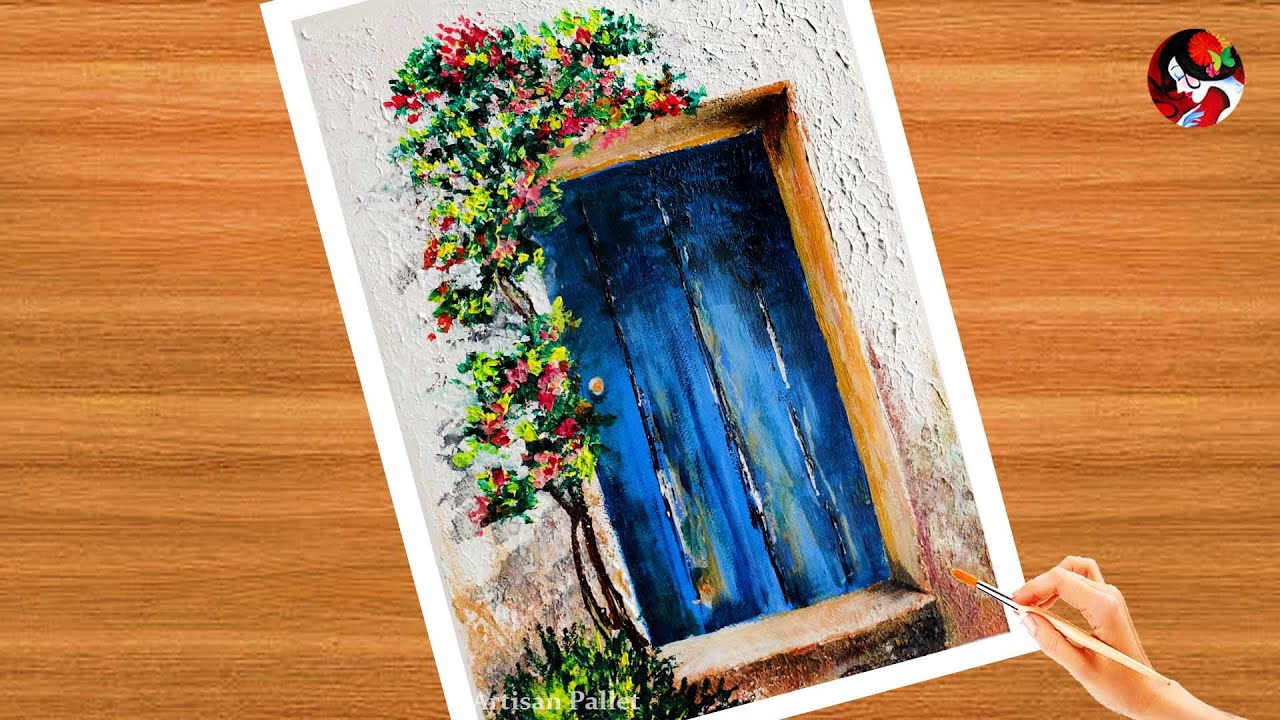
Acrylic Painting Techniques
Acrylic painting on canvas offers endless possibilities. Artists can create vibrant, detailed artworks. Various techniques enhance creativity. Mastering these techniques elevates your artwork. Let’s explore some essential methods.
Mastering Brush Strokes
Brush strokes define the texture and feel of your painting. Different strokes achieve unique effects. Here are some common techniques:
- Dry Brush: Use a dry brush with minimal paint. This creates a scratchy texture.
- Washing: Dilute acrylic with water. Apply for a translucent effect.
- Stippling: Dab the brush to create dots. This adds texture and depth.
- Hatching: Use parallel lines to add shading.
Exploring Textures And Layers
Creating textures and layers adds dimension. Use different tools and techniques to achieve this:
| Technique | Description |
|---|---|
| Impasto | Apply thick layers of paint. Use a palette knife for a 3D effect. |
| Scumbling | Scrub a dry brush over a dry layer. This reveals some of the underpainting. |
| Glazing | Apply thin, transparent layers. Build up color and depth gradually. |
| Collage | Add paper, fabric, or other materials. This creates interesting textures. |
Experiment with these techniques. They will help you develop a unique style. Happy painting!
Color Theory For Acrylics
Understanding color theory is crucial for creating stunning acrylic paintings. It helps artists to mix colors effectively and create depth in their work. This guide will explore essential tips for mixing acrylic paints and creating depth with color.
Mixing Acrylic Paints
Mixing acrylic paints can be both fun and rewarding. To get the right shade, start with the primary colors: red, blue, and yellow. Here are some tips:
- Primary Colors: Use red, blue, and yellow as your base.
- Secondary Colors: Mix two primary colors to get green, orange, and purple.
- Tertiary Colors: Combine a primary and a secondary color for more shades.
Don’t forget to use a palette knife for better mixing. This tool helps to blend colors smoothly. Experiment with different proportions to see what works best.
Creating Depth With Color
Creating depth in your painting makes it more realistic. Use these techniques:
- Contrast: Use light and dark colors to add contrast.
- Layering: Apply multiple layers to build depth.
- Shading: Add shadows to create a three-dimensional effect.
- Highlighting: Use bright colors to highlight key areas.
Acrylic paints dry quickly, so work fast. Use a spray bottle to keep the paint moist. This tip helps you blend colors more easily. Also, remember to step back and view your work from a distance. It helps you see the depth and balance better.
/media/Tarini_Mrinal_Dutt.jpeg)
Credit: dirums.com
Composing Your Masterpiece
Creating an acrylic painting on canvas is a journey. The key to success is a well-planned composition. This section will guide you through the process. We will cover everything from planning your composition to incorporating a focal point. Let’s dive in.
Planning Your Composition
Planning your composition is the first step. Start with a rough sketch. This helps you visualize your painting. You can use a pencil or charcoal for this.
Consider the rule of thirds. Divide your canvas into nine equal parts. Place important elements along these lines or at intersections. This creates a balanced and pleasing composition.
Think about the background. A simple background can make your subject stand out. You can also use colors to create depth.
| Element | Tips |
|---|---|
| Sketch | Use pencil for a rough outline. |
| Rule of Thirds | Divide canvas into nine parts. |
| Background | Keep it simple and use colors for depth. |
Incorporating A Focal Point
A focal point draws the viewer’s eye. It should be the most interesting part of your painting. You can use color, contrast, or detail to create it.
Choose a focal point that stands out. It could be a bright flower, a unique object, or a person’s face. Make sure it is placed according to the rule of thirds.
Use contrast to highlight your focal point. This can be achieved with different colors, light and dark shades, or textures. Remember, the focal point should be the star of your painting.
- Color: Use bright colors for your focal point.
- Contrast: Use light and dark shades.
- Detail: Add more detail to the focal point.
Sealing And Protecting Your Art
After creating a beautiful acrylic painting on canvas, it’s crucial to protect your artwork. Sealing your painting ensures its longevity and enhances its vibrancy. This section covers how to choose a sealant and apply varnish.
Choosing A Sealant
Choosing the right sealant is essential. There are different types to consider:
| Type | Finish | Durability |
|---|---|---|
| Gloss | Shiny | High |
| Matte | Flat | Medium |
| Satin | Semi-shiny | High |
Select a glossy sealant for a shiny look. Choose a matte sealant for a flat finish. Satin sealants offer a balance between gloss and matte.
Applying A Varnish
Applying varnish is a key step to protect your painting. Follow these steps:
- Place the canvas on a flat surface.
- Ensure the painting is completely dry.
- Use a clean, soft brush.
- Start applying varnish from the top.
- Work your way down in smooth strokes.
- Allow the varnish to dry completely.
For best results, apply multiple coats. Let each coat dry fully before adding the next.
Protecting your art preserves its beauty for years. Use the right sealant and apply varnish carefully.

Credit: www.pinterest.com
Displaying And Selling Your Work
Displaying and selling your acrylic paintings on canvas can be rewarding. Proper presentation and effective marketing are crucial. These steps will help you showcase your work beautifully and reach potential buyers.
Framing And Presentation Tips
Presentation matters when displaying your artwork. Here are some tips to enhance your acrylic paintings:
- Choose the right frame: Select a frame that complements the painting. Avoid overly ornate frames that distract from the artwork.
- Use a mat: A mat can add depth and focus to your painting. Ensure the color of the mat matches the painting.
- Glass protection: If framing under glass, use non-reflective glass to reduce glare. This keeps the focus on your artwork.
- Display lighting: Proper lighting is essential. Use soft, focused lights to highlight your painting without causing shadows.
Marketing Your Art Online
Selling art online opens up a global market. Here are some tips to market your acrylic paintings:
- Create a website: Build a professional website to showcase your portfolio. Include high-quality images and detailed descriptions of each piece.
- Use social media: Platforms like Instagram and Facebook are great for sharing your art. Post regularly and engage with your followers.
- Join online art marketplaces: Websites like Etsy, Saatchi Art, and Artfinder can help you reach more buyers. Set up a profile and list your paintings for sale.
- Email marketing: Collect emails from interested viewers. Send newsletters with updates, new works, and promotions.
By focusing on both presentation and marketing, you can effectively display and sell your acrylic paintings on canvas. These strategies will help you connect with art lovers and increase your sales.
Credit: www.youtube.com
Frequently Asked Questions
Can You Paint Acrylic Directly On Canvas?
Yes, you can paint acrylic directly on canvas. Prime the canvas first for better adhesion and vibrant colors.
Do You Need To Prep A Canvas For Acrylic Paint?
Yes, you need to prep a canvas for acrylic paint. Use gesso to prime the surface for better adhesion. This ensures longevity and enhances color vibrancy.
Do I Need To Seal Acrylic Paint On Canvas?
Yes, sealing acrylic paint on canvas is recommended. It protects the artwork from dust, UV rays, and fading. Use a clear acrylic sealer.
Do You Need To Use Water With Acrylic Paint On Canvas?
You don’t need to use water with acrylic paint on canvas. Water can thin the paint for different effects.
What Is Acrylic Paint?
Acrylic paint is a fast-drying, water-based paint made of pigment suspended in acrylic polymer emulsion.
How To Start Acrylic Painting?
Begin with a primed canvas, basic colors, and brushes. Experiment with blending and layering techniques.
Can Acrylic Paint Be Used On Canvas?
Yes, acrylic paint adheres well to canvas and is commonly used for this type of painting.
How Long Does Acrylic Paint Take To Dry?
Acrylic paint typically dries within 15-20 minutes, depending on thickness and environmental conditions.
Conclusion
Exploring acrylic paintings on canvas offers endless creative possibilities. This versatile medium suits beginners and professionals alike. Experiment with colors, textures, and techniques. Enjoy the artistic journey and transform your canvas into a masterpiece. Dive into acrylic painting today and let your creativity shine.
Happy painting!