DIY leather projects are rewarding, durable, and surprisingly beginner-friendly to master.
You want to make something real with your hands. Maybe it’s a slim wallet that fits like it was made for your pocket. Maybe it’s a chic pair of earrings, a custom key fob, or a sturdy belt that lasts for years. DIY leather projects let you turn simple tools and a few materials into useful art. The best part? You can start small, learn fast, and level up with each stitch. In this guide, I break down kits and resources that make your first build simple, your skills sharper, and your results clean enough to gift.
Get Started in Leather Crafting Guide
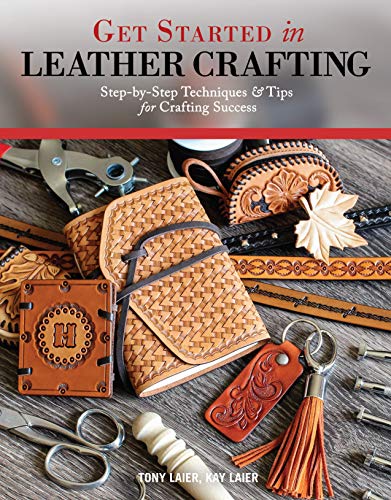
This beginner-friendly book gives you a clear, visual path into leathercraft. It walks through the basics of leather types, tool use, pattern transfer, and stamping. The steps are short and direct, with photos that make each move easy to copy. If you learn best by seeing each technique, this guide lowers the learning curve fast.
What I like most is how it connects small wins to bigger skills. You start with simple projects that teach cutting, gluing, and edge work. Then you build on that with carving, dyeing, and tool control. By the time you finish a few projects, you’ll feel ready to tackle more advanced diy leather projects with confidence.
Pros:
- Clear photos that show each step for quick learning
- Friendly tone that removes fear for first-time crafters
- Solid intro to stamping, embossing, and finishing
- Practical starter projects with useful end results
- Explains core tools so you buy only what you need
- Teaches clean edges and safe cutting habits
- Great reference to keep near your bench
- Helps avoid common rookie mistakes
Cons:
- Focuses on basics, not advanced saddle stitching theory
- Project styles may feel classic rather than trendy
- Does not include tools or materials
My Recommendation
If you want a guide that shows, not just tells, this is a strong pick. It is ideal for anyone starting diy leather projects and needs a simple structure to follow. The book lays a firm base in cutting, stamping, dyeing, and edge work. That means fewer ruined hides and more proud “firsts.” If you already know the basics, it still works as a quick tool and technique refresher.
For long-term value, a well-structured book beats random videos. Keep it open as you craft. Mark pages with painter’s tape. Build muscle memory, one step at a time.
| Best for | Why |
|---|---|
| Complete beginners | Clear photos and steps reduce confusion and waste |
| Visual learners | Each technique is shown with simple images |
| DIY gift makers | Starter projects yield clean, gift-ready results |
Leather Crafting Kit for Beginners

This kit bundles the core tools you need to try lots of small projects. It includes stamping, dyeing, carving, sewing, and edge-sealing tools, paired with video tutorials. That mix helps you complete earrings, a wallet, keychains, wristbands, and bookmarks. You can start and finish your first piece in a single evening.
For beginners, the real win is guidance. Video instructions bridge the gap between “I think I get it” and “Oh, that’s how it’s done.” You learn needle angles, thread tension, and stamp strikes. Those tips boost your control and finish quality, which is key in early diy leather projects.
Pros:
- All-in-one starter toolkit for small leather goods
- Video tutorials show proper hand control
- Covers sewing, stamping, dyeing, and edge work
- Useful for earrings and giftable accessories
- Saves time compared to buying tools one by one
- Good value for testing the hobby
- Encourages practice with different techniques
- Portable for craft nights or workshops
Cons:
- Tool quality is entry level, not pro grade
- May not include large leather pieces
- Some tools will need upgrading as skills grow
My Recommendation
Choose this kit if you want to make small, fast wins. It suits anyone who loves bite-size diy leather projects like earrings, key fobs, and slim wallets. The kit helps you learn stitches, stamps, and edge sealing without a big spend. Once you get a feel for the craft, you can upgrade the tools you use most.
I suggest starting with a basic keychain or bracelet. Watch the tutorial twice, then follow along step by step. Keep strokes light and even. You’ll see clean results right away.
| Best for | Why |
|---|---|
| New crafters | Starter tools plus videos shorten the learning curve |
| Gift makers | Quick projects finish in one evening |
| Budget learners | Affordable way to test multiple techniques |
FREEBLOSS 4‑Set DIY Wallet Kit

This set gives you four PU leather mini wallet projects, with pieces that are ready to assemble. The holes are typically pre-punched, which makes stitching easy and neat. That is ideal for first-timers who want a clean finish without layout work. You can craft gifts for men or women and get a feel for shape, fit, and thread work.
PU leather is synthetic, so it is vegan-friendly and easy to wipe clean. It is also more forgiving in early practice rounds. The wallets come together fast, so you can try different thread colors and stitch styles. For fast, fun diy leather projects without cutting or edge beveling, this kit delivers.
Pros:
- Pre-cut and pre-punched panels save time and effort
- Four projects mean lots of practice
- Beginner-friendly stitching with clean lines
- PU leather is budget-friendly and low maintenance
- Gift-ready designs with unisex appeal
- No special tools needed beyond needles and thread
- Great confidence builder for new makers
- Lets you test color and stitch combinations
Cons:
- Not full-grain leather; different long-term wear
- Design choices are fixed by the kit
- Less room to customize panel shapes
My Recommendation
If you want a low-stress win, this is the kit. It is best for brand-new crafters and anyone who craves quick results from diy leather projects. You will learn thread handling, stitch spacing, and how a wallet folds and fits. Those basics transfer to real leather when you are ready to level up.
Use these builds as practice rounds. Focus on even tension and tidy backstitching at the ends. Keep threads waxed and consistent. You will open the door to more advanced and custom work later.
| Best for | Why |
|---|---|
| Total beginners | Pre-punched holes make stitching simple and neat |
| Quick gifts | Four mini wallets with fast assembly |
| Vegan crafters | PU leather avoids animal-based materials |
ArtSkills 80‑Piece Leather Tooling Kit

This set packs a broad array of tooling, stamping, and crafting pieces into one box. You get the basics needed to punch, stamp, and stitch, along with design stamps for textures and patterns. The range lets you test ideas without hunting down each item. It is a good pick for makers who want to try many techniques before upgrading.
For diy leather projects, this much variety speeds up learning. You can stamp coasters, add texture to straps, and build small wallets. The kit helps you understand what tools you reach for most. From there, you can invest in heavier-duty tools as your style evolves.
Pros:
- Wide mix of tools for stamping and stitching
- Great for exploring different patterns
- Helps build a broad skill base fast
- Convenient bundle for hobbyists and class demos
- Good for group craft nights
- Useful to test before buying pro-grade tools
- Encourages creative experiments with texture
- Starter value at an accessible price point
Cons:
- Entry-level durability, not long-term pro gear
- May lack specialty punches or premium stamps
- You will likely upgrade favorites over time
My Recommendation
Pick this if you want a “sampler” of leathercraft tools. It’s best for curious makers who love to try new textures and patterns on small diy leather projects. Use it to learn what you enjoy and what you ignore. Then buy one or two higher-grade tools to match your style.
Start with simple stamped coasters. Practice steady, square strikes and even spacing. Keep notes on stamp types and settings. That practice pays off when you move to belts, sheaths, or bags.
| Best for | Why |
|---|---|
| Experimenters | Lots of stamps and tools to test ideas |
| Hobby crafters | Affordable way to learn and explore |
| Craft classes | Enough variety for group projects |
18 Faux Leather Sheets, 8×12, Deep Brown

This pack of faux leather sheets is sized for small accessories and craft cuts. The 8×12 inch format fits earrings, bows, hair clips, and layered patches. The deep brown color looks classic and pairs well with brass or gold hardware. For small diy leather projects, this size keeps waste low and creativity high.
Faux leather is flexible, cleanable, and friendly to craft cutters. You can trace patterns, cut with a sharp blade, and glue or stitch as needed. The sheets hold shape for simple accessories and soft goods. It’s a smart way to test designs before moving to real leather.
Pros:
- Great size for earrings, bows, and clips
- Faux leather is easy to cut and clean
- Consistent color across sheets for matching sets
- Budget-friendly for practice runs
- Works with hand tools and craft cutters
- Ideal for classroom and group crafts
- Vegan-friendly alternative material
- Low waste compared to large hides
Cons:
- Not suitable for heavy-wear items like belts
- Edge burnishing is different from real leather
- Not designed for wet molding or carving
My Recommendation
Go for these sheets if you want quick, stylish accessories. They are best for crafters who love earrings, hair bows, and layered shapes. For entry-level diy leather projects, faux leather sheets simplify cutting and cleanup. They help you focus on design without worrying about hide cost or grain direction.
Stack colors, punch small holes, add jump rings, and enjoy. Once your designs click, try them again in veg-tan or chrome-tan leather. That path builds design skill and makes your next projects shine.
| Best for | Why |
|---|---|
| Accessory makers | Perfect size and flexibility for earrings and bows |
| Design testing | Low-cost material for pattern trials |
| Vegan projects | Faux leather avoids animal materials |
FAQs Of diy leather projects
What type of leather should beginners use?
Vegetable-tanned leather around 4–6 oz is a great start. It cuts clean, stamps well, and teaches edge work. Chrome-tan works for soft goods like pouches and wallets.
Do I need many tools to begin?
No. You can start with a knife, ruler, stitching chisels, needles, and waxed thread. Add an edge beveler and burnisher when you can.
Can I use faux leather for diy leather projects?
Yes. Faux leather is easy to cut and great for earrings, bows, and patches. It is not ideal for heavy-use items or carving.
How do I get smooth edges?
Bevel, sand, and burnish with water or gum tragacanth. Keep pressure steady and move in one direction. Repeat until the edge shines.
What do I do if my stitches look uneven?
Check your chisel spacing, keep thread tension even, and slow down. Practice on scrap first. Backstitch and melt ends for a clean finish.
Final Verdict: Which Should You Buy?
If you’re brand new, start with the “Get Started in Leather Crafting Guide” and the “Leather Crafting Kit for Beginners.” The book teaches you proven steps. The kit lets you practice fast on small diy leather projects.
Want quick wins or gifts? Pick the FREEBLOSS wallets or the faux leather sheets. If you love testing textures, go with the ArtSkills kit. Build skills, enjoy the process, and make pieces you’ll use every day.