
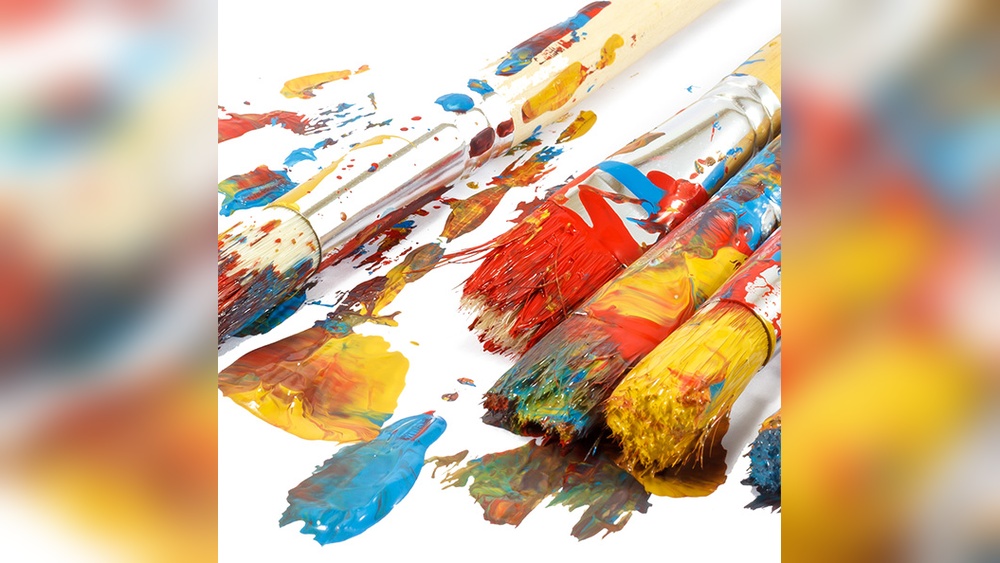
Quick answer: To break in a new paint brush, rinse out the factory sizing (the stiff gum that holds the shape) in lukewarm water, wash it gently with mild soap, reshape the tip and let it dry flat. Before the first real painting, wet the brush, blot it, and make a few practice strokes on scrap paper so the filaments relax and absorb color evenly. Natural bristle brushes may also benefit from a short conditioning soak.
A brand-new artist brush often feels stiff, crunchy or oddly pointed straight out of the package. That is by design, not a defect. Most manufacturers coat the hairs in a water-soluble sizing so the shape survives shipping and display. Knowing how to break in a new paint brush properly removes that coating, relaxes the filaments, and helps the brush hold its shape for years instead of weeks.
Below you will find the exact steps for synthetic, natural hair and hog bristle brushes, how to adjust the process for watercolor, acrylic and oil, and the mistakes that ruin a new brush before it ever touches canvas.
What “Breaking In” a Brush Actually Means
Breaking in is three small jobs done in order:
- Removing sizing. Sizing is usually gum arabic or a starch-based coating. Left in, it blocks paint from loading into the belly of the brush and can make strokes skip or streak.
- Relaxing the filaments. Hairs packed tightly for shipping need a little moisture and movement before they spring back and spread naturally.
- Checking for defects. The first wash is the best time to spot loose hairs, a wobbly ferrule or a tip that will not come to a point.
Brand-new brushes do not need aggressive treatment. In most cases, ten minutes of gentle work is enough.
How to Use New Brushes for Painting: Step-by-Step Break-In
This core process works for nearly every artist brush. Medium-specific adjustments follow.
- Remove the plastic cap and packaging. Throw the cap away. Trying to slide it back on later tends to catch and bend hairs at the tip.
- Feel the hairs. If they are hard and glued together, the brush has been sized. If they already move freely, it may have only a light coating.
- Rinse in lukewarm water. Hold the brush with the bristles pointing down and run it under lukewarm (not hot) water for 30 to 60 seconds. Gently squeeze the hairs between your fingers to help dissolve the sizing. Keep water away from the ferrule seam as much as possible.
- Wash with mild soap. Swirl the brush lightly on a bar of mild soap or a dedicated brush soap, then work the lather in with your fingertips from the ferrule toward the tip. Rinse until the water runs clear and the hairs no longer feel tacky.
- Tug test. Pinch the hairs and pull very gently. A couple of loose hairs on a new brush is normal; they are better removed now than stuck in your painting later. If many come out, the brush may be defective.
- Reshape. Gently squeeze out the water and form the hairs back into their intended shape: a point for rounds, a crisp chisel edge for flats.
- Dry flat or tip down. Lay the brush flat on a towel or hang it bristles-down. Never stand a wet brush upright in a jar, because water runs into the ferrule and can loosen the glue and swell the wooden handle.
- Do a test run. Once dry, wet the brush again, blot it, and make 15 to 20 practice strokes on scrap paper with the paint you plan to use. This “seasons” the hairs and shows you how the brush loads and releases color.
Breaking In by Brush Material
Different filaments respond differently to water, soap and solvents. Here is a quick reference.
| Brush material | Sizing level | Break-in focus | What to avoid |
|---|---|---|---|
| Synthetic (nylon, taklon, polyester) | Light to moderate | Quick rinse and soap wash; minimal conditioning needed | Hot water, which can permanently bend or curl filaments |
| Kolinsky or red sable | Moderate to heavy | Gentle rinse, mild soap, optional conditioner, careful reshaping | Harsh detergents and strong solvents |
| Squirrel and goat (mops, washes) | Heavy | Long, gentle soak and repeated rinsing; very soft handling | Squeezing or wringing the hair |
| Hog bristle | Light | Rinse and wash; a few days of use softens the tips naturally | Leaving it soaking for hours |
| Synthetic-natural blends | Moderate | Treat like natural hair for safety | High heat and harsh cleaners |
Synthetic brushes
Synthetic filaments are durable and usually need nothing more than the rinse and soap steps above. Because many synthetics are heat-set into their shape, warm water is fine but hot water can distort them. If a synthetic brush feels slightly rough after washing, that usually smooths out within one or two painting sessions.
Natural hair brushes
Natural hairs have a scaly cuticle, similar to human hair, which is what lets them hold so much water and color. A small amount of hair conditioner, worked in and rinsed out thoroughly, can help them feel supple. Rinse completely, because leftover conditioner can repel watercolor and leave blotchy washes.
Hog bristle brushes
Hog bristle has naturally split ends called flags, which help it carry thick paint. New bristle brushes can feel very stiff. They tend to soften gradually with use, so the main break-in step is simply washing out the sizing and painting with them.
Adjusting the Break-In for Your Medium
Watercolor brushes
Watercolor is where leftover sizing causes the most trouble, because it interferes with the brush’s ability to hold a full charge of water. Rinse a new watercolor brush very thoroughly, then soak just the hair for a few minutes in clean, lukewarm water before the first session. Test it by loading a wash and checking that the tip springs back to a point and the belly releases color smoothly.
Acrylic brushes
For acrylic, the main goal is getting the brush slightly damp before it touches paint. A pre-wetted brush keeps acrylic from creeping up and drying in the ferrule, which is one of the fastest ways to ruin any brush. Dip, blot on a paper towel, and start painting.
Oil brushes
After removing sizing with water and soap, let the brush dry completely before using it in oil. Water and oil paint do not mix well, and leftover water in the belly can cause beading or uneven strokes. Some painters condition a new oil brush by working a small amount of the medium or a drying oil into the hairs, then wiping it out with a rag before painting.
If you are still deciding which brushes to add to your kit, our roundup of the best artist brushes for every medium compares shapes, filaments and sizes in one place.
Common Mistakes When Breaking In a Brush
- Using hot water. Heat can loosen ferrule glue and distort synthetic filaments.
- Soaking the whole brush. Submerging the ferrule and handle causes swelling, cracked lacquer and loose heads over time.
- Scrubbing against the palette or jar bottom. This bends tips permanently and frays edges.
- Skipping the sizing removal. Painting through sizing gives patchy strokes and can leave gum residue in your colors.
- Storing it upright while wet. Water collects in the ferrule and weakens the glue.
- Putting the plastic cap back on. It almost always catches and bends hairs.
- Cutting off stray hairs too short. If a single hair sticks out, it often falls back into line after washing. If not, trim it at the base with small scissors rather than near the tip.
How to Tell Your Brush Is Ready
A properly broken-in brush passes four simple checks:
- Snap. Wet the brush, flick it once, and look at the tip. A round should return to a clean point; a flat should form a straight edge.
- Load. Dip the brush in paint. It should absorb color into the belly, not just coat the outside.
- Release. Make a long stroke on paper. Color should flow evenly without skipping.
- Shed. After a short session, check your paper for loose hairs. One or two early on is acceptable; more than that after the first wash is a warning sign.
Keeping Your Brush in Good Shape After Break-In
The habits you build in the first few weeks determine how long a brush lasts.
- Clean promptly. Rinse acrylic before it dries and clean oil brushes at the end of every session.
- Reshape after every wash. Use your fingers to restore the point or edge before drying.
- Store properly. Once fully dry, store brushes upright in a jar (handle down) or flat in a roll. Keep natural hair brushes in a container with airflow to discourage moths.
- Use the right brush for the job. Do not use a fine sable round to scrub in a background or mix large piles of paint. Keep a cheap brush or palette knife for mixing.
- Rotate brushes. Giving brushes a rest between heavy sessions lets the hairs recover fully.
Different synthetic lines vary in how stiff they feel out of the box and how quickly they soften. Our Princeton paint brush set review describes how one widely sold set handles in early use.
Break-In Tips by Experience Level
Beginners
Keep it simple: rinse, wash with mild soap, reshape, dry flat, and test on scrap paper. Most student-grade synthetic sets need nothing more. Spend the extra time learning which brush shape does what rather than conditioning every brush.
Intermediate painters
Start paying attention to how each brush behaves after a few sessions. Note which ones lose their point quickly or shed hairs, so you know which types and brands are worth buying again.
Experienced painters
For expensive natural-hair brushes, consider dedicated brush soap and occasional conditioning. Some painters keep their best sable rounds reserved for final details only, using a less expensive synthetic for laying in color.
Breaking In Specialty Brushes
A few brush types need small adjustments to the standard routine.
- Fan brushes. The hairs are glued in a thin arc and can clump together after washing. While still damp, gently spread them back into an even fan with your fingertips, then dry flat so the arc does not collapse.
- Mops and large wash brushes. These carry heavy sizing and a lot of hair. Rinse them longer, up to a couple of minutes, and squeeze very gently. Expect drying to take several hours; do not store them until the center of the head is fully dry.
- Riggers and liners. The long, thin hair tangles easily. Rinse with the brush pointing straight down so the water draws the hairs into a single line, and dry flat.
- Angled flats. Check that the slant is clean after washing. If the long corner splays, press it back into line between two fingers and let it dry that way.
- Stiff bristle brights. Short bristle heads hold sizing deep near the ferrule. Work the lather in with a little more pressure at the heel, then rinse until the water runs clear.
What about very cheap brushes?
Budget brushes often use heavier sizing and looser construction. The same break-in steps apply, but pay extra attention to the tug test. Inexpensive brushes are ideal for gesso, masking fluid, mixing and scrubbing, so even one that sheds a little can still earn its place in the jar for rough jobs.
FAQs
Do you need to wash a new paint brush before using it?
Yes, in most cases. New artist brushes are usually coated in sizing to protect their shape. Washing it out with lukewarm water and mild soap lets the hairs absorb paint properly and prevents gum residue from ending up in your colors.
Why is my new paint brush so stiff?
The stiffness usually comes from sizing, a water-soluble gum applied at the factory. It dissolves with a gentle rinse. Hog bristle brushes also feel stiff by nature and soften over several painting sessions.
Can I use a new brush right out of the package?
You can, but the sizing may make the first strokes patchy and can leave residue in your paint. A five-minute rinse and wash makes the brush perform better from the first stroke.
How long does it take to break in a paint brush?
The active process takes about 10 minutes plus drying time. Natural bristle and hair brushes continue to soften and settle over the first few painting sessions.
Should I condition synthetic brushes?
Synthetic brushes generally do not need conditioner because the filaments lack the cuticle that natural hair has. A clean rinse and mild soap wash is usually enough.
Is it normal for a new brush to shed hairs?
A few loose hairs during the first wash is normal. If hairs keep falling out after cleaning and the first session, the brush may have a poorly glued ferrule and is worth returning or replacing.
Next Step
A good break-in routine gets the most out of any brush, but it cannot fix one that is the wrong shape, size or filament for your painting style. If you are building or upgrading a kit, see our guide to the top-rated paint brushes for flawless strokes to match brushes to the way you work.



One Comment