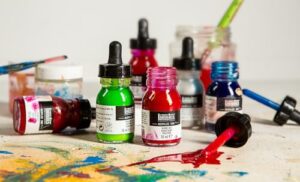
Quick answer: To decorate a cork board, start with the surface: paint the cork with thinned acrylic in a solid color, ombre or taped geometric pattern, or cover it with fabric stretched and glued around the edges. Then upgrade the frame with paint, stain or washi tape, add a ribbon grid for pin-free notes, and finish with matching pushpins, clips and labels. Keep paint coats thin so the cork stays soft enough for pins, and plan zones (to-do, photos, calendar) so it looks organized rather than cluttered.
A plain brown cork board does its job, but it rarely looks like something you chose on purpose. The good news is that cork is one of the easiest surfaces to customize. It takes paint, fabric, tape and glue, and mistakes can usually be covered with another layer. Learning how to decorate a cork board well is mostly about choosing one main idea, keeping the cork pinnable and finishing the edges cleanly.
Below you will find surface treatments, frame makeovers, layout ideas and mounting tips. For more cork-based projects, from wine cork crafts to cork wall tiles, browse our DIY cork projects and ideas.
Plan Before You Decorate
A few quick decisions save a lot of redoing:
- Where will it hang? A kitchen command center, a home office, a kid’s room and an entryway each suggest different colors and features.
- What will go on it? Photos, invitations, schedules, artwork, jewelry or keys. Heavy items need sturdier cork and more pins.
- Pins or no pins? Ribbon grids and clips hold items without holes; plain cork needs pushpins.
- Match or contrast? Pick a color story that ties the board to the room, such as wall color, cabinet hardware or a rug.
Ways to Decorate the Cork Surface
1. Paint the cork a solid color
Acrylic craft paint works well on cork. Because cork is absorbent, the first coat soaks in and looks patchy; a second coat evens it out.
- Thin the paint slightly with water so it does not form a thick, rubbery skin that resists pins.
- Use a foam roller or wide flat brush for even coverage.
- Let each coat dry fully before adding the next.
- Test a pushpin in a corner once dry; it should go in without much resistance.
2. Ombre or color wash
Mix three to five shades of one color by adding increasing amounts of white. Paint horizontal bands from dark to light and blend the edges while wet. A watered-down wash lets the natural cork texture show through for a softer look.
3. Geometric taped patterns
Use painter’s tape to mark triangles, stripes, chevrons or a color-blocked corner. Press tape edges firmly; cork’s texture can let paint seep underneath. Seal the tape edge with a thin coat of the base color (or clear medium) before applying the contrast color, then peel the tape while the final coat is slightly damp.
4. Stenciled designs
Stencil a monogram, a floral border, polka dots, or words like “Notes,” “Plans” or “Dream Big.” Dab with a nearly dry stencil brush or sponge, and lift the stencil straight up.
5. Hand-painted art
If you paint, treat the board as a canvas: a simple landscape, a botanical branch, a world map or an abstract design. Keep paint layers thin in the center where pins will go, and save thicker detail for edges.
6. Fabric covering
Fabric gives a soft, upholstered look and hides an old, pin-scarred board.
- Choose a medium-weight cotton or linen. Very thin fabric shows the cork; very thick fabric is hard to pin.
- Cut fabric 2 to 3 inches larger than the board on all sides.
- For a frameless board, wrap the fabric around the back and staple or glue it, pulling taut and working from the center of each side out to the corners.
- For a framed board, either remove the frame, wrap the cork panel and reinstall, or glue the fabric to the cork face and trim it neatly at the frame edge.
- Spray adhesive under the fabric prevents bubbles and sagging; use it lightly and in a ventilated space.
Adding a thin layer of batting under the fabric creates a padded look and makes pins grip even better.
7. Wrapping paper, maps or scrapbook paper
Glue decorative paper onto the cork with a decoupage medium or spray adhesive, then seal with a thin coat of matte medium. Old maps make great travel-plan boards. Paper does tear around pins over time, so this suits boards that hold lighter items.
8. Chalkboard or whiteboard combo
Mask off a section of the cork, such as the top third or one side, and paint it with two or three coats of chalkboard paint. Cork’s texture shows through slightly, so very fine handwriting is harder, but it works well for weekly headings and short lists. Alternatively, glue a thin sheet of whiteboard film or a small dry-erase panel onto one corner.
9. Seasonal swaps
Keep the base board neutral and change the accents through the year: paper leaves and acorn pins in fall, snowflake cutouts in winter, pastel ribbons in spring and bright citrus pins in summer. It keeps the board feeling fresh without repainting.
Refreshing an Old, Pin-Scarred Board
Older boards develop crumbly holes, faded patches and stains. Before decorating, vacuum or brush away loose crumbs, then press a thin layer of wood filler or lightweight spackle into large gouges only if you plan to paint, since filler does not take pins well. For heavily damaged boards, the most reliable fix is gluing a fresh thin cork sheet over the old surface or covering it with fabric and batting, which hides damage and restores grip.
Frame Makeovers
| Frame idea | How | Look |
|---|---|---|
| Painted frame | Mask the cork edge, sand lightly, prime and paint | Clean and coordinated |
| Stained frame | Strip any varnish, sand to bare wood, stain and seal | Warm, natural |
| Washi tape frame | Wrap frame or create a tape “frame” on a frameless board | Playful, removable |
| Rope or twine trim | Hot glue thick jute rope around the edge | Coastal, rustic |
| Metallic finish | Gold, copper or silver spray paint or gilding wax | Glam, modern |
| Ribbon or fabric-wrapped frame | Wrap tightly, glue at the back | Soft, cottage-style |
| Add a new frame | Glue a frameless board inside a thrifted picture frame | Instant upgrade |
Functional Decorations
Ribbon memo grid (French memo board style)
Stretch ribbons diagonally across the board in a diamond pattern, about 4 to 6 inches apart. Secure the ends at the back or edges with staples or glue, and add a decorative pin or button at each crossing. Tuck photos and cards behind the ribbons, no holes needed.
Zones and labels
Divide the board into sections with washi tape or painted lines: “This Week,” “To Do,” “Bills,” “Inspiration.” Add small chalkboard or kraft-paper labels at the top of each zone.
Calendar section
Paint or tape a grid on part of the board, or pin a printable monthly calendar in a clear sleeve so you can update it each month.
Pockets and hooks
Pin small fabric pockets, mason jar holders or mini baskets for pens and keys. Push-in cup hooks hold lightweight items such as keys or jewelry.
Upgraded pushpins and clips
DIY pins make a big difference: glue small pom-poms, buttons, painted wooden beads, mini clothespins or flat-backed gems onto flat thumbtacks. Painted mini clothespins glued to pins hold notes without poking holes in them.
DIY Cork Board Ideas by Room
Kitchen command center
Combine a painted cork board with a strip of chalkboard paint or a small whiteboard. Add a weekly meal plan, grocery list clip and calendar zone. Choose wipeable paint finishes near cooking areas.
Home office
Keep it calm: one neutral color, a thin black or wood frame, and a clear grid of zones. Use minimalist metal pins.
Kids’ room
Bright colors, a fabric covering in a fun print, and a dedicated “art gallery” zone where they can rotate drawings. Use clips or ribbons for younger children instead of sharp pins.
Vision or mood board
Paint the board a soft neutral so images stand out, add a stenciled word at the top, and use a ribbon grid so you can swap images often.
Entryway
Add hooks for keys, a mail pocket and a small mirror strip. Match the frame to door hardware or lighting.
How to Make Your Own Cork Board
If you are starting from scratch, a homemade board lets you choose the size and shape:
- Cut a backing from plywood, MDF or foam board to size.
- Glue down a cork sheet or roll (around 1/4 inch or thicker holds pins well) using spray adhesive or contact cement. Roll it flat to remove air bubbles.
- Trim the edges with a sharp utility knife.
- Decorate the surface with any method above.
- Add a frame or edge trim, and attach hanging hardware to the back.
Saved wine corks are another option: glue them inside a frame for a textured board. Halving them lengthwise gives a flatter, more pinnable surface.
How to Make a Cork Wall
For a whole wall or large area, use cork tiles or rolls. Hexagon, round and square tiles create a modern pattern, while full rolls give a seamless surface. Clean and prime the wall, then attach cork with a cork or contact adhesive, or with strong double-sided mounting tape for a more removable option (results vary by wall surface). Stagger seams like brickwork, and paint some tiles in accent colors before mounting for a mosaic effect.
How to Put Up a Cork Board
| Method | Best for | Notes |
|---|---|---|
| Adhesive strips or hooks | Light, small boards; rentals | Check the product’s weight rating and press firmly per directions |
| Nails or picture hooks | Light to medium framed boards | Use two hooks for wide boards to keep them level |
| Screws with wall anchors | Medium to heavy boards | Choose anchors for your wall type (drywall, plaster, masonry) |
| Screws into studs | Large, heavy boards | Most secure; use a stud finder |
| French cleat | Large boards that must sit flat and level | Two interlocking beveled strips; very sturdy |
| Leaning on a shelf or desk | Flexible decor setups | No holes; secure against tipping in kids’ rooms |
Hang the board so its center sits around eye level, or slightly lower above a desk, so notes are easy to read while seated.
Common Mistakes When Decorating Cork Boards
- Thick paint layers that make the surface hard and pins difficult to push in.
- Loose fabric that wrinkles or sags. Pull taut and work from the center outward.
- Too many ideas at once. Pick one main treatment and one accent.
- Thin cork for heavy items. Pins pull out of thin cork; add a second layer or use clips and ribbons.
- Skipping a pin test before covering the entire board.
- Weak hanging hardware for the board’s weight, especially after adding fabric and frames.
FAQs
Can you paint a cork board?
Yes. Acrylic craft paint works well. Use thin coats so the cork stays soft enough for pins, and allow each coat to dry fully.
How do you cover a cork board with fabric?
Cut fabric 2 to 3 inches larger than the board, spray a light adhesive on the cork, smooth the fabric over it, and staple or glue the excess to the back, pulling taut from the center outward.
How do you decorate a cork board without pins?
Use a ribbon memo grid, binder clips on push-in hooks, or mini clothespins glued to the surface to hold notes and photos.
What is the best paint for a cork board?
Water-based acrylic craft or chalk-style paint. Avoid thick, glossy enamels that harden the surface.
How do you put up a cork board without nails?
Use removable adhesive strips rated for the board’s weight, or lean it on a shelf or desk. Heavier boards are safer with screws and anchors.
How do you make a cork board look aesthetic?
Choose a limited color palette, add a clean frame, create zones with tape or ribbon, and use matching pins and clips. Leave some empty space so it does not look cluttered.
Final Thoughts
Decorating a cork board is a quick, forgiving project: pick one surface treatment, refresh the frame, add a functional layer like a ribbon grid or zones, and hang it securely. The result is a board that works hard and looks like part of the room.
Looking for your next project? Explore our collection of budget-friendly cork craft ideas for 2026, from wine cork decor to full cork walls.