Have you ever wanted to create stunning, colorful artwork without needing advanced painting skills? Pour painting with acrylics is a fun and simple way to turn your creativity into beautiful, flowing designs.
Whether you’re a beginner or just looking for a new art technique to try, this guide will show you exactly how to get started. You’ll learn the step-by-step process, useful tips, and tricks to make your acrylic pour paintings look amazing every time.
Ready to unlock your artistic side and see vibrant colors come to life? Keep reading to discover how easy and enjoyable pour painting can be!

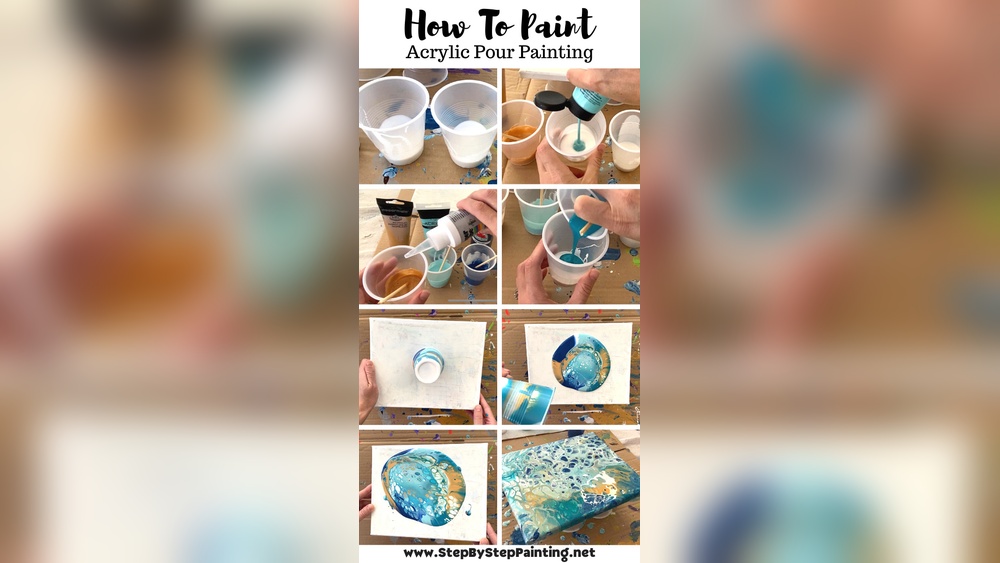
Credit: stepbysteppainting.net
Materials Needed
Pour painting with acrylics is a fun and creative art form. It needs some special materials to get started. Knowing what you need helps you prepare better. This section explains the basic materials for acrylic pour painting.
Choosing The Right Acrylic Paints
Pick fluid acrylic paints for smooth pouring. Thick paints do not flow well. Use paints that are bright and rich in color. Choose brands known for good quality and consistency. Avoid paints with too much texture or grit.
Essential Tools And Supplies
Gather cups for mixing paint and pouring. Use stirring sticks to blend paint and pouring medium. Have a canvas or wood panel ready as your surface. Use gloves to keep hands clean. A plastic sheet or tray helps catch drips and spills.
Preparing Your Workspace
Cover your table with a plastic sheet or newspapers. Work in a well-ventilated area to avoid fumes. Keep paper towels handy for quick cleanups. Arrange all materials within easy reach. Make sure the surface is level to avoid paint running.
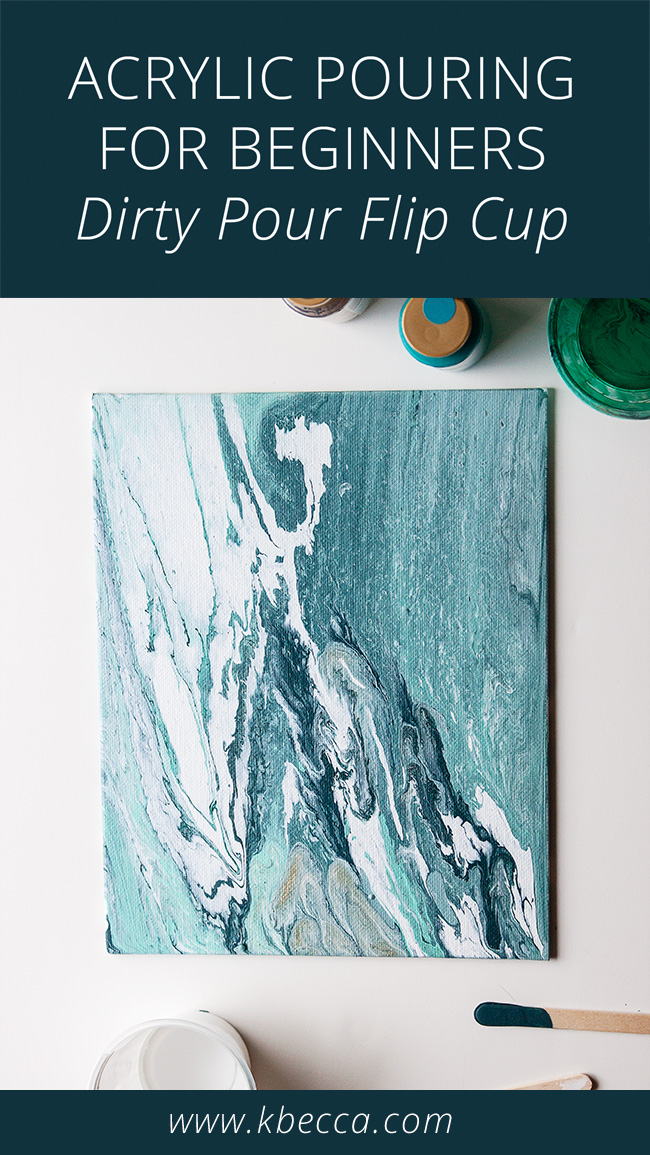
Credit: www.kbecca.com
Preparing Your Paint
Preparing your paint is a key step in pour painting with acrylics. It affects how the colors flow and mix on the canvas. Proper preparation helps you create smooth layers and vibrant effects.
Getting the paint ready takes some practice but is simple with the right tools and materials. You need to mix your paints carefully and check the texture. Some ingredients can help create interesting patterns.
Mixing Paints With Pouring Medium
Start by choosing acrylic paints with good pigment. Pour medium helps thin the paint without losing color. It makes the paint flow easily and blend well.
Mix equal parts of paint and pouring medium. Stir slowly to avoid air bubbles. The mixture should be smooth and even.
Achieving The Right Consistency
The paint must be thin enough to pour but thick enough to cover. Think of warm honey or syrup. Test the flow by tilting your cup. It should move slowly and smoothly.
Add small amounts of water if the paint is too thick. Add more pouring medium if it is too thin. Aim for a balance that lets colors spread and stay vibrant.
Adding Silicone For Cells
Silicone oil creates small round shapes called cells. These add texture and depth to your painting. Use just a few drops in your paint mixtures.
Stir gently after adding silicone. Too much can cause large bubbles. Cells appear when the paint dries and separates slightly.
Pouring Techniques
Pouring techniques shape the way acrylic paint flows and blends on your canvas. Each method creates unique patterns and effects. Experimenting with these styles helps you find your favorite way to pour. Below are four popular pouring techniques. They are simple and fun to try.
Dirty Pour Method
Mix several paint colors in one cup without stirring too much. Pour the cup slowly onto the canvas. Colors spread and swirl together naturally. This creates interesting layers and soft blends. It’s a quick way to make a colorful, abstract design.
Flip Cup Technique
Fill a cup with layers of different paint colors. Place the cup upside down on the canvas. Lift the cup carefully to let the paint flow out. The colors push and pull in unique patterns. This technique adds depth and surprises to your artwork.
Puddle Pour Approach
Pour small pools of individual paint colors directly onto the canvas. Let the puddles merge and mix at the edges. This method gives a soft, organic look. You can control where colors meet and create smooth transitions.
Swipe Pour Style
Pour paint in a line or puddle on the canvas. Use a tool like a spatula or paper towel to swipe across the paint. The swipe pulls colors together, making streaks and waves. This technique adds texture and movement to your pour painting.
Creating Effects
Creating effects in acrylic pour painting brings your artwork to life. These effects add depth and interest. Different techniques help you achieve unique looks. Experimenting with these methods makes your painting stand out.
Making Cells And Patterns
Cells are small, round shapes that appear in the paint. They create a natural, organic look. Use silicone oil or other additives to form cells. Add a few drops to your paint mix. As the paint spreads, cells will appear. Patterns form as colors push and pull each other. Try tilting the canvas to guide the flow. This creates beautiful, random designs.
Using Heat Tools
Heat tools help enhance cells and textures. A small torch or heat gun works well. Move the heat gently over the wet paint. The heat causes the silicone to rise, making cells pop. Be careful not to burn the paint. Heat also helps bubbles escape. This results in a smooth, polished finish. Practice with heat to control the effect better.
Layering Colors
Layering adds complexity to your pour painting. Pour one color, then let it settle slightly. Add another color on top or side. The colors mix but keep their shapes. Layering creates depth and new shades. Use transparent and opaque colors for contrast. Pour slowly to avoid muddying the colors. Each layer changes the final look.
Drying And Finishing
Drying and finishing are key steps in pour painting with acrylics. These steps protect your artwork and enhance its look. Proper care here makes your painting last longer and shine brighter.
Proper Drying Conditions
Keep your painting in a dust-free area. Avoid direct sunlight to stop colors from fading. Room temperature should be steady, not too hot or cold. Let the paint dry slowly to avoid cracks. Drying can take from 24 to 72 hours. Check the surface gently to see if it is fully dry.
Sealing Your Artwork
Seal your painting to protect it from dust and moisture. Use a clear acrylic varnish for best results. Spray varnish works well for even coverage. Apply thin layers and let each layer dry. This adds a nice shine and keeps colors vibrant. Avoid touching the surface after sealing.
Troubleshooting Common Issues
Sticky surfaces mean the paint is not dry yet. Move your painting to a cooler, dryer place. Cracks appear if paint dries too fast or thick. Use thinner layers next time to prevent cracking. Bubbles can form during pouring. Tap the canvas lightly to release air bubbles before drying.

Credit: www.owatroldirect.co.uk
Tips For Success
Pour painting with acrylics can be fun and relaxing. Success depends on some key tips. These tips help you get better results and enjoy the process more. Follow them to avoid frustration and create beautiful art.
Color Selection Advice
Choose colors that work well together. Pick shades that contrast to make your painting pop. Use a mix of light and dark colors for depth. Test colors on a small canvas before starting. Avoid too many colors; it can make your art look messy. Simple palettes often bring the best results.
Avoiding Common Mistakes
Do not use thick paint; it won’t flow well. Use a pouring medium to thin your acrylics. Avoid shaking paint containers too much; it creates bubbles. Pour slowly and steadily to control the flow. Clean your tools often to prevent clumps. Work in a dust-free area to keep your painting clean.
Experimenting With Different Surfaces
Try pouring on canvas, wood, or tiles. Each surface changes how paint moves and dries. Use primed surfaces for better paint grip. Smooth surfaces create different effects than rough ones. Test small pieces before starting large projects. Experimenting helps you find your favorite style.
Frequently Asked Questions
What Materials Do I Need For Acrylic Pour Painting?
You need acrylic paints, pouring medium, canvas, cups, stir sticks, gloves, and a level surface to start. These basics ensure smooth paint flow and vibrant results.
How Do I Prepare Acrylic Paint For Pouring?
Mix acrylic paint with a pouring medium until it’s fluid but not watery. This helps the paint flow evenly without cracking.
What Pouring Techniques Work Best With Acrylics?
Popular techniques include dirty pour, flip cup, and puddle pour. Each creates unique patterns and effects on your canvas.
How Long Does Acrylic Pour Paint Take To Dry?
Drying usually takes 24 to 72 hours depending on paint thickness and room humidity. Avoid moving your artwork during this time.
Conclusion
Pour painting with acrylics offers fun and creative results. Start with simple steps and experiment with colors. Use the right tools and be patient during drying. Each pour creates a unique design. Keep practicing to improve your skills. Enjoy the process and express yourself freely.
Acrylic pour painting can brighten any space. Try different techniques to find what you like best. Art is about joy and creativity, not perfection. Keep your workspace clean and have fun every time.