Are you ready to bring the wild beauty of a wolf to life with your own brush? Painting a wolf with acrylics can seem challenging, but with the right approach, you can create a striking masterpiece that captures the spirit and power of this magnificent animal.
In this guide, you’ll discover simple steps and helpful tips that make painting a wolf easier than you think. Whether you’re a beginner or looking to improve your skills, you’ll find everything you need to turn your canvas into a stunning wolf portrait.
Keep reading, and soon you’ll be amazed at what you can create with just a few strokes of acrylic paint.
Materials Needed
Gathering the right materials is the first step to painting a wolf with acrylics. Proper supplies ensure smooth painting and vivid results. This section covers essential tools needed for your acrylic wolf artwork.
Choosing Acrylic Paints
Select acrylic paints with rich, vibrant pigments. Choose colors like white, black, gray, brown, and some blues for shading. Look for paints that dry quickly and have good coverage. Tubes or jars both work well depending on your budget.
Selecting Brushes
Use a variety of brush sizes for detail and broad strokes. Flat brushes help cover large areas quickly. Round brushes work great for fur texture and fine lines. Synthetic brushes are affordable and hold acrylic paint well.
Canvas And Palette Options
Pick a canvas size that fits your workspace and painting style. Stretched canvas or canvas boards are ideal choices. Choose a palette with enough space to mix your colors easily. Plastic or wooden palettes both function well for acrylics.
Setting Up Your Workspace
Setting up your workspace is the first step in painting a wolf with acrylic paint. A well-prepared area helps you focus and work efficiently. It reduces distractions and keeps your supplies within reach. This makes the painting process smooth and enjoyable. Organizing your tools and choosing the right environment sets the tone for your creative session.
Organizing Supplies
Gather all your acrylic paints, brushes, water cup, palette, and canvas. Arrange them neatly on your table. Keep frequently used colors and brushes closest to you. Use small containers or trays to hold your paints and water. This prevents spills and keeps your area clean. Having everything in order saves time and avoids frustration.
Lighting And Environment Tips
Choose a bright, natural light source for your workspace. Natural light shows true colors and details clearly. Avoid harsh shadows or direct sunlight that can cause glare. If natural light is not available, use a white LED lamp. Position the light so it shines evenly on your canvas. Keep your area quiet and comfortable to stay focused longer.
Sketching The Wolf
Sketching the wolf is the first step in your acrylic painting journey. It sets the foundation for your artwork. A clear sketch helps capture the wolf’s shape and character before adding color. Keep your pencil strokes light to adjust easily as you go. Focus on the overall form before diving into details. This way, your painting will look balanced and natural.
Basic Shapes And Proportions
Start by drawing simple shapes to map out the wolf’s body. Use circles for the head and chest. Add ovals for the legs and snout. Connect these shapes with smooth lines to form the outline. Check the size relationships between parts. The head should not be too big or small compared to the body. Keep proportions accurate to make your wolf look realistic. Take your time with this step. It saves effort later in the painting process.
Refining Details
Once the basic shapes look right, add more details to your sketch. Outline the ears, eyes, nose, and mouth carefully. Show the fur direction with short, light lines. Shape the legs and paws more clearly. Correct any parts that seem off in proportion. Keep your lines clean but still soft. Avoid pressing too hard with the pencil. This makes it easier to paint over later. A refined sketch guides your brush and makes painting smoother.

Credit: www.youtube.com
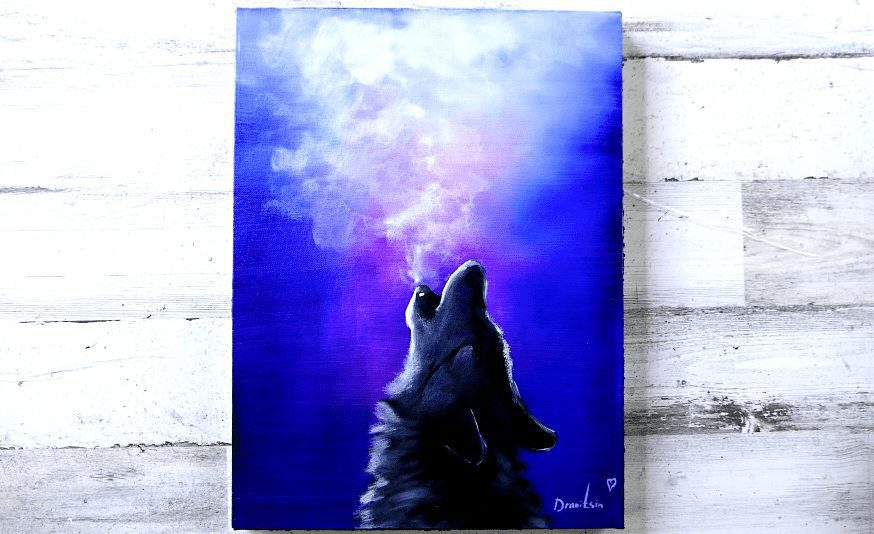
Creating The Background
Creating the background sets the mood for your wolf painting. It gives depth and context to your artwork. A well-made background can make your wolf stand out and look more lively. Start with a simple plan before applying paint. Think about the environment where the wolf lives. Is it a forest, snowy field, or mountain scene? This choice guides your color and technique decisions.
Choosing Colors
Pick colors that match the natural habitat of a wolf. Earth tones like browns, greens, and grays work well. For winter scenes, use cool blues and whites. Avoid bright or harsh colors that distract from the wolf. Use muted shades to create a calm, realistic feel. Consider the time of day too. Warm oranges and yellows suggest sunset, while cool blues hint at dawn or dusk.
Blending Techniques
Blending colors smoothly helps create a soft background. Use a large, flat brush to mix wet paints directly on the canvas. Work quickly before acrylics dry. You can also use a dry brush to soften edges. Light, circular strokes help blend colors naturally. Layering thin washes adds depth without overpowering the wolf. Keep the background simple to keep focus on your main subject.
Painting The Base Layers
Painting the base layers sets the foundation for your wolf acrylic painting. This step builds the basic shapes and tones. It helps you plan the fur, light, and shadow. Take your time to create smooth, even coats of paint. Use thin layers to avoid covering details. This stage is crucial for a realistic look.
Blocking In Fur Colors
Start by choosing the main fur colors for your wolf. Mix a few shades of gray, brown, and white. Use a medium-sized brush to paint large areas of color. Focus on the overall shape of the wolf’s body and head. Don’t worry about details yet. Cover the canvas with broad strokes to block in the fur colors. This step helps you see the wolf’s basic form clearly.
Establishing Light And Shadow
Next, add light and shadow to your base layers. Observe where the light hits the wolf’s fur. Use lighter tones to highlight these areas. Darker tones show where shadows fall. Apply these tones gently with a soft brush. This contrast gives your painting depth and volume. It also guides where you will add details later. Keep your strokes smooth and blend colors softly.

Credit: stepbysteppainting.net
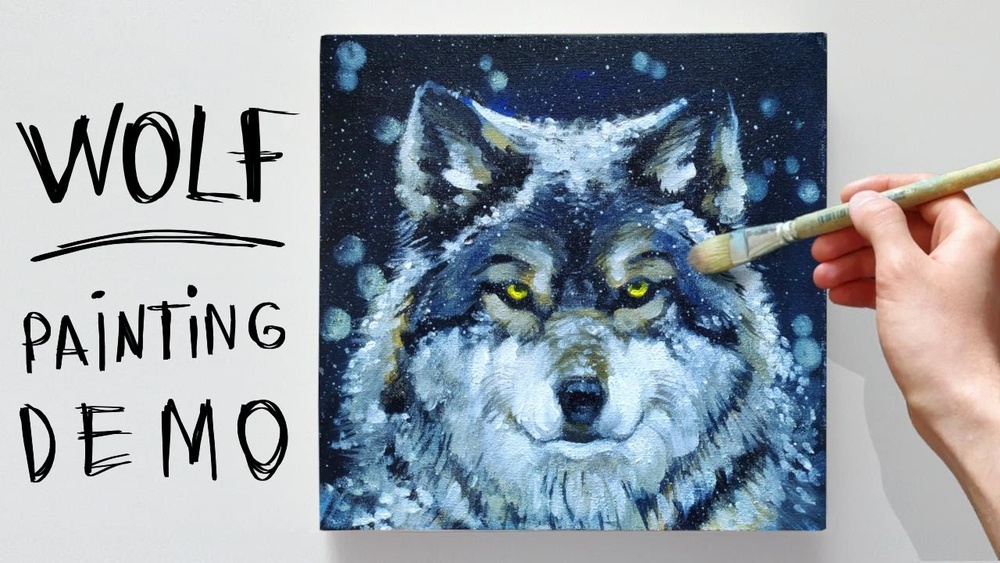
Adding Texture And Details
Adding texture and details brings your wolf painting to life. It makes the fur look soft and natural. Details give the face expression and depth. These touches turn a flat image into a lifelike wolf. Focus on creating fine textures with your brush. Capture the unique patterns in the fur and the sharpness of the eyes. Small strokes and careful layering build a realistic effect.
Brush Strokes For Fur
Use thin, short brush strokes to mimic fur strands. Start with a base color and layer lighter tones on top. Vary your brush pressure for natural texture. Paint in the direction of the fur growth. Mix different shades of grey, brown, and white for depth. Avoid solid blocks of color to keep the fur lively. Highlight areas where light hits the fur. Add shadows in darker sections for contrast. Use a fine liner brush for the smallest hairs. These details create a soft and fluffy look.
Painting Eyes And Facial Features
The eyes are the soul of your wolf painting. Use a small round brush to paint the iris and pupil. Start with a dark base and add lighter colors for shine. Add a small white dot to show reflection. This brings life and emotion to the eyes. Paint the nose with a mix of black and dark brown. Use small strokes to show its texture. Add shadows around the mouth to create depth. Focus on subtle color changes to define the face. Keep your brush strokes smooth and controlled here. These fine details make the wolf’s face expressive and realistic.
Highlighting And Shadows
Highlighting and shadows bring a wolf painting to life. They create a sense of volume and space. Without them, the painting looks flat and dull. Correct use of light and dark tones shows the wolf’s form and texture clearly. This section explains how to paint highlights and shadows effectively.
Enhancing Depth
Use lighter colors to show areas that catch light. Apply these highlights on the wolf’s fur tips and facial features. Darker shades go in the shadowed parts, like under the chin and behind the ears. Layering these tones gives the wolf a 3D look.
Blend gently between light and dark areas. This smooth transition mimics natural fur and adds realism. Avoid harsh lines that can make the painting look stiff. Keep your strokes soft and follow the fur’s direction.
Using Contrast Effectively
Contrast makes your wolf stand out. Place bright highlights next to deep shadows for strong impact. This difference attracts the viewer’s eye and defines shapes clearly.
Choose shadow colors carefully. They should be rich but not overpower the highlights. Use cool tones in shadows to balance warm highlights. This balance creates a natural and appealing look.
Finishing Touches
Finishing touches bring your wolf painting to life. They add realism and depth. This stage focuses on delicate details and color balance. Small efforts here make a big difference. Take your time and use fine brushes for best results.
Adding Whiskers And Fine Details
Use a thin brush or liner brush for whiskers. Choose light colors like white or pale gray. Paint short, gentle strokes coming from the muzzle. Avoid making whiskers too thick or dark. Add small highlights on eyes and nose for shine. Use a tiny brush to add fur texture around the face. These details create a natural, lively look.
Final Color Adjustments
Step back and observe your painting carefully. Adjust shadows and highlights to improve contrast. Mix slightly darker or lighter tones for depth. Soften harsh edges by blending with a dry brush. Enhance key areas like eyes and ears with subtle color boosts. These small changes unify your painting and make it more striking.
Sealing And Preserving
Sealing and preserving your acrylic wolf painting protects your hard work. It keeps colors bright and stops damage from dust or moisture. This step helps your artwork last many years without fading or cracking.
Proper sealing also gives your painting a nice finish. You can choose from matte, satin, or glossy looks. The right varnish enhances your wolf’s details and texture.
Choosing A Varnish
Select a varnish made for acrylic paintings. It should be clear and non-yellowing. Water-based varnishes are easy to use and clean up with water.
Matte varnish reduces shine for a soft look. Satin gives a slight shine for depth. Glossy varnish adds a shiny, wet look that makes colors pop.
Spray varnishes are good for even coverage. Brush-on varnishes allow more control but need a steady hand. Always test varnish on a small area first.
Care Tips For Acrylic Paintings
Keep your painting away from direct sunlight to avoid fading. Avoid places with high humidity or sudden temperature changes.
Clean your painting gently with a soft, dry cloth. Do not use water or cleaning products on the surface.
Handle the painting by its frame or edges to prevent fingerprints. Store or hang your artwork in a safe place where it won’t be knocked over.
Credit: urartstudio.com
Frequently Asked Questions
What Materials Are Needed To Paint A Wolf With Acrylics?
You need acrylic paints, brushes of various sizes, a canvas, palette, water cup, and paper towels. Quality materials ensure better color blending and detail in your wolf painting.
How Do I Start Painting A Wolf With Acrylic Paint?
Begin by sketching the wolf outline lightly on the canvas. Then, apply base colors and gradually add details using smaller brushes for fur texture and facial features.
What Techniques Create Realistic Wolf Fur In Acrylics?
Use layering and dry brushing techniques to mimic fur. Start with darker base tones, then add lighter strokes with a dry brush to create depth and texture.
How Can I Blend Colors Smoothly In Acrylic Wolf Paintings?
Work quickly while the paint is wet, use a clean, damp brush to blend edges gently, and layer thin washes to achieve smooth color transitions on the fur.
Conclusion
Painting a wolf with acrylics takes patience and practice. Start with simple shapes and build layers carefully. Use different brush strokes to add texture and depth. Remember to mix colors to create natural shades. Keep your workspace clean and your brushes ready.
Enjoy the process and learn from each stroke. Your skills will improve with every painting session. A beautiful wolf painting is within your reach. Just keep painting and have fun!