
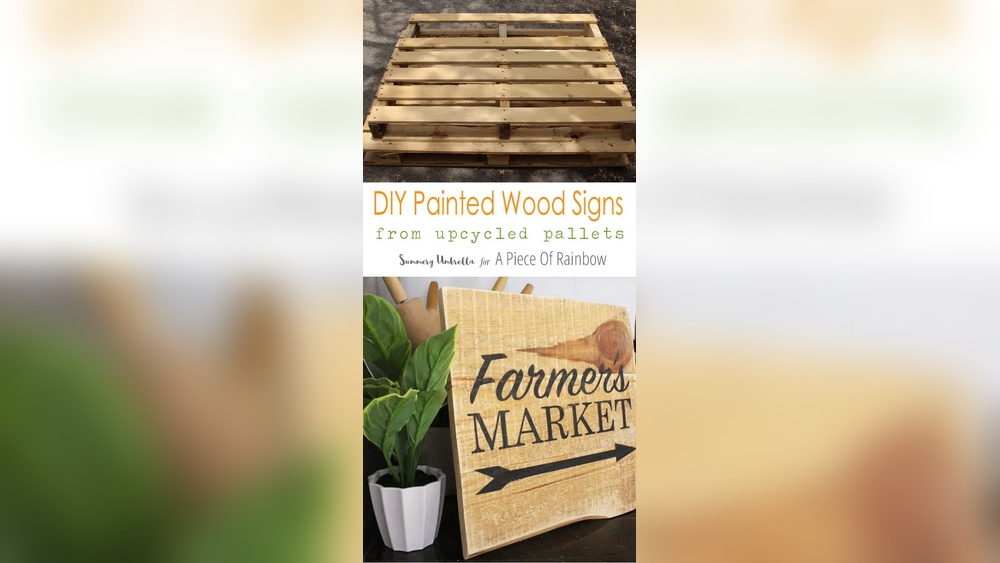
Pallet wood signs have a look that new lumber cannot quite copy: weathered boards, visible gaps, nail holes and grain that has been bleached by time. That rustic character is also what makes them tricky to paint. Rough surfaces swallow paint, gaps break up lettering and old wood can hide splinters, stains or chemical treatments. This guide covers how to paint DIY wooden pallet signs from choosing safe pallet wood to sealing the finished piece.
Quick answer: To paint a DIY wooden pallet sign, choose a pallet stamped “HT” (heat treated), disassemble and clean the boards, sand them smooth (around 80 then 120–150 grit for rustic work), assemble them with cleats on the back, and apply a base coat or stain. Transfer your design with graphite paper or a stencil, paint lettering with acrylic craft paint in thin coats, lightly distress if desired, and seal with a water-based clear coat (exterior-rated for outdoor signs).
Step 0: Choose Safe Pallet Wood
Not every pallet should be brought indoors. Many wooden pallets used internationally carry an IPPC stamp showing how they were treated against pests:
| Stamp code | Meaning | Use for crafts? |
|---|---|---|
| HT | Heat treated | Generally considered the safer choice |
| KD | Kiln dried | Generally acceptable |
| MB | Methyl bromide fumigation | Avoid |
| No stamp | Unknown treatment | Use caution; often domestic pallets with unknown history |
Also avoid pallets with oily stains, strong odors or signs of chemical spills, since you cannot know what they carried. Painted or colored pallets are often rental pallets owned by companies and should not be taken. If in doubt, buy reclaimed pallet-style boards from a craft or hardware store.
Materials and Tools
- Wood: Pallet boards or reclaimed planks
- Disassembly tools: Pry bar, hammer, reciprocating saw or a pallet buster tool
- Sanding: Orbital sander or sanding block with 80, 120 and 150–220 grit paper
- Assembly: Two or three scrap cleats, wood glue, short screws or nails
- Paint: Acrylic craft paint, chalk-style paint or outdoor acrylic for lettering and backgrounds
- Stain (optional): Water-based or oil-based wood stain
- Brushes: 1–2 inch flat for base coats, small round and liner brushes for lettering, stencil brush
- Design transfer: Graphite transfer paper, stencils or vinyl stencils
- Finish: Water-based polyurethane or polycrylic indoors; exterior spar urethane or outdoor clear sealer outdoors
- Safety: Gloves, eye protection and a dust mask
Paint choice decides how well the sign survives humidity, sun and handling. Our comparison of the best paint for wooden signs and DIY craft projects covers indoor and outdoor options by coverage and durability.
Step 1: Disassemble and Clean the Pallet
- Wear gloves and eye protection; pallet wood splinters easily.
- Remove boards with a pry bar, working gradually from both ends to avoid splitting. Alternatively, cut boards along the inside edges of the stringers with a saw, which is faster but gives shorter boards.
- Remove or hammer flush any remaining nails. Run a magnet over boards to find hidden nail fragments before sanding.
- Scrub boards with a stiff brush and soapy water to remove dirt. Let them dry completely, which may take a day or more.
Step 2: Sand for the Look You Want
How much you sand depends on whether you want a smooth or rustic finish.
- Rustic: Sand with 80 grit to remove splinters and loose fibers, then 120 grit. Keep some texture and character marks.
- Smoother: Continue to 150–220 grit for cleaner lettering and a more refined look.
Wear a dust mask; wood dust is an irritant. Sand with the grain and wipe away dust with a tack cloth or slightly damp rag.
Step 3: Assemble the Sign
- Lay boards face down side by side. Decide on tight joints for a clean surface, or small gaps for a rustic look.
- Cut two or three cleats (strips of wood) slightly shorter than the sign’s height.
- Glue and screw or nail the cleats across the back of the boards, making sure fasteners are short enough not to poke through the front.
- Trim the ends evenly with a saw if needed.
Step 4: Choose a Background Finish
Option A: Stain
Stain shows off the wood grain. Apply with a rag or brush, wait a few minutes, and wipe off the excess. Lighter stains like weathered gray or natural oak keep lettering readable; darker stains like walnut work with white or cream lettering. Pallet wood often absorbs stain unevenly; a pre-stain conditioner can help even it out.
Option B: Painted base coat
Paint the entire sign in a solid color. White, cream, soft gray, navy and black are popular. Two thin coats are usually better than one thick coat, especially on porous pallet wood.
Option C: Whitewash
Thin white paint with water, roughly 1:1, brush it on and wipe it back so the grain shows through. This gives a soft, beachy, farmhouse look.
Option D: Layered and distressed
Paint a dark base, then a lighter top coat. Once dry, sand edges and high spots to reveal the base color underneath.
Let the background dry fully, ideally several hours or overnight, before lettering.
Step 5: Plan and Transfer the Design
Lettering is the heart of most signs. Planning prevents crooked or crowded text.
- Design to scale. Use a word processor or design app to lay out text at the actual sign size. Print it across several sheets and tape them together.
- Check spacing. Leave a margin around the edges, and avoid placing thin letter strokes directly over board gaps if possible.
- Transfer with graphite paper. Place graphite or carbon transfer paper under the printout and trace the outlines firmly with a pencil or ballpoint pen.
- Alternatively, use stencils. Adhesive vinyl stencils give the crispest edges on rough wood. Reusable plastic stencils work but need firm taping.
- Chalk method. Rub chalk on the back of the printout, place it on the sign and trace. Chalk wipes away easily afterward.
Step 6: Paint the Lettering and Design
Freehand painting over transferred lines
- Use a small round or liner brush with acrylic paint thinned slightly with water so it flows.
- Paint the outline first, then fill in.
- Apply two thin coats for opacity rather than one thick coat.
- Keep a damp cotton swab handy to clean up mistakes quickly.
Stenciling on rough pallet wood
- Press the stencil firmly, especially along edges.
- Seal the stencil edges by dabbing a thin layer of the background color first; let it dry. Any bleed will match the background.
- Use a stencil brush or sponge with very little paint, dabbing straight down rather than brushing sideways.
- Build up two or three light layers.
- Remove the stencil while the last layer is slightly tacky.
Dealing with board gaps
Paint lettering across gaps as usual, then use a small brush to touch up the edges of each board. Some makers deliberately leave lettering broken at the gaps for an authentic rustic effect.
Step 7: Distress (Optional)
For a weathered look, lightly sand over the lettering and edges once the paint is fully dry, using 150–220 grit. Focus on edges and corners where natural wear would occur. Stop before you sand through too much lettering; subtle is usually better.
Step 8: Seal the Sign
| Location | Sealer | Notes |
|---|---|---|
| Indoor | Water-based polyurethane or polycrylic (matte or satin) | Non-yellowing over light colors |
| Covered porch | Exterior water-based clear coat | Multiple coats; reapply as needed |
| Fully outdoor | Spar urethane or exterior clear sealer with UV protection | Oil-based spar can amber over white |
Apply sealer in thin coats with a soft brush, following the grain, and let each coat dry according to the label. Lightly sand between coats with very fine sandpaper if the surface feels rough. Seal the back and edges too, especially for outdoor signs, to reduce moisture absorption.
Step 9: Add Hanging Hardware
Attach sawtooth hangers or D-rings to the cleats on the back. For a rustic look, drill two holes near the top and thread through rope or jute. Make sure hardware is rated for the sign’s weight.
Pallet Sign Design Ideas
- Family name and established year
- Welcome sign for a porch, often vertical with a wreath
- Kitchen or coffee bar signs with short phrases
- Seasonal signs: pumpkin patch, harvest, winter greetings
- Garden markers made from short pallet slats
- Directional arrow signs for weddings or events
- American flag painted across the slats
- Coordinates or map signs for meaningful places
For more on painting signs on new boards rather than reclaimed pallets, see our guide to painting DIY wooden signs at home.
Common Problems and Fixes
Paint soaks in and looks patchy
Pallet wood is often dry and porous. Apply a primer or an extra base coat, or a sanding sealer, before painting.
Lettering edges are fuzzy
Rough wood fibers wick paint. Sand smoother where lettering will go, use thicker paint, and seal stencil edges first.
Stain looks blotchy
Uneven absorption. Use a pre-stain wood conditioner and test on a scrap piece.
Sealer yellowed white paint
Oil-based finishes can amber. Use water-based, non-yellowing clear coats indoors and choose exterior water-based products where possible.
Boards warp or split outdoors
Moisture moving in and out of unsealed wood causes movement. Seal all sides and hang the sign under cover if possible.
Caring for a Finished Pallet Sign
Indoor signs need little more than an occasional dusting with a soft dry cloth. Outdoor signs benefit from a quick inspection each spring: look for cracks in the finish, peeling at the edges or gray, weathered patches, and lightly sand and reapply a coat of exterior sealer where needed. Hanging the sign under an overhang or on a covered porch will greatly extend its life compared with full sun and rain exposure.
Tips by Skill Level
Beginner
Use a vinyl stencil with a simple word on a stained background. Keep the design to one or two colors.
Intermediate
Combine hand lettering with simple graphics like arrows, laurels or a small painted flower.
Advanced
Try layered distressing, mixed lettering styles, painted scenes across slats or faux aged finishes.
Choosing Fonts and Layouts for Pallet Signs
Lettering style changes the whole feel of a sign. Bold sans-serif and block fonts read clearly from a distance and survive the texture of rough wood well. Script fonts look elegant but have thin strokes that can disappear into the grain, so choose versions with thicker lines or paint them slightly heavier. A common layout combines one script word with block lettering above or below it, such as a family name in script with “EST. 2026” in small caps.
Keep text short. A sign with five or six words is easier to space well and reads instantly. If you need more text, reduce the font size of supporting lines rather than crowding the main words. Center the design visually rather than strictly by measurement, since a slight upward shift often looks more balanced.
FAQs
What paint is best for pallet signs?
Acrylic craft paint or chalk-style paint works well indoors. For outdoor signs, use outdoor-rated acrylic paint and seal with an exterior clear coat.
Do you need to sand pallet wood before painting?
Yes. Sanding removes splinters and loose fibers and gives paint a better surface. Sand more for smooth lettering, less for a rustic look.
Are wooden pallets safe to use for signs?
Pallets stamped HT (heat treated) are generally considered the safer choice. Avoid pallets stamped MB or those with stains, odors or unknown history.
How do you transfer lettering onto pallet wood?
Print the design to size and trace it using graphite transfer paper, or use adhesive vinyl stencils for crisp edges.
How do you seal a pallet sign for outdoors?
Apply several thin coats of an exterior clear sealer or spar urethane with UV protection, covering the front, back and edges.
Should I stain or paint the background?
Stain shows wood grain for a natural look; paint or whitewash gives a cleaner background for colorful lettering. Both work.
Final Thoughts
Pallet signs reward patience at the start: choose safe boards, sand and assemble carefully, and give the background time to dry before lettering. Thin coats, sealed stencil edges and a good clear finish do the rest. When you are ready to pick supplies, our guide to paints that hold up on wooden signs will help you match paint to where your sign will hang.




