Quick answer: To paint fire in oil, set up a dark surrounding value so the flames can glow, then paint the flame from the inside out: the hottest core in pale yellow-white, surrounded by warm yellow, then orange, then red at the tips, with soft, flickering edges that taper upward. Keep the brightest values small, use thin glazes of transparent red or orange for the outer glow, and light nearby surfaces with the fire’s warm color so it looks like it is emitting light.
Fire is one of the few subjects in painting that is itself a light source. That changes the usual rules. You are no longer painting how light falls on a form; you are painting the light, and everything around it has to react. Painters who get fire right usually spend as much time on the darkness and the glow around the flames as on the flames themselves.
This guide explains how to paint fire in oil: the color temperature structure of flames, palettes, setting up value contrast, step-by-step methods for a campfire or candle flame, glazing for glow, painting smoke and embers, and common mistakes. For more oil subjects and technique guides, see our oil painting technique collection.
How Fire Actually Looks
Before mixing any paint, observe flames or study good reference. A few things are consistent:
- The hottest part is the lightest. Near the fuel, flames often appear pale yellow to almost white. As they rise and cool, they shift to deeper yellow, orange, then red at the tips.
- Edges are soft and flickering. Flames have no fixed outline. Their edges taper and break into wisps.
- Shapes are teardrop-like and upward. Hot air rises, so tongues of flame lean upward, often curving and splitting.
- Blue appears at the base in clean-burning flames, such as candles and gas burners, where combustion is most complete.
- Everything around fire is lit warmly. Faces, logs, rocks and ground near the fire take on orange and red light, with deep, often cool shadows.
Why Contrast Matters More Than Color
Paint cannot emit light. The only way to make fire look bright on canvas is to surround it with darker values. A yellow flame on a white background looks pale and flat; the same yellow surrounded by deep browns and blues seems to glow.
Plan your composition so the flames are the lightest values in the painting, set against the darkest values nearby. That is why many fire paintings are night scenes or dark interiors.
Palette for Painting Flames in Oil
| Role | Suggested colors | Notes |
|---|---|---|
| Hottest core | Titanium white with a touch of lemon yellow or cadmium yellow light | Keep this area small |
| Inner flame | Cadmium yellow medium or a warm hansa yellow | Opaque yellow for punch |
| Middle flame | Cadmium orange or a yellow-red mix | Main body of the flame |
| Outer flame and tips | Cadmium red light, pyrrole red | Fade into the dark |
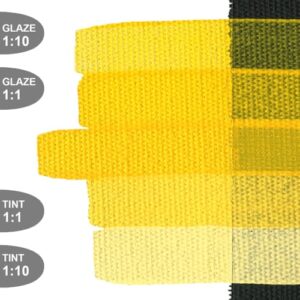
| Glow glazes | Transparent red oxide, quinacridone red or orange, indian yellow | Thin over dry layers for luminous glow |
| Darks | Burnt umber, ultramarine, alizarin crimson or a permanent alternative, ivory black | Rich, transparent darks around the fire |
| Blue base | Ultramarine or cerulean with white | Only for candle or gas flames |
Transparent, warm pigments are especially useful for fire because light passes through them and reflects off the lighter layers underneath, which gives a sense of luminosity that opaque paint alone cannot achieve.
Materials
- Primed canvas or panel
- Oil paints from the palette above
- Odorless mineral spirits for early layers and cleanup
- Glazing medium (such as a linseed or alkyd-based medium) for later layers
- Brushes: medium flat or filbert for blocking in, small filberts and rounds for flame shapes, a soft blending brush, a fine liner for wisps and sparks
- Palette knife and rags
- Good reference: your own photos of a fire, candle or fireplace, or studies from life
How to Paint Fire in Oil: Step-by-Step (Campfire)
Step 1: Tone the canvas dark
Cover the canvas with a thin wash of burnt umber and ultramarine, or transparent red oxide for a warmer start. A dark ground gives you contrast from the beginning and lets you build up to the light rather than fighting a white surface.
Step 2: Sketch the fire and surroundings
Lightly draw the logs, stones and the general mass of the fire. Map the overall flame shape as a loose teardrop or cluster of teardrops. Do not draw individual flames yet; they change constantly and are best painted directly.
Step 3: Block in the darks
Paint the night sky, background and deep shadows with rich, dark mixtures. Keep them a bit transparent. These darks will frame the fire.
Step 4: Paint the glow zone
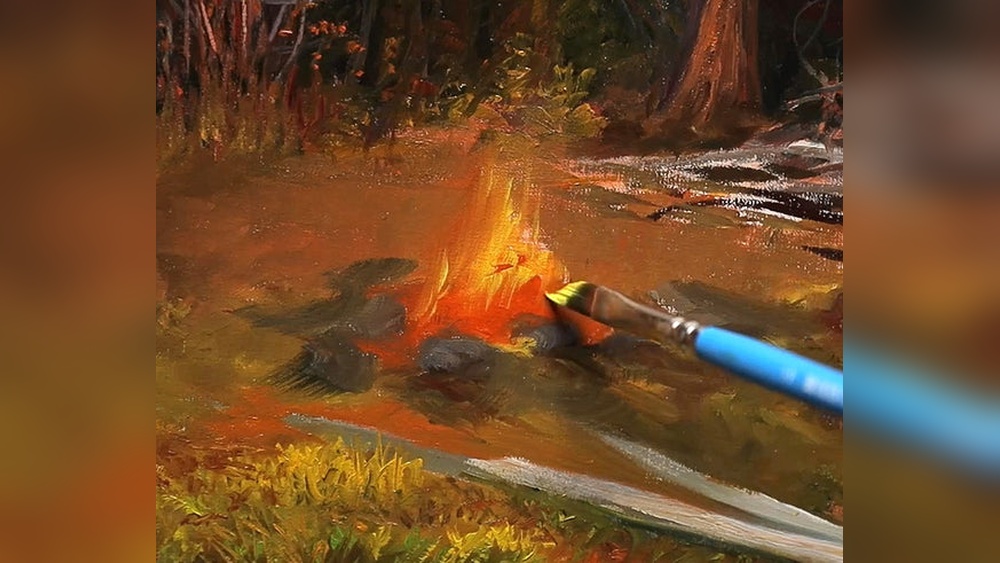
Around the fire, lay in a soft warm halo of deep orange and red, darker than the flames but lighter than the background. Blend its outer edge into the dark so it fades gradually. This is the light the fire throws into the air and onto smoke.
Step 5: Block in the flame body
Using a filbert, paint the flame mass in orange, with upward, flicking strokes. Let the edges taper and split. Vary the heights and widths of the flame tongues.
Step 6: Add the yellow inner flames
Inside the orange, paint smaller yellow shapes concentrated near the base of the flames, where the fire is hottest. Blend the boundary between yellow and orange softly, wet-in-wet.
Step 7: Place the hottest core
Add the palest yellow-white in small areas at the heart of the fire, close to the logs. Restraint is key. If the light core is too large, the fire looks flat and the glow is lost.
Step 8: Red tips and wisps
Pull red and deep orange into the tips of the flames, fading into the dark. Use a liner brush with slightly thinned paint for small wisps breaking away from the main flame.
Step 9: Light the surroundings
Paint warm light onto the sides of logs and stones facing the fire: bright orange and yellow on the edges closest to the flames, fading into deep reddish browns and cool darks on the far sides. Add glowing embers among the logs with small dots of orange and yellow surrounded by dark red.
Step 10: Glaze for luminosity
Once the painting is touch-dry, often a few days later, mix a transparent orange or red with glazing medium and apply a thin glaze over the glow zone and outer flames. This deepens the color and adds the radiant warmth that makes fire believable. You can re-establish the brightest core afterward with a small touch of opaque pale yellow.
Step 11: Sparks and smoke
Flick tiny dots of yellow and orange above the fire for sparks, using a liner or the tip of a palette knife. Paint smoke as a soft, semi-transparent gray, warm near the fire and cooler as it rises and drifts.
Painting a Candle Flame in Oil
A candle flame is a smaller, calmer version of fire with its own structure:
- Background dark. Paint the surroundings in deep tones.
- Soft halo. Paint a circular glow around the flame in warm orange and yellow, blending outward into the dark.
- Flame shape. Paint a teardrop shape in warm yellow, pointed at the top.
- Core. Add a pale yellow-white center, slightly above the wick.
- Blue base. Add a touch of soft blue at the bottom of the flame around the wick.
- Wick. Paint a thin dark wick with a tiny glowing tip.
- Light on wax. Light the top of the candle where melted wax pools, which glows translucent orange.
Edges: The Secret to Moving Flames
Fire looks alive when its edges are soft and varied. A few edge tips:
- Keep most flame edges soft and blended into the glow.
- Allow a few edges to be sharper to suggest a sudden flicker.
- Break the outline of the flame mass with tongues and gaps of dark.
- Avoid symmetry. Real flames lean and twist.
- Paint quickly and decisively. Overworked flames lose their energy.
Painting the Light Fire Casts
The surroundings sell the fire. Consider:
- Falloff: light is strongest near the fire and fades quickly with distance. Objects farther away get dimmer and redder.
- Warm light, cool shadow: warm orange light on forms facing the fire, with cooler, bluish shadows behind them where moonlight or ambient light might reach.
- Rim light: figures or objects between the viewer and the fire get bright, warm edges outlining their silhouette.
- Flickering suggestion: uneven lighting on surroundings can suggest movement.
Fireplace and Torchlight Variations
Different types of fire call for small adjustments. A fireplace fire is framed by dark brick or stone, so the glow falls mainly on the hearth, floor and anything in front of the opening. Torchlight and lanterns create a smaller, more concentrated pool of light with a rapid falloff into darkness, which makes them useful for dramatic nocturnes. Large wildfires or bonfires cast an orange glow across the sky and smoke, so the sky itself becomes a warm gradient rather than a cool dark.
Common Mistakes
- Using too much white. Large areas of white make fire look flat and cold. Keep the brightest values small.
- Surrounding fire with mid or light values. Without dark contrast, flames cannot glow.
- Hard outlines. Outlined flames look like cutouts.
- Mixing complementary colors at the edges. Blending orange with blue at flame edges creates muddy gray-brown. Let warm and cool meet without overmixing.
- Forgetting the surroundings. If logs and faces near the fire are not lit warmly, the fire does not seem to emit light.
- Uniform flame shapes. Repeated, evenly spaced tongues look like a pattern rather than fire.
Practice Exercises
- Candle studies: paint a candle flame from life on small panels, focusing on halo and value contrast.
- Five-minute flame sketches: paint quick flame shapes from video reference to practice gesture and edges.
- Glaze tests: on a dried yellow-orange study, try glazes of different transparent reds and oranges to see how they change the glow.
- Figure by firelight: paint a simple head or still life lit only by fire to practice warm light and cool shadows.
The same idea of soft, luminous edges applies to atmospheric subjects. Our guide on painting fog in oil explores how to make light and haze feel natural.
Safety and Drying Notes
Some traditional fire colors, such as cadmiums, contain heavy metals. Avoid ingesting or sanding dried cadmium paint, wash hands after painting, and follow the label precautions. Hue versions offer similar colors with different pigments. Oil-soaked rags can self-heat as they dry, so lay them flat to dry outdoors or store them in a sealed metal container with water before disposal.
Glazes and transparent colors can stay tacky longer than opaque layers. Follow fat over lean: lean, thin layers at the start, richer layers with more medium later, to reduce the chance of cracking.
FAQs
What colors do you use to paint fire in oil?
Titanium white with a little yellow for the hottest core, cadmium or hansa yellows for the inner flame, orange for the body, and cadmium or pyrrole reds for the tips. Transparent reds and oranges are useful for glazing the glow.
How do you make fire look like it is glowing?
Surround it with dark values, keep the brightest areas small, add a soft warm halo that fades into the darkness, and glaze transparent warm colors over the glow area. Lighting nearby objects warmly reinforces the effect.
Should I paint fire on a dark or light canvas?
A dark or mid-dark toned canvas is easier, because fire depends on contrast. Starting dark lets you build up the lights for maximum glow.
How do you paint flames that look like they are moving?
Use upward, flicking brushstrokes, soft and varied edges, asymmetrical shapes and small wisps breaking away. Paint them quickly and avoid overblending.
Why does my fire painting look flat?
Usually because the surrounding values are too light, the bright areas are too large, or the edges are too hard. Darken the surroundings, shrink the hottest areas and soften edges.
How long should oil paint dry before glazing fire?
Wait until the underlayer is touch-dry, which often takes a few days for thin layers, longer for thick paint or slow-drying colors. Glazing over wet paint can muddy colors.
Final Thoughts
Painting fire and flames in oil is about creating the illusion of light. Plan for strong value contrast, paint from the hot core outward, keep edges soft and varied, glaze for glow, and let the fire light everything around it. Restraint with the brightest values makes the whole scene feel brighter.
When you are ready for your next challenge, explore more oil painting guides for different subjects to keep building your skills.