
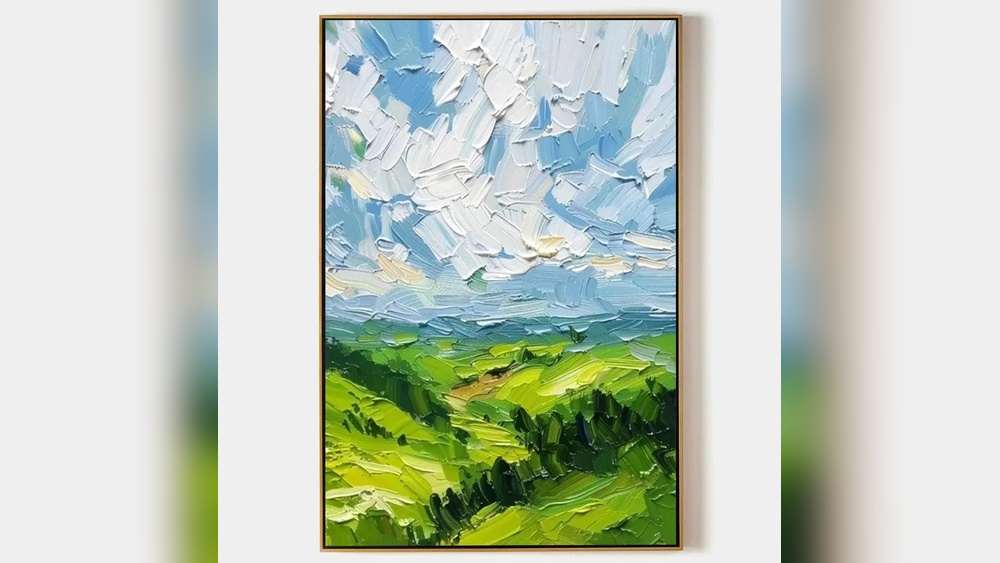
Quick answer: To paint a landscape for wall decor, choose a simple scene with a clear focal point, decide on a horizon line around one-third from the top or bottom of the canvas, and paint from back to front: sky first, then distant hills, middle ground and foreground. Keep distant elements lighter, cooler and softer, and make foreground elements darker, warmer and sharper. Pick colors that echo your room, use a canvas sized to the wall, and finish with varnish so the painting is ready to hang.
A landscape painting can open up a wall like a window. It adds depth, calm and color, and it is one of the most versatile subjects for home decor because it suits nearly every interior style. Painting one yourself means you can match the exact palette and size your room needs, something that is hard to find in stores. This guide explains how to paint a landscape for wall decor, from planning the composition around your space to finishing the canvas for display.
The focus is on acrylic paint because it dries quickly and is easy for beginners, but the same principles apply to oils and gouache.
Start With the Wall, Not the Canvas
Decor paintings succeed when they suit the room. Before you buy a canvas, think about three things:
- Size: Above a sofa or bed, art usually looks best when it spans about two-thirds of the furniture’s width. A 72 inch sofa suits a canvas around 48 inches wide, or a pair of smaller canvases.
- Orientation: Horizontal canvases suit wide walls and panoramic scenes. Vertical canvases suit narrow walls and subjects like waterfalls or tall trees.
- Palette: Pull two or three colors from the room’s textiles, flooring or furniture. A blue-gray sofa might inspire a coastal scene; warm wood and rust pillows suggest an autumn field or desert.
Choose a Landscape Type
| Landscape | Mood | Main challenge | Fits |
|---|---|---|---|
| Rolling hills and meadow | Calm, pastoral | Soft color transitions | Farmhouse, cottage, bedrooms |
| Mountain range | Dramatic, grand | Layered atmospheric depth | Living rooms, offices, cabins |
| Seascape or beach | Fresh, airy | Waves and reflections | Coastal, bathrooms, sunrooms |
| Desert | Warm, minimal | Subtle warm color shifts | Southwestern, boho, modern |
| Lake with reflections | Peaceful | Mirror-image reflections | Bedrooms, reading nooks |
| Abstract landscape | Contemporary | Balancing loose shapes | Modern and minimalist interiors |
Supplies
- Canvas sized for your wall (24×36 and 30×40 inches are common decor sizes)
- Acrylics: titanium white, cadmium yellow light, yellow ochre, cadmium red, burnt sienna, burnt umber, ultramarine blue, phthalo blue, sap green, payne’s gray
- Brushes: 2 to 3 inch flat or hake for skies, 1 inch flat, a filbert, a fan brush, a small round and a liner
- Palette knife
- Spray bottle and slow-drying medium (helpful for skies)
- Reference photo, ideally your own
Landscape painting is a big topic, and our hub on landscape paintings and their essentials covers styles, supplies and display ideas in more depth if you want to go beyond this tutorial.
Composition Basics for Decor Landscapes
A pleasing composition matters more than detail when a painting is viewed from across a room.
- Horizon placement: Avoid the exact middle. A low horizon emphasizes a dramatic sky; a high horizon emphasizes fields, water or foreground.
- Focal point: Choose one: a tree, a sunlit peak, a path, a barn. Place it near a rule-of-thirds intersection.
- Leading lines: Roads, rivers, fences and shorelines guide the eye toward the focal point.
- Three planes: Foreground, middle ground and background. Each needs a distinct value range.
- Simplify: Leave out clutter from your reference. Fewer, bolder shapes read better at a distance.
How to Paint a Landscape for Wall Decor: Step-by-Step
Step 1: Tone the Canvas (Optional)
Cover the canvas with a thin wash of a warm mid-tone such as diluted burnt sienna or yellow ochre. A toned ground makes it easier to judge values and gives warmth to any gaps between brushstrokes.
Step 2: Sketch Big Shapes
Lightly mark the horizon, major landforms, the focal point and any leading lines. Skip details.
Step 3: Paint the Sky
Mix three sky values: a deeper blue for the top, a lighter blue in the middle and a pale, warm tone near the horizon. Skies are usually darker and more saturated directly overhead and lighter near the horizon. Blend them with horizontal strokes using a large brush, misting the canvas if the paint dries too fast. Add clouds with a filbert, using white tinted with a little yellow on the lit side and a soft gray-violet on the shaded side.
Step 4: Paint Distant Elements
Mountains or hills furthest away should be pale, bluish and low-contrast. Mix your sky color with a little gray or violet. Paint them with soft edges and no detail.
Step 5: Paint the Middle Ground
Use more saturated, slightly darker colors. Hills might be muted greens, fields soft gold. Suggest tree lines with dabbed strokes. Introduce some value contrast but keep detail moderate.
Step 6: Paint the Foreground
Here colors are richest, darkest and warmest, and edges are sharpest. Paint grasses, rocks, flowers or a tree with clear texture. Use a fan brush flicked upward for grass and a palette knife for rocks.
Step 7: Add Light and Shadow
Decide where the sun is and stay consistent. Add warm highlights to the sides of hills, trees and rocks facing the light, and cool shadows on the opposite side. Long shadows suggest early morning or late afternoon, which adds mood.
Step 8: Refine the Focal Point
Put your strongest contrast and most detail at the focal point. A bright highlight against a dark shape immediately pulls the eye.
Step 9: Step Back and Adjust
View the painting from across the room, or take a photo and view it small on your phone. Problems with value and composition become obvious. Adjust as needed.
Special Techniques for Popular Decor Scenes
Sunset Skies
Sunsets are the most requested sky for decor landscapes. Paint the sky in horizontal bands while wet: pale yellow at the horizon, then orange, then pink or coral, then violet or blue at the top. Blend each border with a clean, dry brush in light horizontal strokes. The key rule is to avoid letting yellow touch blue directly, since they mix into green. A band of orange or pink between them keeps the transition clean. Clouds in a sunset are lit from below, so paint their undersides warm and their tops cooler and darker.
Water Reflections
Lakes and calm rivers mirror what is above them. Paint the reflection directly below each object, roughly the same height as the object itself, but slightly darker and less saturated. Pull the reflection colors down vertically with a flat brush, then drag a dry brush lightly across horizontally to break it up. Finish with a few thin, light horizontal lines to suggest ripples and the water’s surface.
Fields and Meadows
Distant fields should be smooth bands of color. Closer fields can show texture with short vertical strokes. For wildflowers, dot small amounts of color in the foreground, making the dots larger and more distinct toward the bottom of the canvas and smaller and blurrier as they recede.
Rocky Shorelines and Cliffs
Use a palette knife to scrape on rock shapes in a mid-tone, then catch the top planes with a lighter color and the vertical faces with a darker one. Sharp, angular strokes read as rock; soft round strokes read as bushes.
Tips by Skill Level
- Beginner: Paint a three-band landscape (sky, distant hills, foreground field) on a 16×20 canvas before attempting a large decor piece.
- Intermediate: Add a focal point such as a single tree or barn, and practice reflections or a sunset sky.
- Advanced: Work from your own photos, paint a large diptych that spans two canvases, or try plein air studies to capture real light before painting a studio version. A structured walk-through of this process appears in our step-by-step landscape painting guide.
Color Palettes That Suit Common Interiors
| Interior style | Landscape palette | Example scene |
|---|---|---|
| Coastal | Aqua, sand, soft white, pale gray-blue | Dunes and sea grass |
| Farmhouse | Sage, wheat, cream, muted barn red | Meadow with a distant barn |
| Modern minimalist | Gray, black, white, one muted accent | Abstract layered hills |
| Boho | Terracotta, mustard, blush, olive | Desert at sunset |
| Traditional | Deep greens, golden ochres, warm sky | Pastoral valley with trees |
Painting a Simple Abstract Landscape
Abstract landscapes are popular for modern decor and easier for many beginners because they do not require realism. Divide the canvas into horizontal bands representing sky, hills and land. Paint each band with loose, layered color, letting some underlayers show. Add texture with a palette knife and a few expressive marks such as a thin horizon line or a circle for the sun. Limit the palette to four or five colors to keep it cohesive.
If you are drawn to soft, transparent effects, our guide to painting landscapes with watercolors covers washes and glazing techniques that also influence acrylic abstracts.
Common Landscape Painting Mistakes
- Horizon in the center. Splits the painting into two equal halves.
- Distant hills too dark or detailed. Flattens the depth.
- Bright green straight from the tube. Looks artificial. Mix greens with ochre, sienna or red.
- Inconsistent light direction. Confuses the viewer.
- Too much detail everywhere. Detail belongs mainly at the focal point and foreground.
- Canvas too small for the wall. Small art on a big wall looks lost.
Working From a Reference Photo
A good reference speeds up decision-making, but copying a photo exactly often produces a stiff painting. Crop the photo to the same proportions as your canvas before you start. Convert a copy to grayscale to see the main value groups clearly, then simplify those groups into three or four values. Feel free to move a tree, remove a power line or warm up a dull sky. Your own photos avoid copyright concerns and usually make the most personal decor pieces.
Finishing and Hanging
Let the painting dry for at least 24 hours. Apply a varnish to protect against dust and UV and to even out the sheen. Satin is a safe choice for most rooms. Paint the canvas edges or add a floating frame. Hang so the center of the painting is about 57 to 60 inches from the floor, and above furniture leave about 8 to 10 inches of space between the furniture and the bottom of the frame.
Lighting matters too. A painting lit from the side by a window may show glare with gloss varnish. Picture lights or angled ceiling spots bring out color and texture in the evening. Warm white bulbs flatter sunsets and autumn scenes, while neutral white light keeps coastal blues and greens accurate. Keep paintings away from heating vents and humid bathrooms where possible, since rapid temperature and moisture changes are hard on canvas over time.
FAQs
What is the easiest landscape to paint for beginners?
Rolling hills under a simple sky, or a sunset with silhouetted trees, are good starting points. They use broad shapes and gradients and require little detail.
Where should the horizon line go in a landscape?
Usually about one-third from the top or bottom of the canvas, not in the center. A low horizon emphasizes the sky; a high horizon emphasizes the land or water.
What size canvas is best for wall decor?
Choose a size proportional to the wall and furniture. Above a sofa or bed, aim for roughly two-thirds of the furniture width. Common decor sizes include 24×36, 30×40 and 36×48 inches.
Should I use acrylic or oil for a landscape?
Acrylic dries quickly and is easier to clean up, which suits beginners and decor projects. Oil stays workable longer for blending skies but takes much longer to dry and varnish.
How do you make a landscape painting look deep?
Use atmospheric perspective: make distant elements lighter, cooler, softer and less detailed, and foreground elements darker, warmer and sharper. Overlapping shapes and leading lines also create depth.
How do I choose colors for a landscape to match my room?
Pick two or three colors from the room’s textiles or furniture and build the landscape palette around them, adding neutrals for balance.
Next Step
A landscape tailored to your wall is one of the most satisfying decor projects you can paint. Start with a simple scene, keep the depth rules in mind, and scale up once you are comfortable. For more styles, supply guidance and display ideas, explore our full resource on landscape painting essentials for your space.




