Have you ever wanted to capture the mysterious beauty of an owl on your canvas? Painting an owl with acrylic paint is a rewarding way to bring this majestic bird to life with vibrant colors and bold textures.
Whether you’re a beginner or looking to sharpen your skills, this guide will walk you through simple, clear steps to create a stunning owl painting. By the end, you’ll not only have a beautiful piece of art but also the confidence to explore more acrylic painting projects on your own.
Ready to transform your blank canvas into a captivating owl portrait? Let’s get started!
Gather Materials
Gathering the right materials sets the base for your owl painting. Proper supplies make the process smooth and enjoyable. Start by collecting all essentials before you begin.
This preparation helps you focus on painting without interruptions. Let’s explore the main materials you need.
Choose Acrylic Paints
Select high-quality acrylic paints for vibrant colors. Choose basic colors like white, black, brown, yellow, and orange. These colors help create realistic owl feathers and eyes. Opt for small tubes or a beginner’s set to keep it simple. Acrylic paints dry fast and blend easily, perfect for detailed work.
Select Brushes
Pick a variety of brushes for different parts of the owl. Use a small round brush for fine details like eyes and feathers. A flat brush works well for larger areas like the background or body. Synthetic brushes are affordable and work well with acrylic paint. Keep brushes clean to maintain sharp lines.
Prepare Canvas And Palette
Use a canvas size that fits your painting space. A small canvas is easier for beginners. Stretch canvas or acrylic paper works fine too. Prepare your palette by squeezing small paint amounts. Arrange colors close for easy mixing. Have water and paper towels ready to clean brushes quickly.

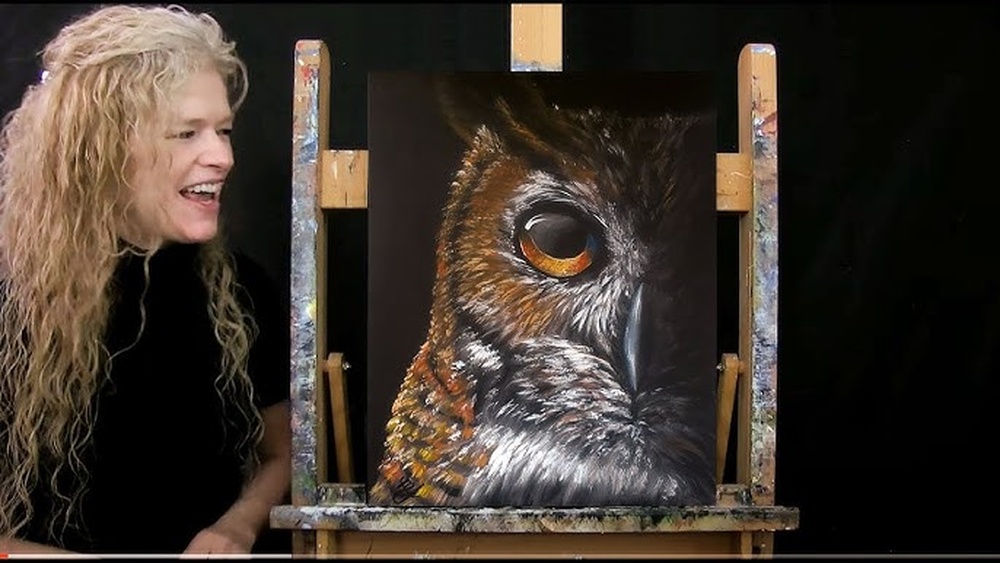
Credit: www.youtube.com
Sketch The Owl
Sketching the owl is the first step to a successful acrylic painting. It helps you plan the shapes and details before applying paint. A good sketch creates a strong foundation and guides your brushstrokes. Take your time to capture the owl’s form clearly and simply.
Draw Basic Shapes
Begin by drawing simple shapes to form the owl’s body. Use an oval for the body and a smaller circle for the head. Add two small ovals for the eyes. Sketch a triangle or a small diamond shape for the beak. These shapes help keep the proportions correct.
Outline Features
Next, connect the shapes with smooth lines to outline the owl. Draw the curve of the wings along the sides of the body. Add the ears at the top of the head with small pointed shapes. Sketch the talons as small curved lines at the bottom. Keep your lines light for easy corrections.
Refine Details
Focus on adding details to make the owl look realistic. Draw the pupils inside the eyes and add eyelids or lashes if needed. Shape the feathers with short, curved lines along the wings and body. Define the texture on the beak and talons. Erase any extra lines for a clean sketch.
Paint Base Layers
Starting your owl painting with base layers sets a strong foundation. It helps create depth and form. Use simple shapes and broad strokes first. This stage focuses on color blocking and light placement. Avoid details to keep the painting flexible for later work.
Apply Background Colors
Begin by covering the canvas with background colors. Choose colors that match the owl’s natural environment. Use a large brush to apply smooth, even strokes. Keep the background subtle to make the owl stand out. Let the paint dry before moving on.
Block In Owl’s Main Colors
Next, paint the owl’s basic shapes with its main colors. Use medium brushes for better control. Focus on big areas like the head, body, and wings. Avoid small details at this stage. This step defines the owl’s overall color scheme.
Establish Light And Shadow
Add light and shadow to give the owl a three-dimensional look. Observe where light hits the owl’s feathers. Use lighter tones for highlighted areas. Apply darker shades for shadows and depth. Blend softly to keep transitions smooth.

Credit: stepbysteppainting.net
Add Feather Texture
Adding feather texture brings your owl painting to life. It creates depth and realism. Feathers have unique patterns and shapes. You can show these details with simple brush techniques. Use the right method to mimic softness and layers of feathers.
Use Dry Brush Technique
The dry brush technique uses a small amount of paint. Your brush should be mostly dry. Lightly drag it over the surface. This creates fine lines that look like tiny feathers. It works well for soft, fuzzy parts of the owl. Try different angles for varied effects.
Layer Feather Details
Start with a base color for feathers. Then add layers of lighter and darker shades. Each layer adds more detail and depth. Use thin brush strokes for tiny feather shapes. Let each layer dry before painting the next. This builds a rich, textured look.
Vary Brush Strokes
Use different brush sizes and stroke directions. Short strokes mimic small feathers close to the body. Longer strokes represent larger feathers on the wings. Change the pressure to create thick and thin lines. This variation makes feathers look natural and dynamic.
Define Facial Features
Defining the facial features of your owl painting brings the bird to life. These details focus on the eyes, beak, talons, and facial markings. Each element adds character and realism. Take your time to paint with care. Use layers and subtle color changes for depth. This step creates a strong focal point in your artwork.
Paint Eyes With Depth
Start by painting the owl’s eyes with a dark base color. Add lighter tones near the center for shine. Use small white dots to mimic light reflections. This gives the eyes a lively, three-dimensional look. Paint thin lines around the eyes to define the eyelids. Blend colors softly for a natural effect.
Detail Beak And Talons
Use a fine brush to paint the beak and talons. Choose a warm brown or yellowish color. Add shadows on one side to show roundness. Paint thin lines to indicate texture and sharpness. Highlight the edges with a lighter shade. This makes these features stand out clearly.
Highlight Facial Markings
Observe your owl reference carefully for facial patterns. Paint these markings with a small brush and steady hand. Use colors that contrast gently with the base feathers. Add soft streaks or spots around the eyes and cheeks. These markings give the owl its unique personality. Blend edges slightly to avoid harsh lines.
Enhance With Highlights And Shadows
Adding highlights and shadows brings your owl painting to life. These details create depth and make your artwork look three-dimensional. Use light and dark tones carefully to show the owl’s feathers and shape. This step improves realism and draws attention to key features.
Add Light Reflections
Use a small brush with white or very light paint. Gently dab on areas where light naturally hits, like the eyes and beak. These bright spots mimic light reflections and make your owl look lively. Avoid overdoing it to keep the effect natural.
Deepen Shadows
Mix a darker shade of your base colors for shadows. Apply this under the wings, around the eyes, and below feathers. Shadows add volume and show the owl’s form. Paint softly to avoid harsh lines. Shadows guide the viewer’s eye through your painting.
Blend For Realism
Use a clean, dry brush or a soft blending brush to merge highlights and shadows. Blend edges where light meets dark to soften transitions. This technique creates smooth color shifts like real feathers. Blending helps your owl look natural and complete.
Final Touches
Adding final touches to your acrylic owl painting brings it to life. These last steps sharpen details and enhance the overall look. Careful finishing makes your artwork stand out and look polished. Take your time to refine, add background, and protect your painting.
Refine Edges
Use a small brush to clean up the owl’s outline. Smooth rough edges for a neat appearance. Sharpen details around the eyes and feathers. This step makes your owl look crisp and clear. Check for any stray paint and fix it gently.
Add Background Elements
Choose simple shapes or colors to support your owl. Paint branches, leaves, or a subtle sky behind it. Use soft tones to keep focus on the owl. Background elements add depth and interest. Keep them light so they do not overpower the main subject.
Seal The Painting
Apply a clear acrylic sealer to protect your artwork. Use a matte or glossy finish based on your preference. Sealing prevents dust, dirt, and moisture damage. Let the sealer dry fully before moving the painting. This step helps your owl painting last longer and look fresh.
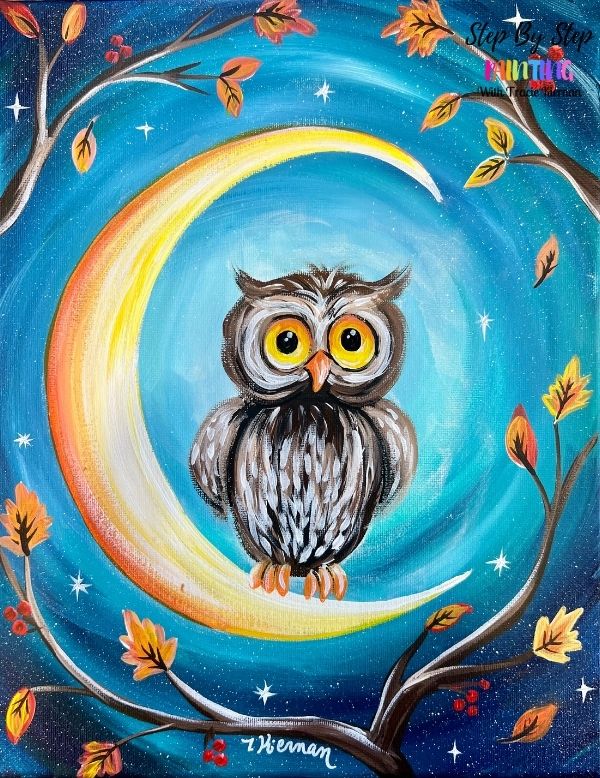
Credit: stepbysteppainting.net
Frequently Asked Questions
How To Make An Owl Very Easy?
Draw two overlapping ovals for the body and head. Add wing shapes on each side. Sketch eyes, beak, and talons. Erase extra lines and add simple details. Color as desired. This creates an easy, cute owl drawing quickly.
How To Draw An Owl Simply Draw?
Draw two overlapping ovals, smaller on top for the head. Add wing shapes on each side. Sketch talons below. Erase inner lines for clarity. Finish with eyes and beak details.
How To Draw A Simple Owl Head?
Draw a large circle for the head. Add two big circles inside for eyes. Sketch a small triangle for the beak. Outline curved eyebrows above the eyes. Erase extra lines and add simple feather details around the head.
How To Do Owl Color?
To color an owl, start with yellow around the eyes. Use light green and blue for the body. Add purple and pink for the tail. Blend colors smoothly for a natural look. Use acrylic paints for vibrant results and layer details for depth.
Conclusion
Painting an owl with acrylics can be a fun and rewarding project. Start simple, and take your time with each step. Use layers to build texture and depth in your painting. Remember to enjoy the process, not just the final piece.
With practice, your owl paintings will look more detailed and lively. Keep experimenting with colors and brush strokes to find your style. Painting helps you see nature in a new way. Try creating different owl poses and backgrounds next time.
Your skills will grow with every painting you complete.